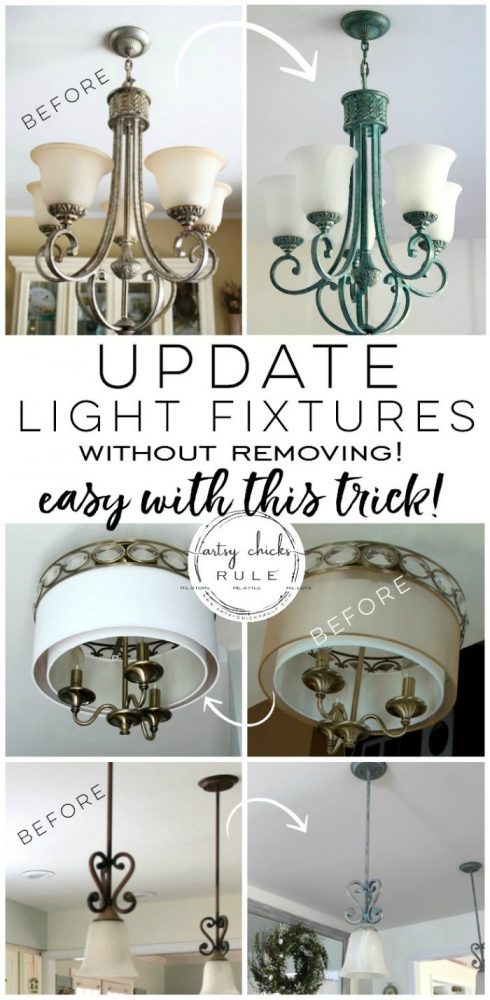
How To Paint Light Fixtures (update without taking them down!)
Tired of your old light fixtures? Don’t feel like replacing them? You don’t have to! Paint (and a few other simple products) are your friends here. And guess what? You don’t even have to take them down to update them this way! Learn how to paint light fixtures so you can give new life to your lighting, too!
I’m sharing how to paint light fixtures today….and without having to remove them from the ceiling!
Even better, right?
I don’t know about you, but I grow tired of my decor from time to time. And that would include, of course, light fixtures.
As you change your styles, those often need changing, too.
Many times you can just paint those light fixtures instead of replacing them.
As you know, we have decided to stay in our home for a few more years instead of selling this year.
That means…..I’m changing things up around here! ;)
If you want to catch up, I talked about the paint and a few other changes we are making in this post and this post .
To be honest, at least 2 of the light fixtures really didn’t match my current decor anyway. I didn’t worry too much because we were planning to move.
Since we now aren’t…at the moment anyway…it’s time to do something with them.
I really considered replacing them but came up with a few ideas instead.
I am SO thrilled to say all 3 worked out very nicely and we saved a bunch by not having to replace them.
How To Paint Light Fixtures (without taking them down)
You want to know the simple trick?
Painter’s tape and small artist style paintbrushes . :) Nothing more!
Well, that’s not true, you do need a few products, like paint….and a step stool or ladder. :)
But the trick is…….using the proper tools. That’s right.
And most projects are just that, all about using the correct tools.
Let’s start with this chandelier in the dining room.
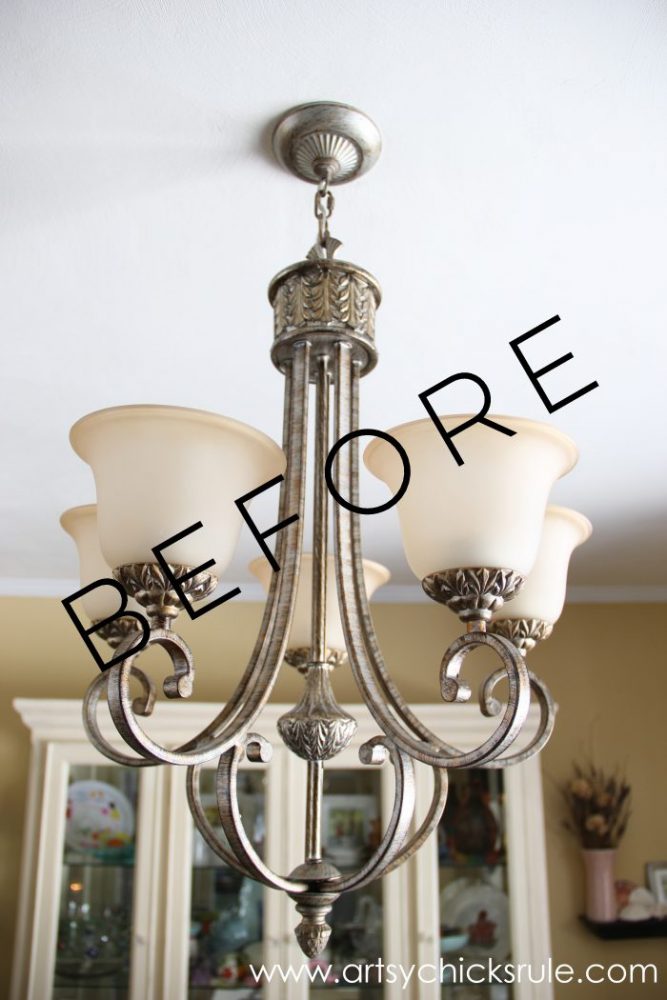
I actually tried to update it inexpensively last year with new, white globes.
It did make it look a ton better and the globes were not pricey at all.
But I still didn’t love it.
Here is what it looks like now…
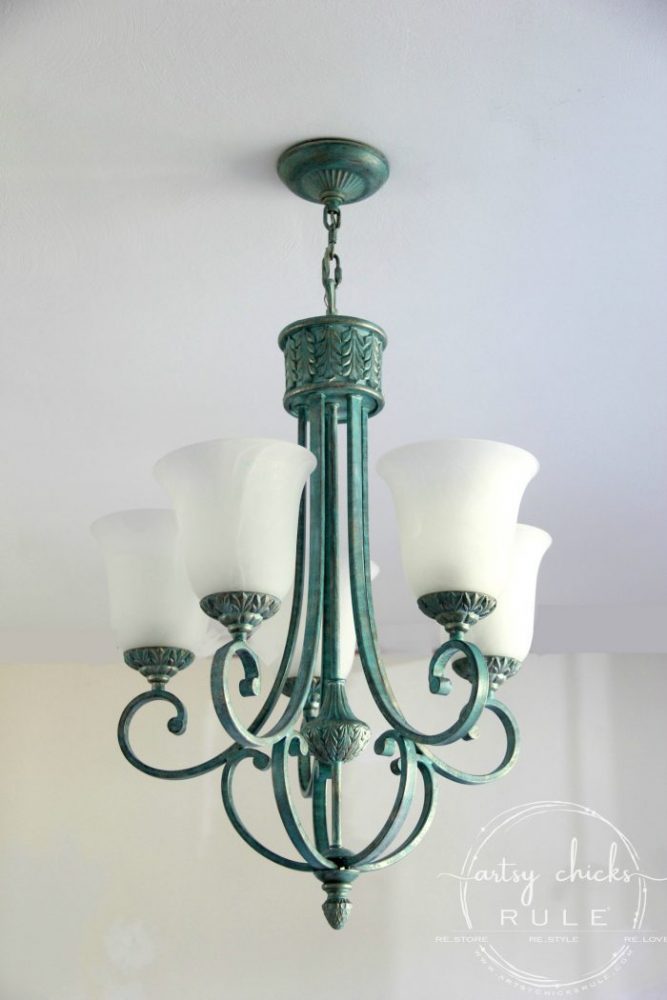
What a difference, right?
If you follow along on Instagram, you might have seen a snippet or two (or 5, lol) over the weekend when I was painting/re-doing them.
I share a lot of the things I’m doing, at the moment, over there in the “stories”. Plus a few random daily life things, too. ;)
So it’d be fun if you’d follow along!
And just take a look at that crispy white ceiling I painted last night.
I’ve painted every single wall in this house as least 4-5 times (not even kidding, every single one ;) ) but have never painted the ceilings. Ugh
And I honestly don’t think they’ve been painted by anyone in 40 years. So they were long overdue.
Just to give you a clue as to how dark and dingy they were…..
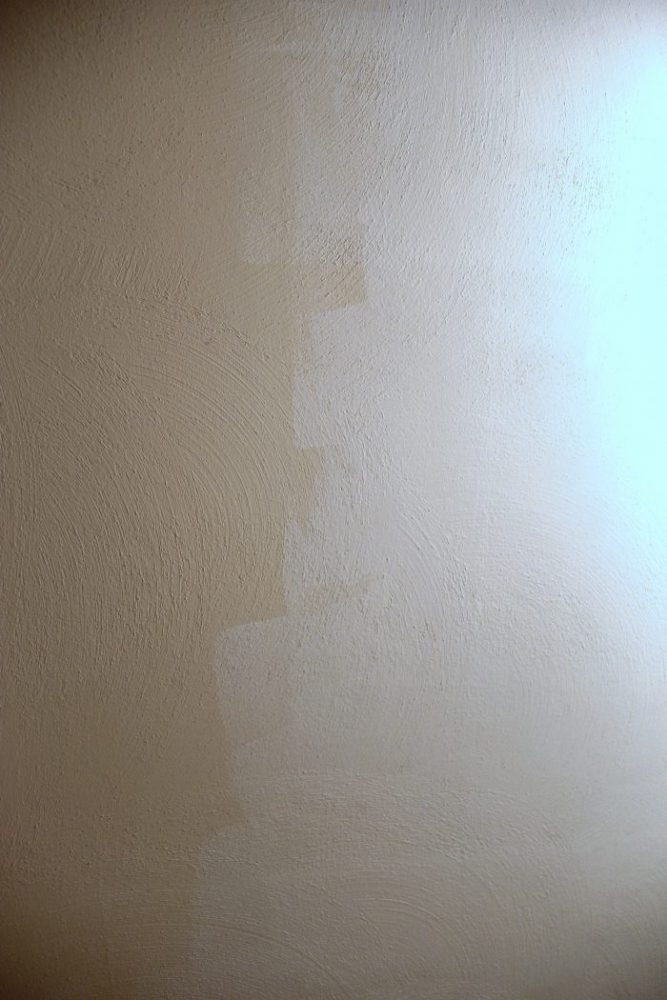
SO needed. What do you think? ;)
I’m hoping that by painting all the ceilings downstairs, it will really brighten up the spaces.
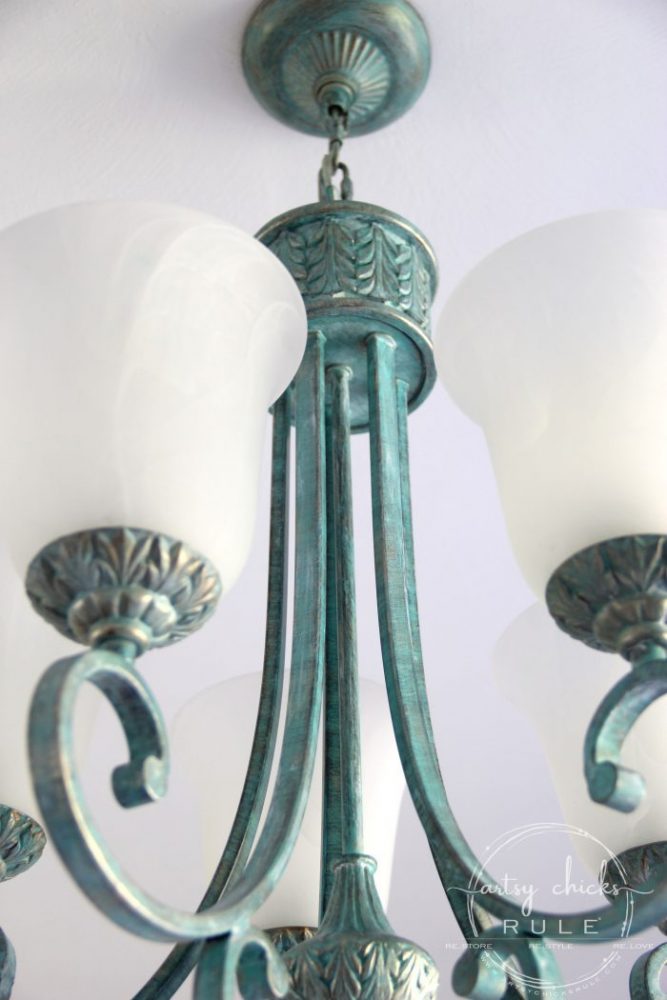
This finish is amazing….and the only one that didn’t get created with PAINT!
Nope…you’ll just have to stay tuned to see this magic. ;)
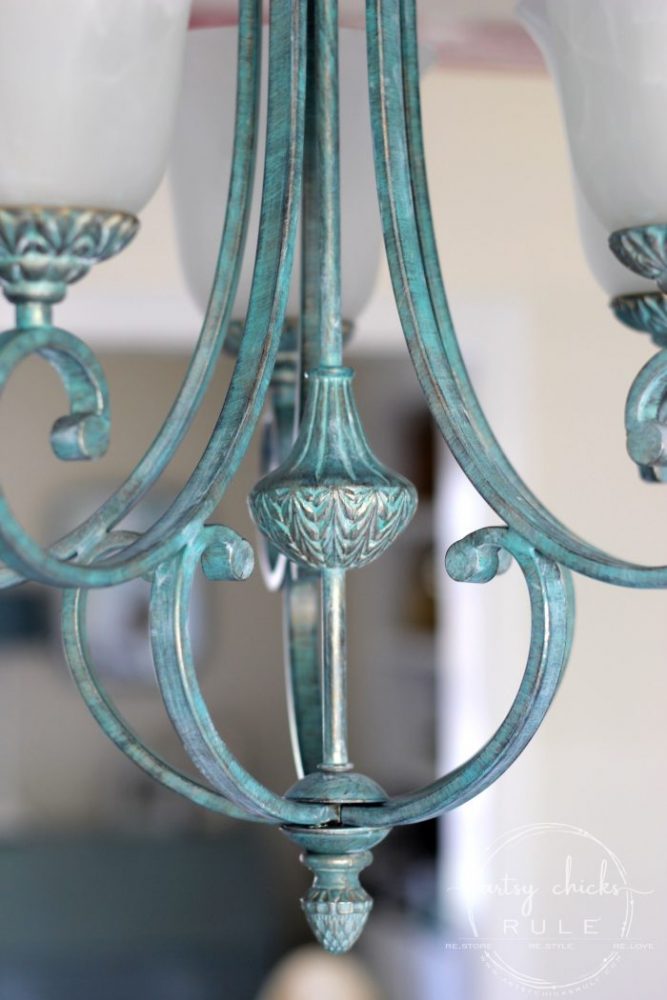
I’ll be back later on with a full tutorial on how to create this “faux” verdigris. I will say, it was oh-so-simple to do.
I painted all 3 of these in one day.
UPDATE: You can see it now, here >>> “How To Create Faux Verdigris“
Here is the second set.
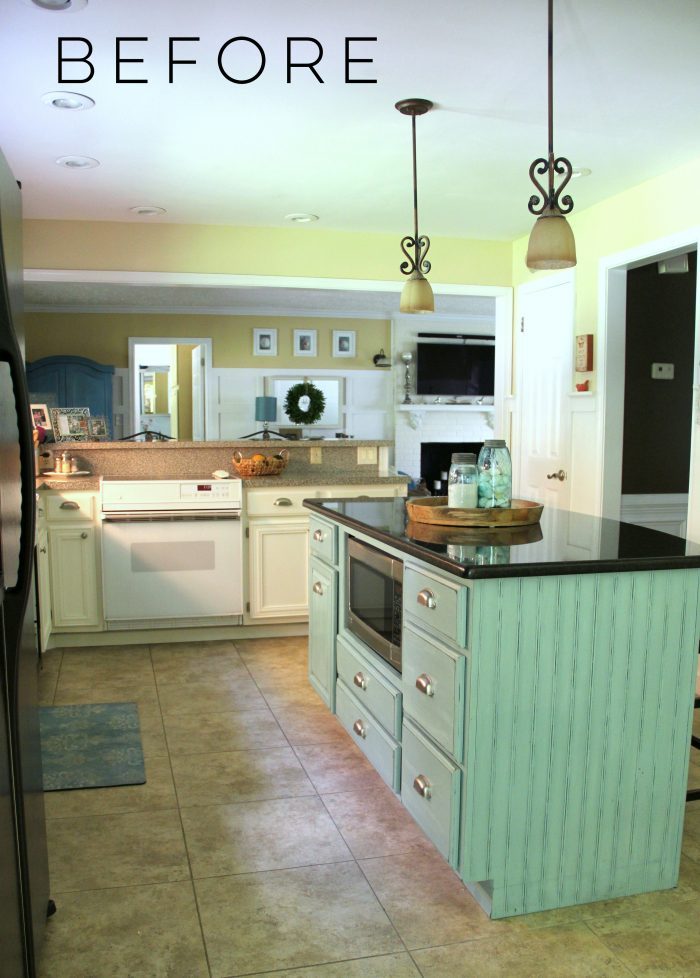
And most recently with new, white globes. (same ones I put on the chandelier)
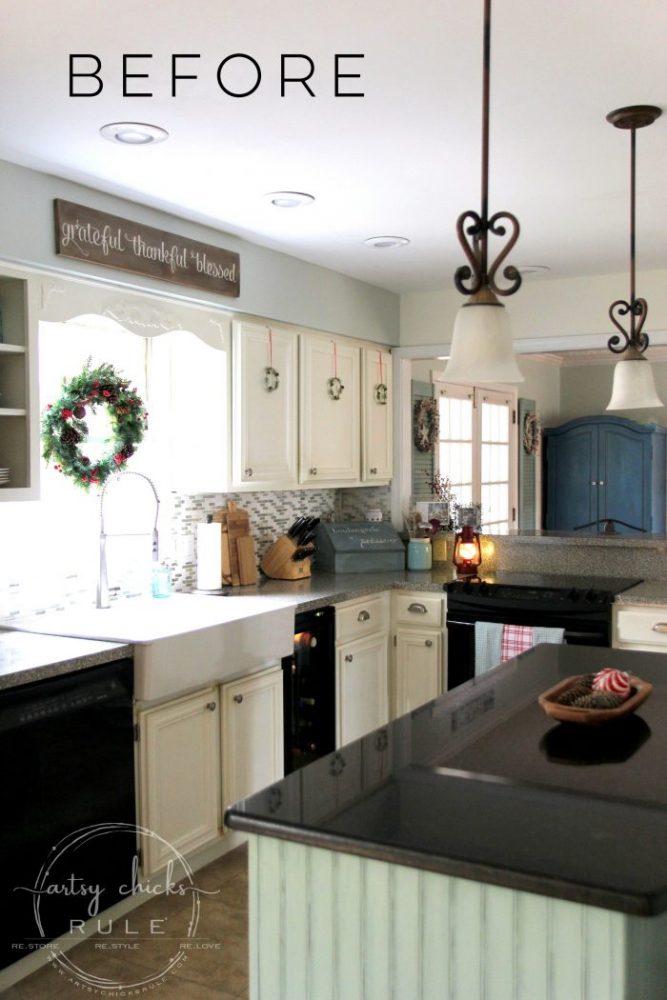
Not bad, but that bronze is not really matching my style or colors in here anymore.
So they got a little paint.
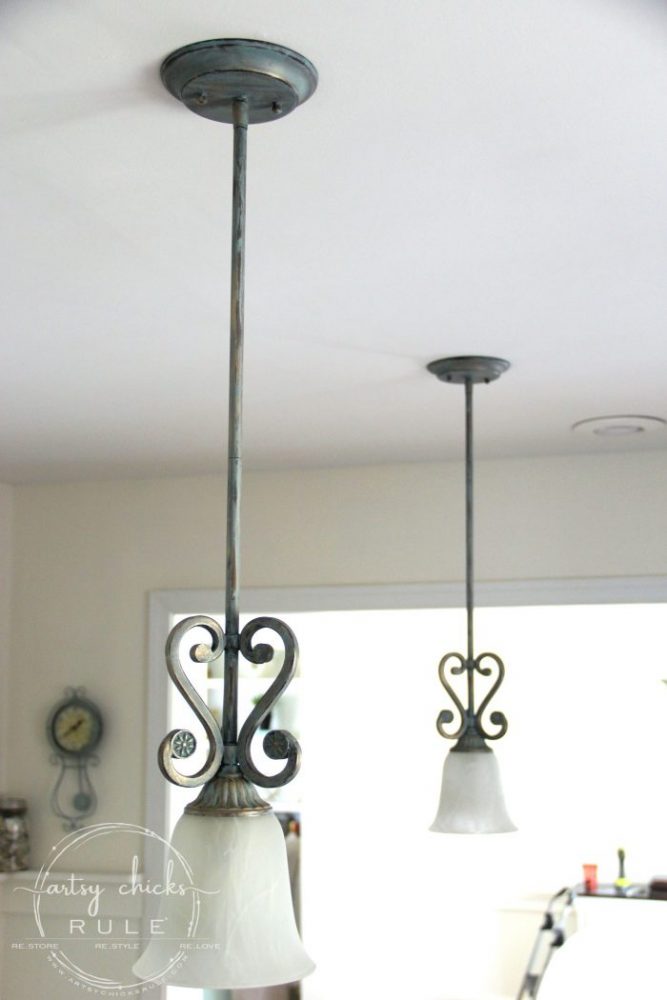
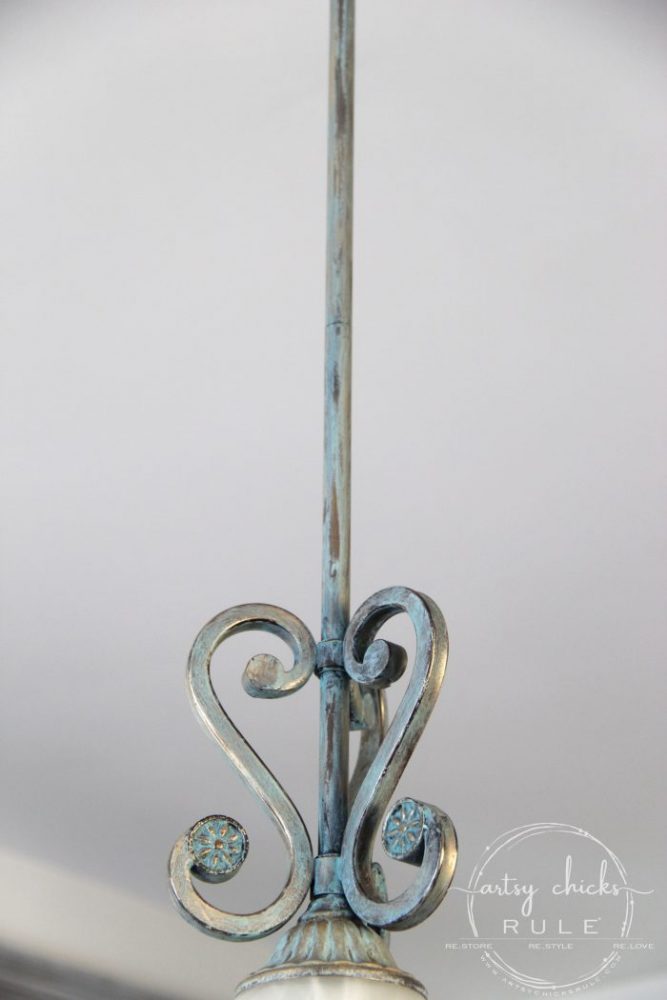
And yes, this one got paint. ;) I did these a little differently than I did the chandelier.
I’ll be sharing this “faux” patina tutorial soon, too. :)
UPDATE: You can see it now, here >>> “How To Create Faux Patina”
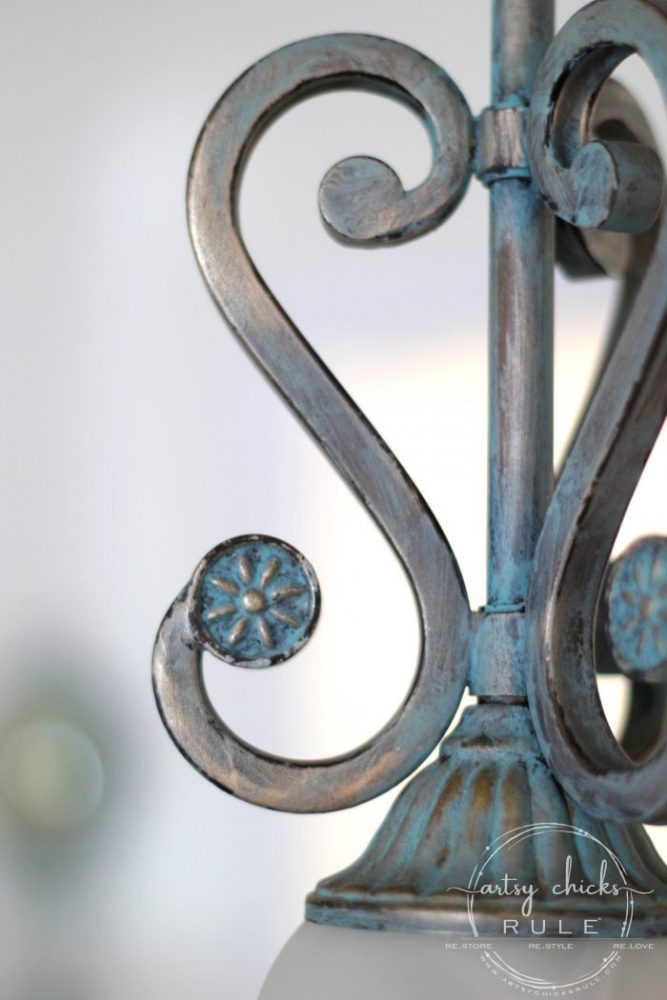
I just adore how they turned out!
The coloring is perfect for the colors in my home. Plus, the aged feel is also a good match for my decor.
So happy with them…and I didn’t spend a dime. Every single thing I used, I already had. Love that!
Which is good because I usually come upon these creative things on a whim! ;)
And no, I did not have to remove these from the ceiling either.
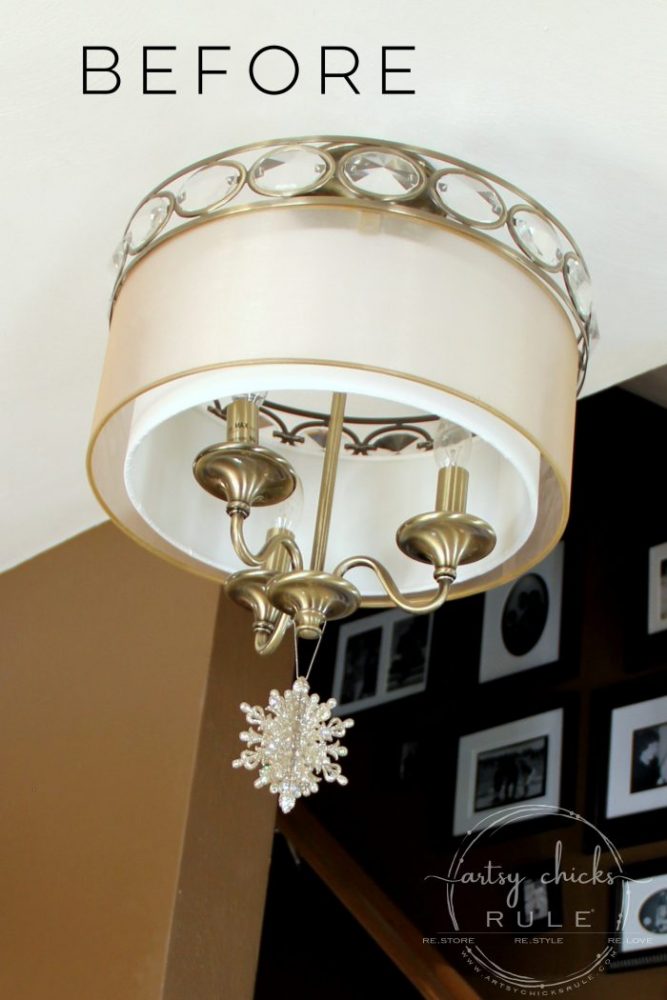
Lastly, the light fixture in the foyer.
I recently repainted the foyer in my favorite, SW Sea Salt and it totally changed the feel of the entry.
The light fixture, as is, was no longer working.
Here it is “before”…(and the old wall paint color)…
And here it is now…
Along with the new wall paint color.
You can see a sneak peek of the old gallery wall. ;) It got a little paint too.
I’ll be sharing the new foyer look once I get it finished.
But just look at that fixture…would you ever guess it’s been painted?
Another “before”…..

And after…..
Isn’t that the best thing ever?!
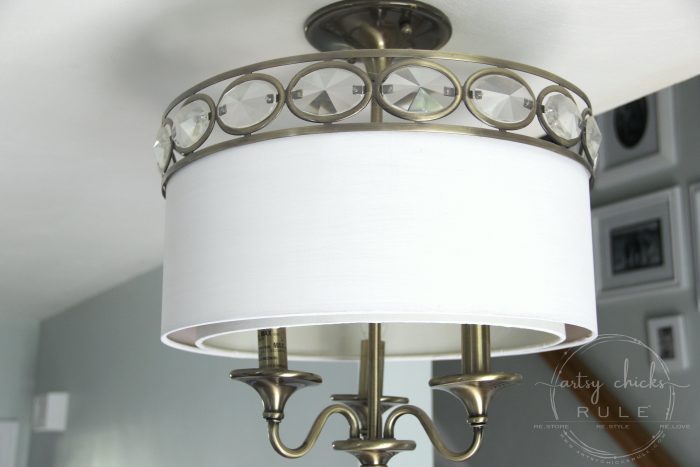
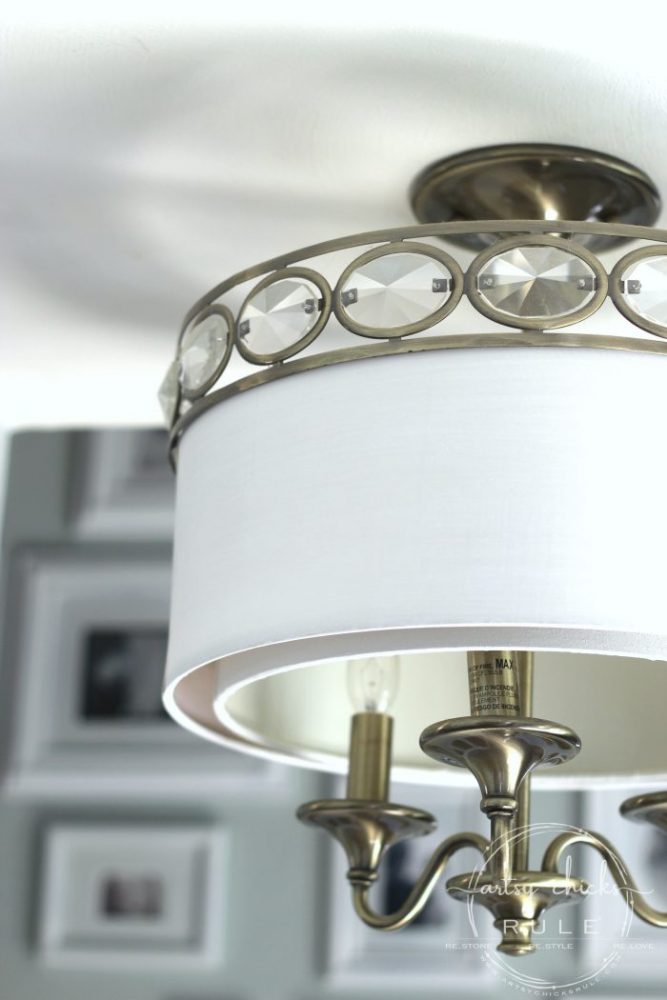
Now, I did have to remove the lampshades…but the fixture stayed up.
There’s not much to this tutorial because it’s really that simple.
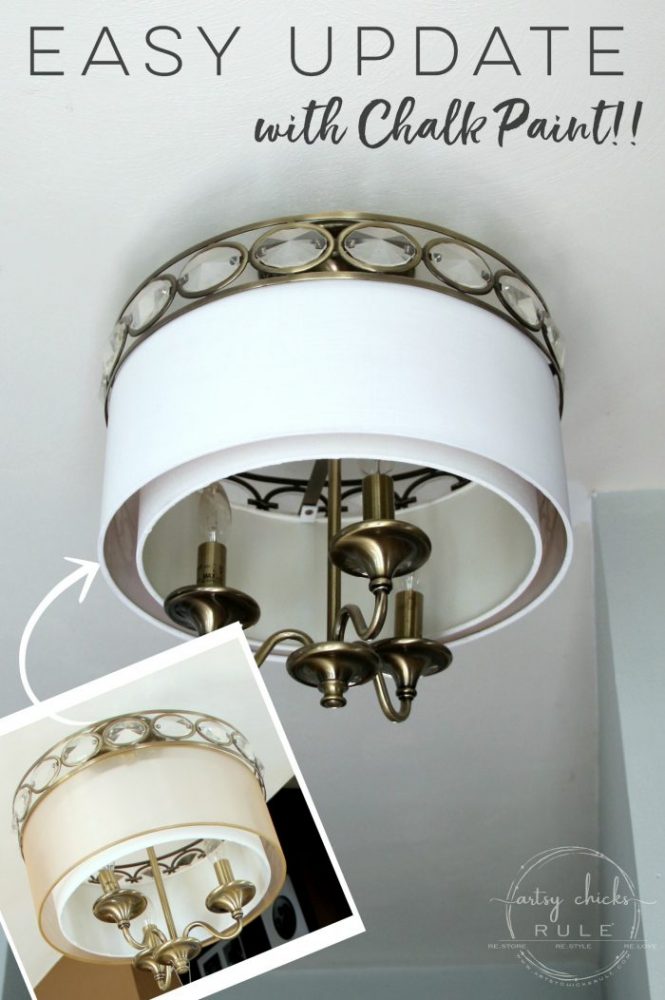
Light Fixture Chalk Paint Update:
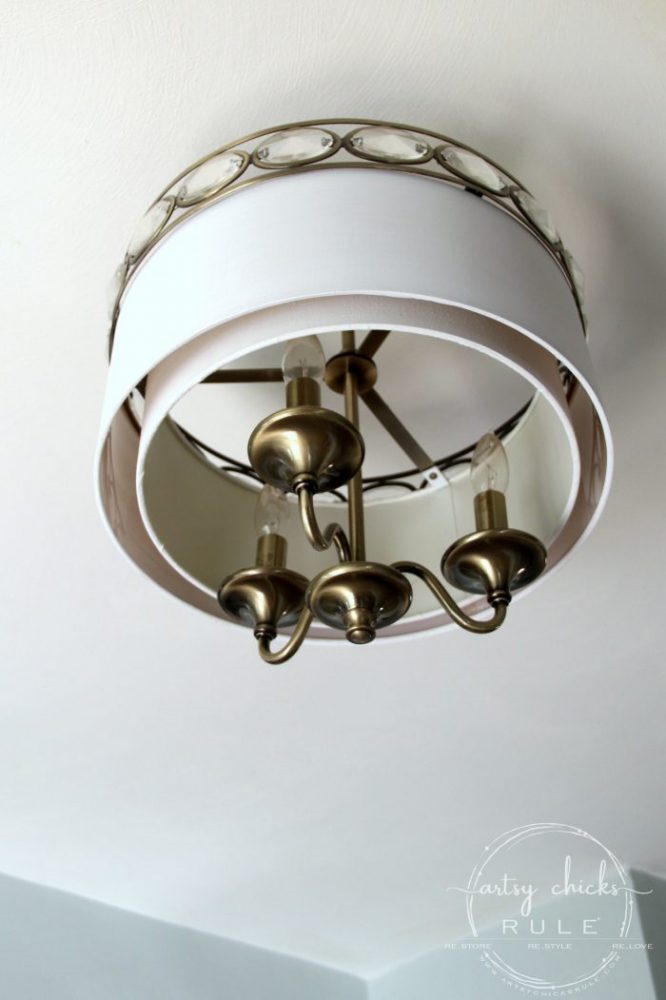
The inner shade got one coat of paint and the outer shade got 2 coats of paint.
I used this chalk style paint mixed with a tiny bit of water to make it a bit more fluid.
You can use a chip brush for this.
Simply apply the paint either long way around the shade or short, up and down strokes, making your way around the shade.
Do make sure your paint is not too thick and try to apply evenly.
You want it to “soak in”. Several light coats are better than one heavy one.
Paint one coat and hold it up to a light to see if you have brush strokes or any missed spots.
If you do, or if you want a bit more color, apply a second coat. (once the first coat is dry)
I didn’t seal this because I didn’t feel it really needed it since it is up and out of the way.
This is not the first lampshade I’ve painted, by the way. I’ve painted more….and many other things with Chalk Paint back in the day! ;)
Want to see them all? Check out this post here, “Chalk Paint – It’s Not Just For Furniture”
Next week I will share the full tutorials on the other light fixtures I shared today. It would have made this post much too long to include it all here. But I did want to include photos of them for inspiration along with the white chalk painted shade tutorial I shared today.
How to paint light fixtures…who knew it was this easy….and budget-friendly, too.
So by painting all 3 light fixtures (well, 4 in total), we saved a bunch of money (and time and effort) by not replacing.
AND….I actually am in love with all of their new looks so it doesn’t even feel like a compromise.
It feels like I got 3 new light fixtures. And that truly is the best thing ever for this very thrifty girl. :)
Stay tuned for the upcoming tutorial posts on how I did the verdigris and patina finishes. They are just so beautiful (and truly easy to accomplish).
I’ll be sharing them soon!
How to paint light fixtures… (and even so much better not having to remove them from the ceiling)
Okay guys, so next time you don’t love your light fixtures, what are you gonna do?
Paint them, and fall in love with them all over again, right??!! Yesss. :)
More home DIY tutorials we have shared here:
- DIY Faux Shiplap (get the look, without the expense!)
- DIY Faux Board & Batten (simple and quick!)
- How To Make a DIY Wood Countertop
- Build Your Own Kitchen Island With Big Box Store Cabinets
- How To Install Laminate Flooring (tips and tricks)
- DIY Crown Mold (easy way to get that wide custom look!)
- Build Your Own Built In Bookcase – Tutorial
- Chalk Painted Kitchen Cabinets
- How To Use Gel Stain On Your Stairs
- How To Paint Light Fixtures Without Removing Them (you are here)
- How To Build a Permanently Attached Wall Coat Rack
- DIY Floating Shelves Tutorial
- How To DIY a Tile Backsplash
Hope you have a wonderful week, friends!
xo

Related Posts:

")
")
")
")

")
")


Love your updates Nancy and your ceiling, wow! I’m shocked you didn’t put a patina on the double drum shade chandelier! :) Or maybe not just yet.
I look forward to your patina posts. :)
Happy Spring!!!
Hey Christina! Thanks so much!! And that ceiling, I know!! lol All of them are like that and I knew they were in need of paint, but didn’t know they were in that much need! ;) And I considered also giving that light a little patina, too, but I have a few other things in the foyer with that antique/gold-ish color, so left it. For now. ;) Happy spring to you too!! Looks like warmer weather is coming here finally! :) xoxo
Your light upgrades are so cool! And so timely! I just scored an old hanging light fixture at the dump that I plan on repainting. I was just going to spray paint it (since it’s not hung), but who knows? Looking forward to the tutorials!
Thanks so much Donna! :) And oh yay!! That’s awesome! Keep an eye out. I’m going to get one in on Thursday and then the other next week. If not, both will be up next week either way! xo
Love the transformation! Eagerly awaiting your tutorial.
Thanks Colette!! I hope to have them both up by next week! :) xo
What a gorgeous transformation! Can’t wait for the tutorial.
Thank you Korinne! :) Sharing it soon! xo
Oh my gosh…I absolutely LOVE the verdigris. Can’t wait to see the tutorial. Your light fixtures have so much character now.
Thanks Liz! :) I agree, what a difference it made! xo
I absolutely LOVED your lighting updates!! I did a basic graphite chalk paint fix to the old 1941 chandelier in my foyer and to the awful 2003 fixture in my breakfast nook. Amazing how much of a difference a little paint can make ? I can’t wait to see your patina tutorials!!
Thanks so much Angela! :) Isn’t paint the best! I love how simply we can give something a brand new look with it. xoxo
LOVE the turquoise look!!!!
Thanks Rose!! :) Me too! I’m so thrilled with them. It feels like I have brand new light fixtures!! xoxo
Nice job on all of them!!!!!
One of my bathrooms has wall fixtures of the same period as yours. I used three colors of Annie Sloan and some sponges to make them blend in with my sort of French bathroom. It was a fun makeover and I think you enjoyed doing yours as much as I enjoyed doing mine. Thanks (not!–LOL) for reminding me I have ceilings to repaint after 20+ years. But it’s giving me time to think about how to paint the ceiling fans!!! LOL
Thanks MJ! :) Your lighting makeover sounds great! Love that idea of using sponges. Yes, I’d have to say I truly enjoyed doing this project. I felt like a kid in a candy shop! ;) And oh no, sorry!! lol ;) I’ve just been trying to ignore mine for the last 14 years!! haha I must say, the one room I’ve done so far sure seems so much lighter and brighter! Good motivation to do the rest, right? And I like the way you think! Let’s paint the fans! ;) xoxo
Your light fixtures look amazing!! I especially love your dining room fixture! That patina is gorgeous! XOXO
Thanks Christy! So glad I was able to give them a makeover instead of buying new! xo
Nancy,
I like the new finishes on your light fixtures much better. I need to update the one in my dining area, but haven’t decided how. I am into the retro “50s” look so something vintage/modern would work. Any ideas? My fixture is nickel with 3 white glass shades. Like you, I’ve thought of just replacing the shades but haven’t tried yet.
Hi Barbara! Thank you, me too! I’m so thrilled with my “new” fixtures. ;) Hmm, that depends on what other colors you have in the room and probably the style of the fixture itself. For retro, how about an aqua color with the white globes? Or maybe white on white for a more modern look? You can do the same technique I did and apply the paint without removing it from the ceiling. And you could replace the shades like you mentioned, too! xo
can that same verdigris paint process be done on a ceiling fixture that has moisture in the air due to steam?
Hmm, I’m not really 100% sure but it might be okay since the majority of the product is a wax. Is there any way you can test a small area first?
What color and brand of paints did you use for the ceiling fixture to make it the dark rubbed brass (or whatever it is).
Hi Linda! I answered your email! :)
Hi! I know this post is from quite a while ago but I have recently come across a light fixture exactly like the third one you redid and wanted to see if you remember what brand it was or where you got it? It is the one that has the large clear “gems” around the top and the three armed light chandelier type. Just wondering if you had any idea about it or where you got yours. Thanks in advance!
Hello! I think it came from Lowe’s. I don’t have any other info about it though. Sorry!