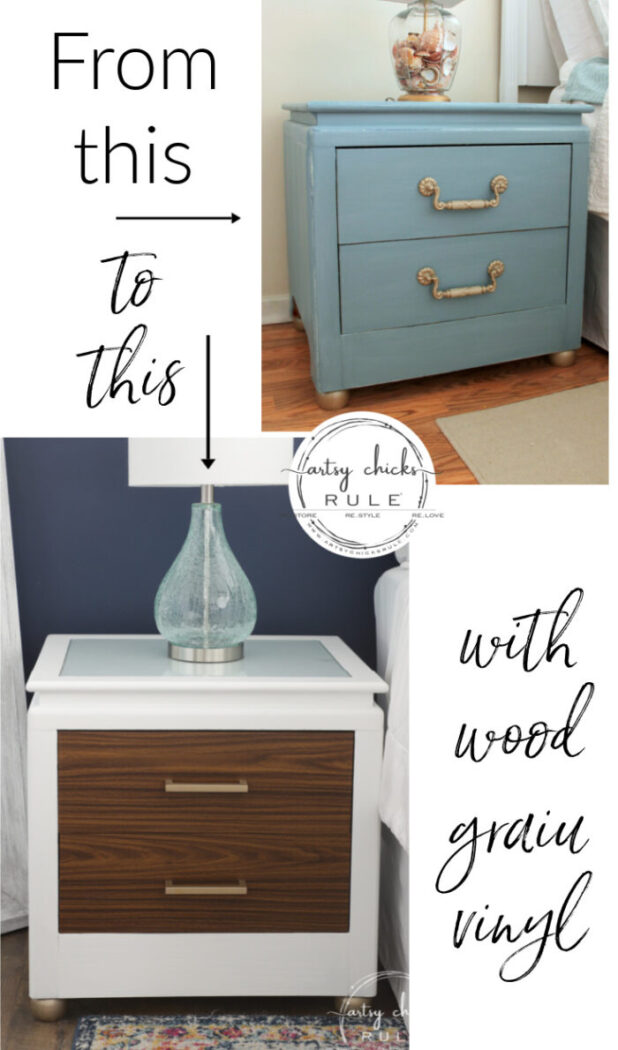
Realistic wood grain vinyl for furniture makeovers…well yes! What a fun way to update your old furniture!
Hello beautiful friends!
Okay, before we get going on today’s project, have you entered my latest giveaway yet?? If not, you have a couple more days to enter!
Hop on over >>> here for details.
………………………………………………………………………………………………..
I have a super fun project for y’all today. I enjoyed doing this one so much.
Who doesn’t love trying something different and new?
I was inspired to do this to our nightstands because of something else I saw. I’ll share more on that below.
And let me tell you, inspiration is everywhere, just take a look around.
But first, let me tell you, I had originally decided to get new nightstands when we started giving our master bedroom a makeover.
Unfortunately, I could not find what I was looking for…or anything I really liked.
So…I decided to keep what we have and give them a makeover instead. And guess what?
This is the 3rd time they’ve gotten a makeover from me! lol Third times the charm, right?
Or I am at least restyling and reloving my finds well, anyway!
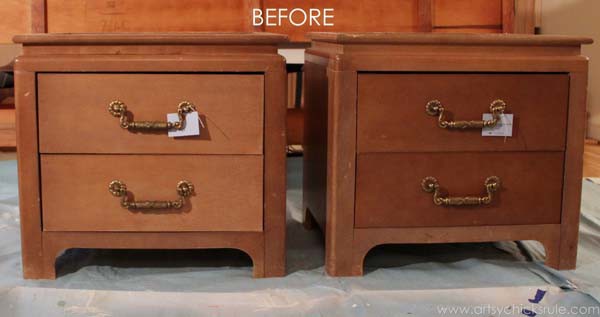
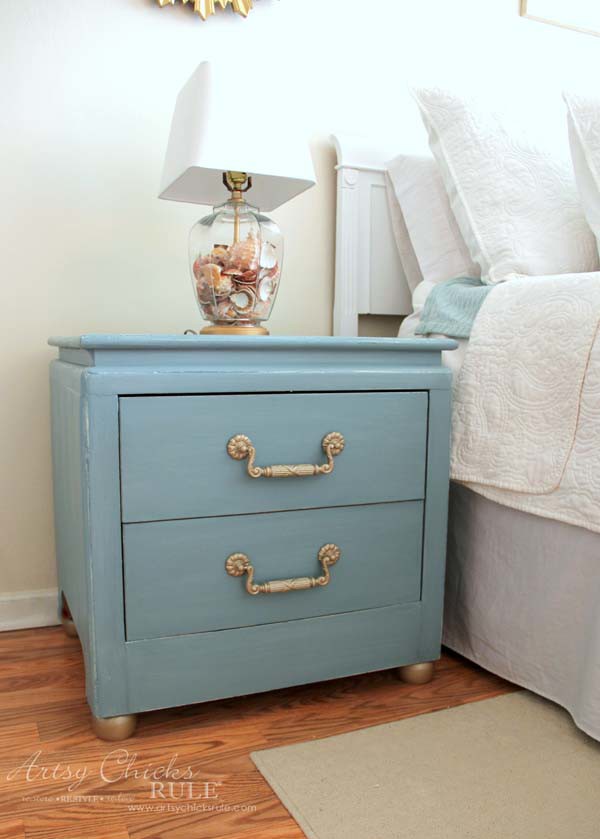
Here are how they looked when I first found them back in 2014.
Oddly different from each other but anyway, this is how they looked.
But for $15, you can’t beat that. They are solid and HEAVY.
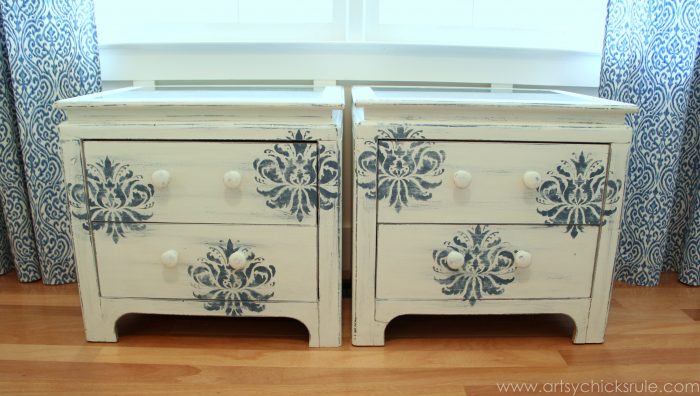
Here is the first makeover look…
Whimsical and fun.
Side note…remember those pretty blue and white curtains I made forever ago? No?
Check them out >>> here. I still have them and need to find a place for them…still love them!
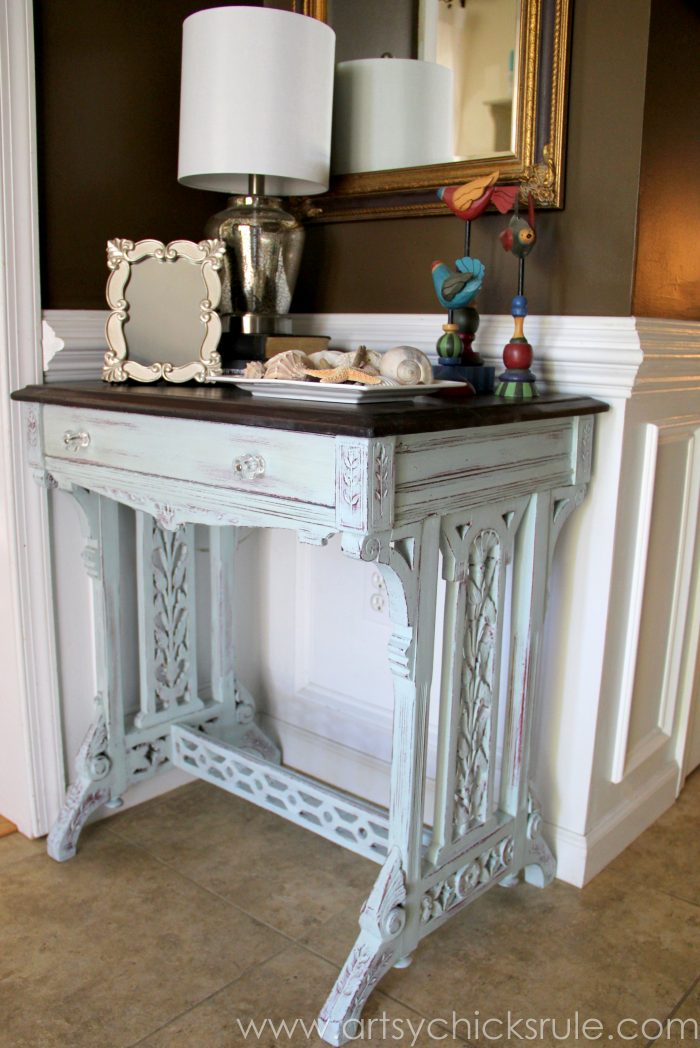
Second look, much better…
This time not only did I paint them, but I added feet and changed the bottom trim piece out.
Now, let’s back up and let me share where the inspiration for these came from and what I used, etc.
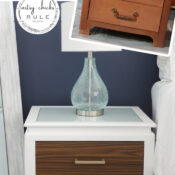
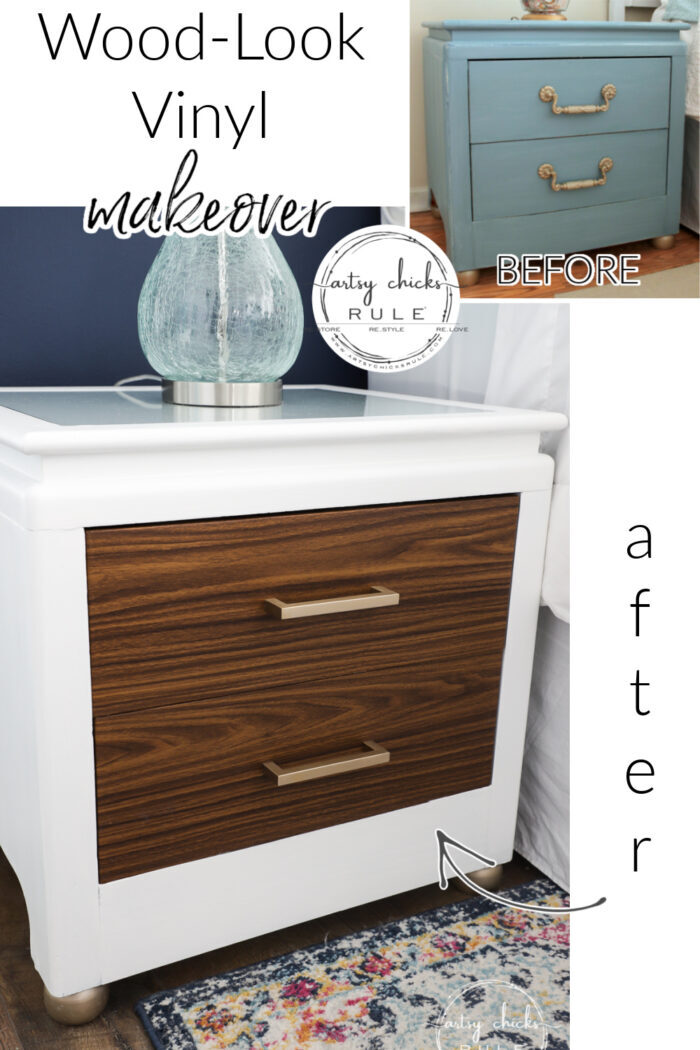
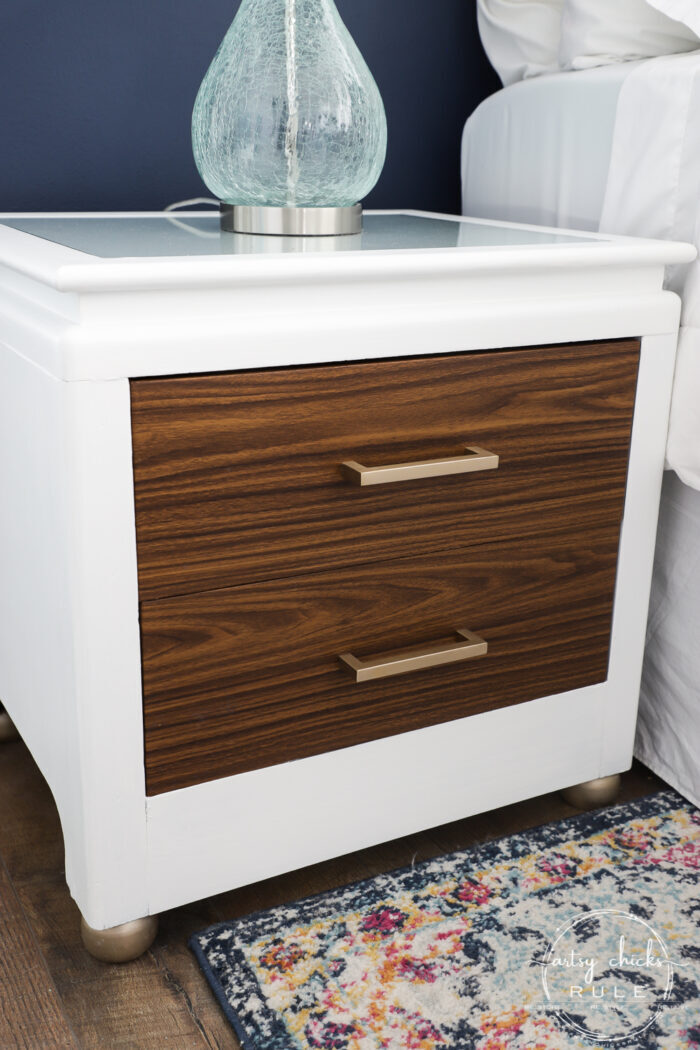
Wood Grain Vinyl Wrap Nightstand Makeover
So, if you follow along with me on Instagram, you might have seen a story or two about my office getting a makeover…finally!
Ugh, it only took 8+ years to do. But I’m SO thrilled with how it’s turning out. Can’t wait to share it with you all.
It is like an absolute breath of fresh air. I cannot even tell you! (you will soon see what I mean and you will agree! haha)
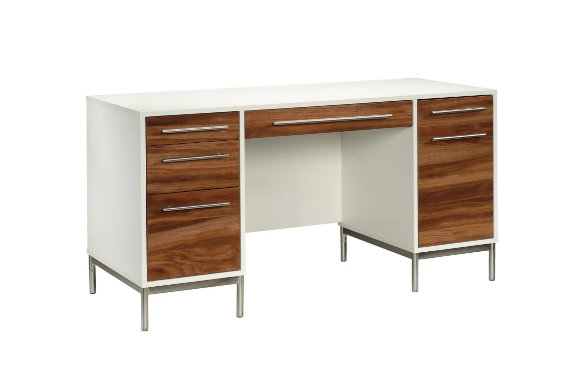
But back to the inspiration for these nightstands…which was the desk I found to go in my office. (well, desk(s)…because we have made space for my husband to work in here as well…so it is now our office…and I love hanging out with him so it’s a win-win :) )
They are beeeuuutiful! And we both love them.
You can find them right >>> here. They are on sale right now too.
I know I seem ridiculously giddy over a desk but I was working on an old kitchen table that I had turned into a “desktop”… for over 8 years. No drawers, no cubbies, and not too pretty. (I think I have plans for that old table by the way, it’s actually the first table my husband bought for our house back around 1990-91 and it’s sort of farmhouse style….stay tuned)
So, do you see the inspiration??? ;)
Well of course you do!
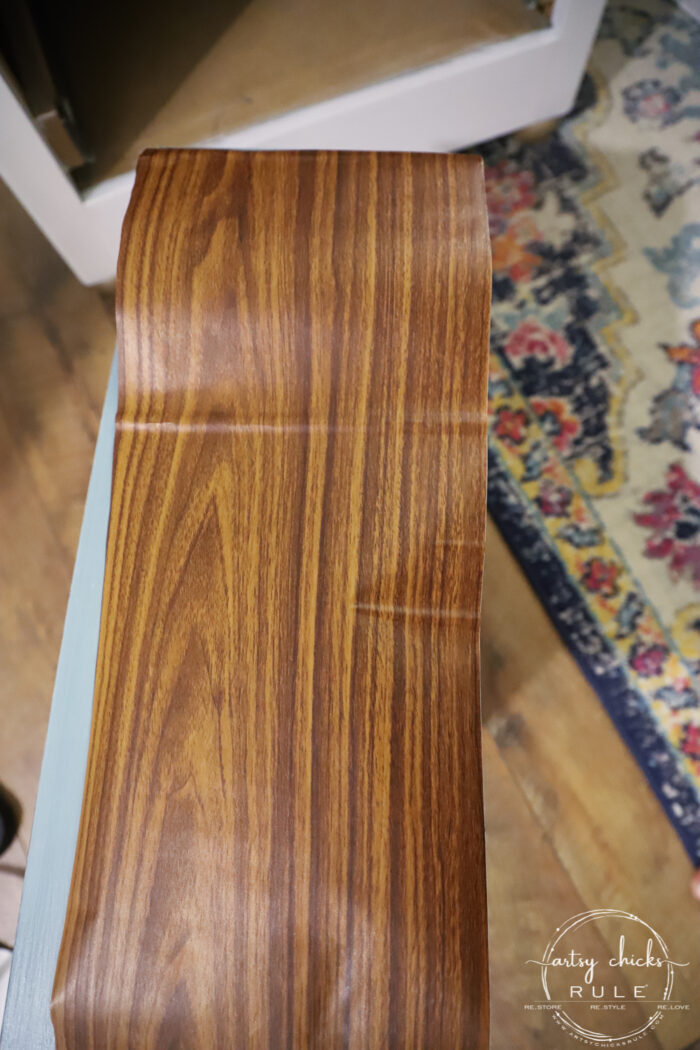
I thought that was a super cool look and decided to do something similar to my nightstands. The only problem was finding a wood grain vinyl that looked realistic. Not too easy, unless you’re lucky on your first shot.
I wasn’t.
I ordered 3 different ones from Amazon and yep, the third time was the charm. The first two…ick.
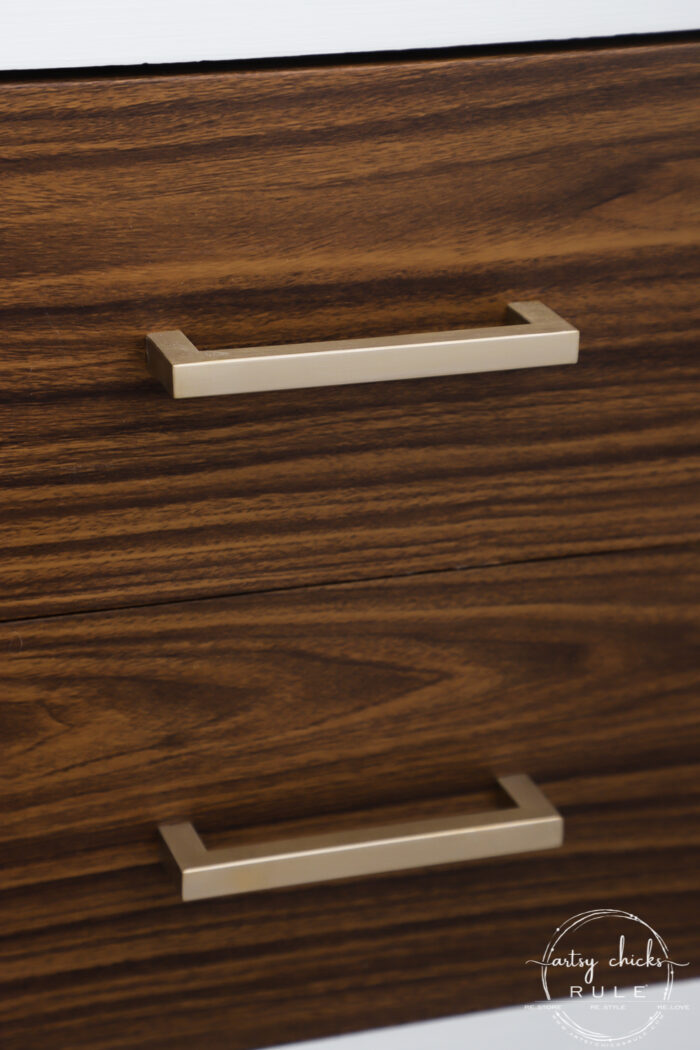
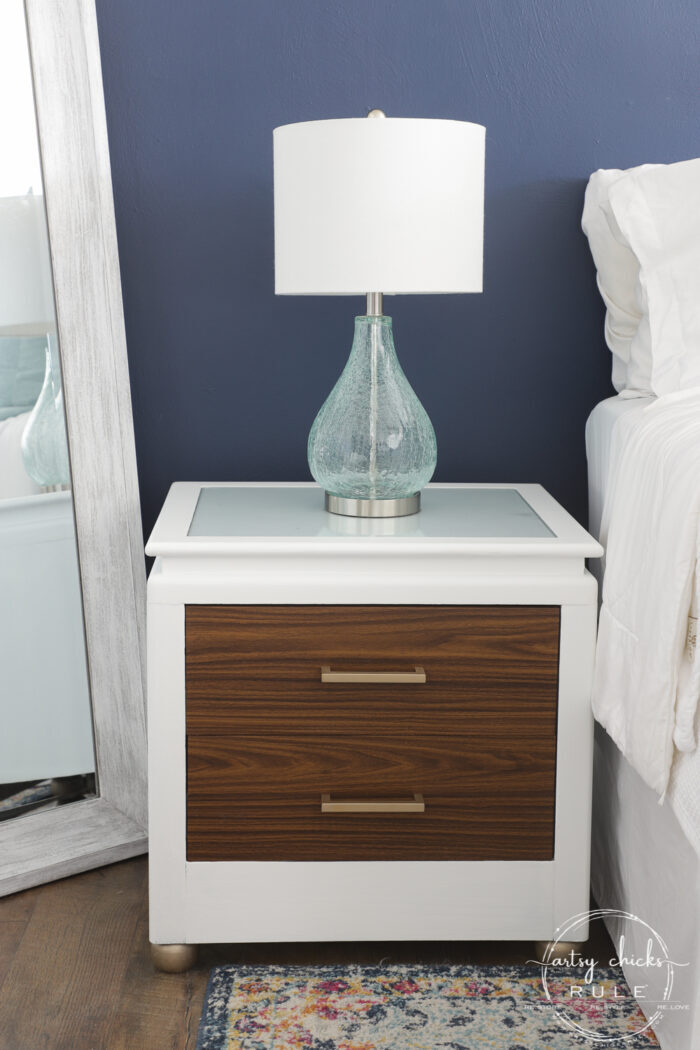
This one looks very realistic and I love it.
How well will it hold up?
Well, time will tell. BUT I am okay if it doesn’t last forever because I do still plan to find some other nightstands but wanted to go ahead and get something that looked better in the new room in the meantime so I can share a reveal soon.
So far so good though! I’ll keep you updated and let you know, you know I will.
I opted to give the Fusion Mineral Paint another go. Again with the Picket Fence.
I like that paint and the crisp white but dang it takes forever to cover.
I did multi coats, maybe 3? My other white I use most often covers a bit better. (but it’s gone quite a bit up in price, what the heck?)
Once it was dry, I let it sit overnight and then applied 2 coats of their Tough Coat in “matte” with a sponge applicator. (drying well in between coats) I really liked it. We’ll see how it holds up and if it yellows.
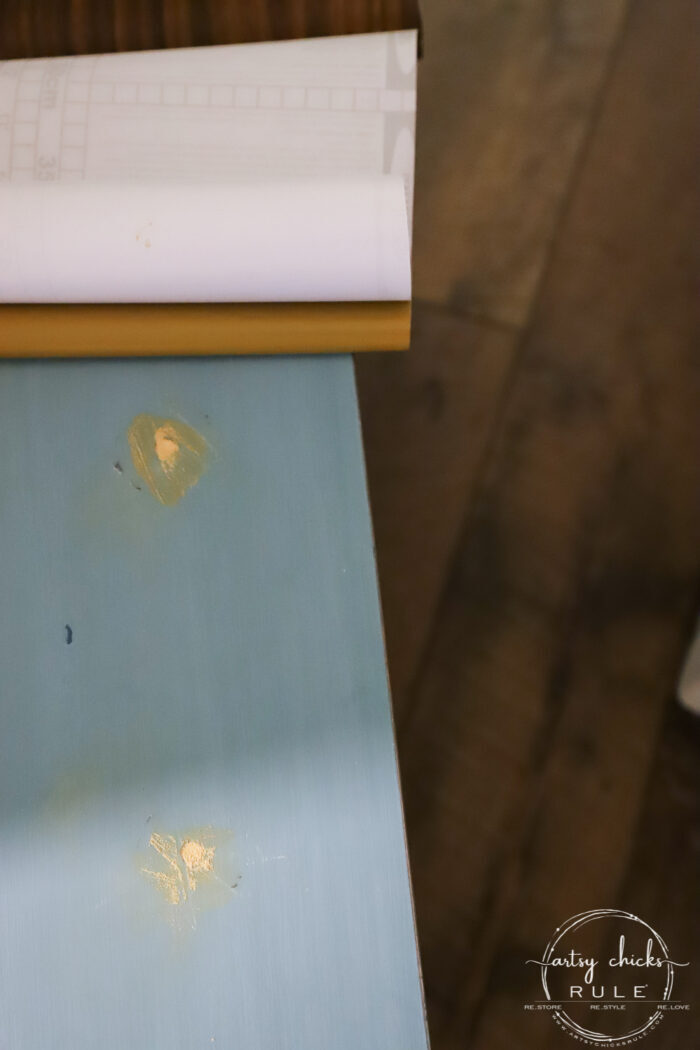
I did lightly sand the whole thing before beginning. As well as the drawers that were getting the vinyl.
I filled in the holes so I could make new ones since the hardware I was planning to use had a bit smaller opening.
Once that was dry, I sanded them smooth and finished attaching the vinyl.
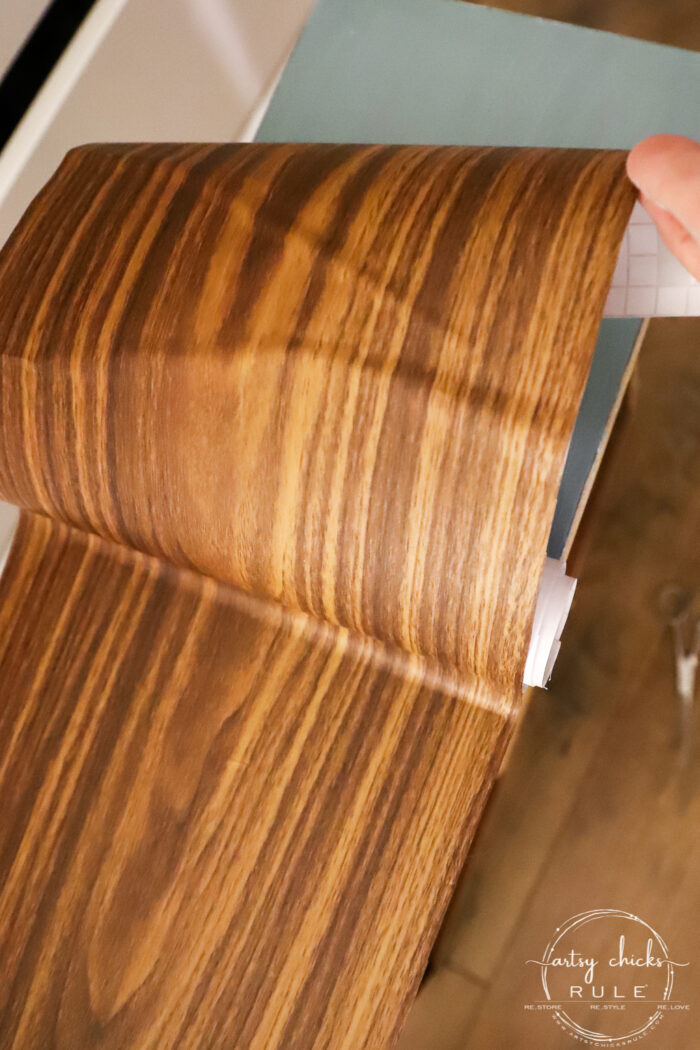
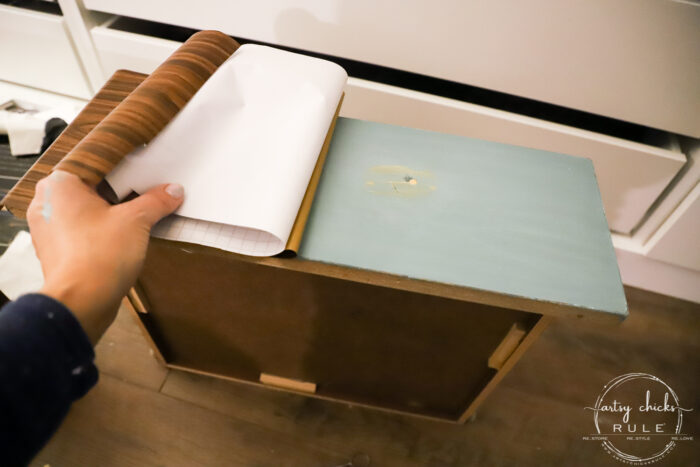
It applied so well.
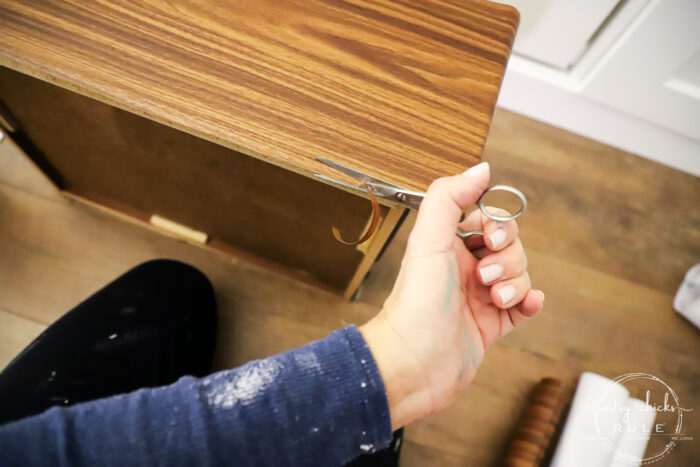
I measured and cut it slightly bigger than needed. (on the top and sides…I wish now I had gone ahead and wrapped the bottom too)
And then took a small pair of scissors to trim the excess straight across the wood (on the bottoms). The scissors glided nicely across and cut it easily.
Don’t mind the painting clothes or paint on my hands. I was also painting something in the “French Eggshell” Fusion Paint color that I’m sharing later this week.
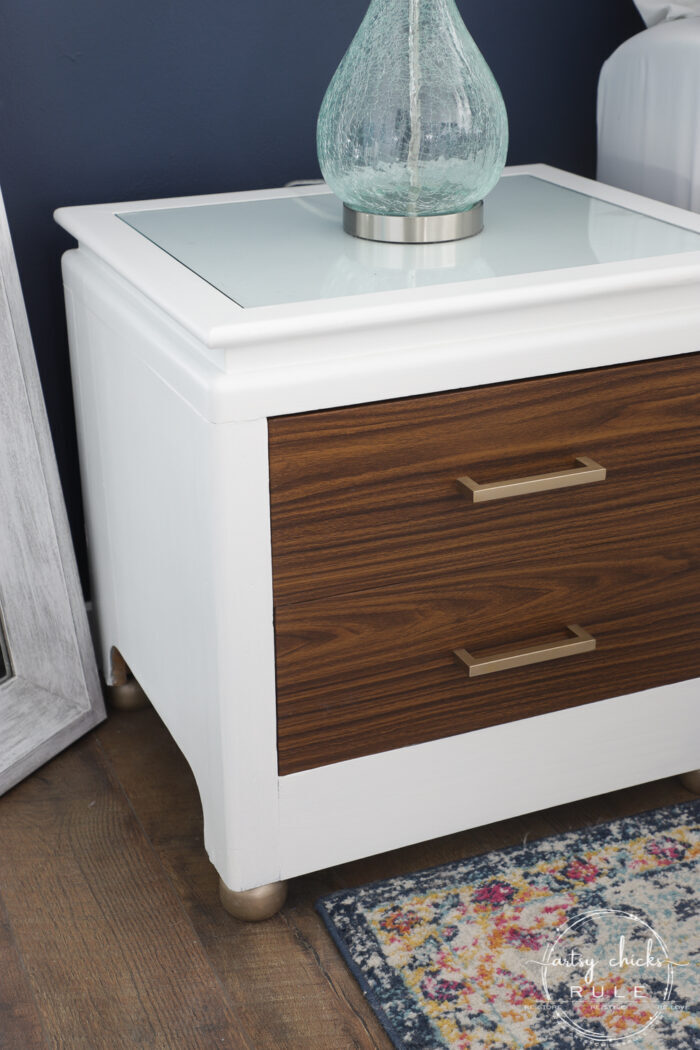
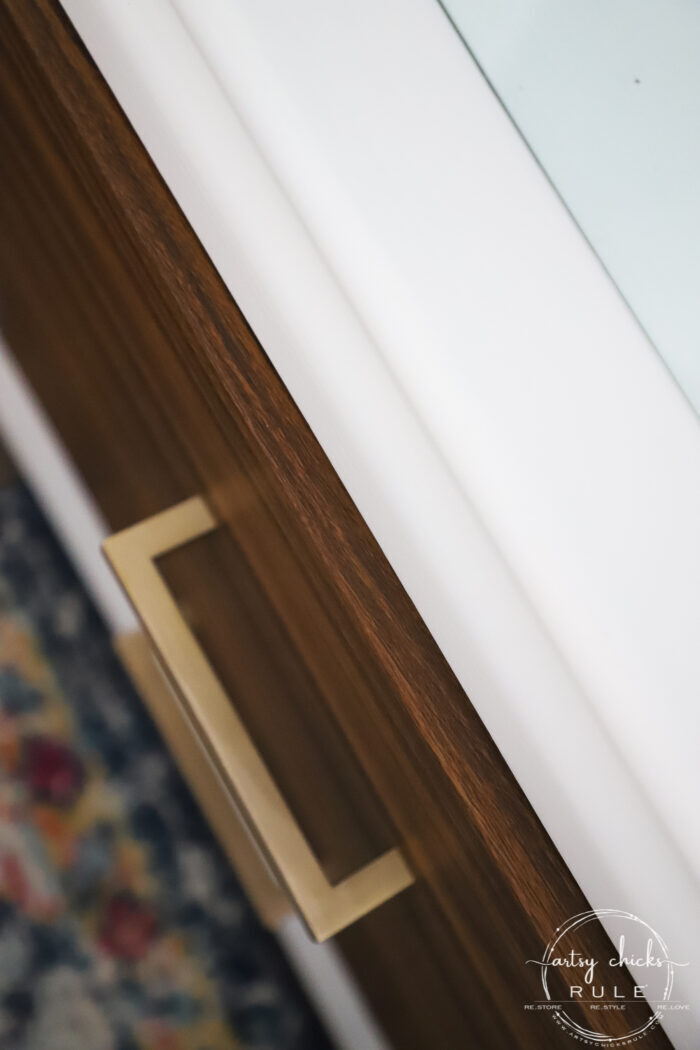
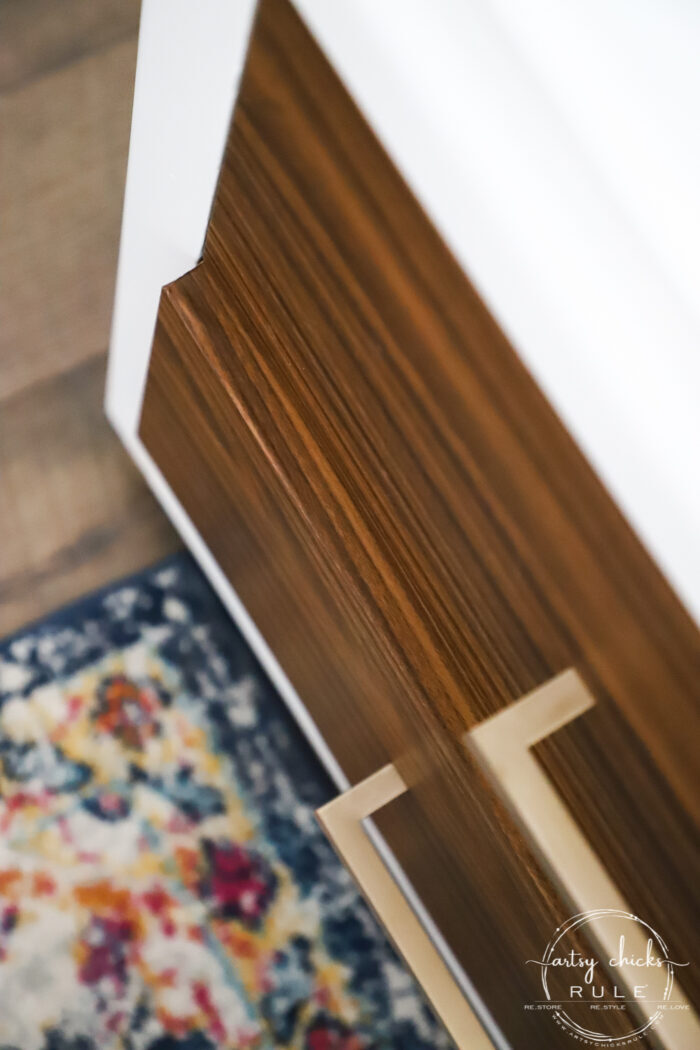
I did wrap the tops and sides though.
It looks VERY realistic. I am so pleased.
As mentioned, I had 4 handles leftover from our closet makeover (they came in a set of 5 and I only needed one this size in the closet) so it worked out perfectly.
BUT they were a bit too brassy/gold for the look I was going for on these nightstands. AND they were a different looking gold then the ball feet.
So I pulled out my “German Silver” paste wax and rubbed a bit of that on all 4 and it toned them down nicely. I love how it gives the finish a “brushed” look.
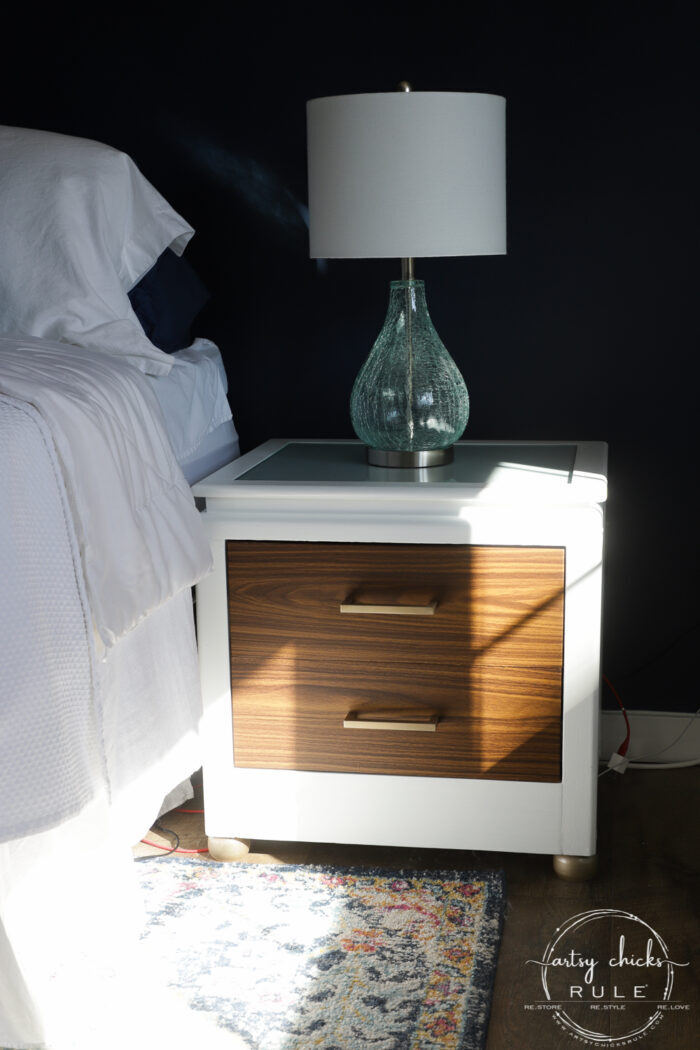
And hubby’s side…
The sun was shining in super bright on his side but wanted to show you the pretty wood grain vinyl on his.
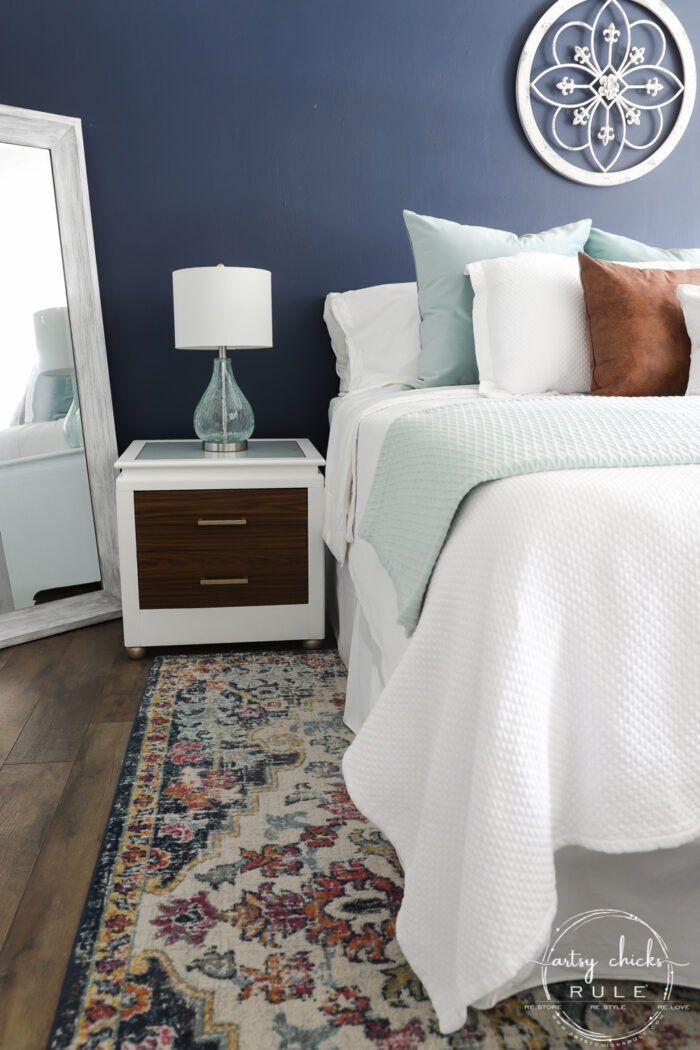
A little sneak peek of our bedroom so far to give you an idea of where we are going.
And to see how I brought the colors together a bit with the pillows, nightstands, etc. (those are “leather-look” pillows on the bed)
Basically, I am trying to make the room look less feminine and bring in some more “manly” looking features for my hubby.
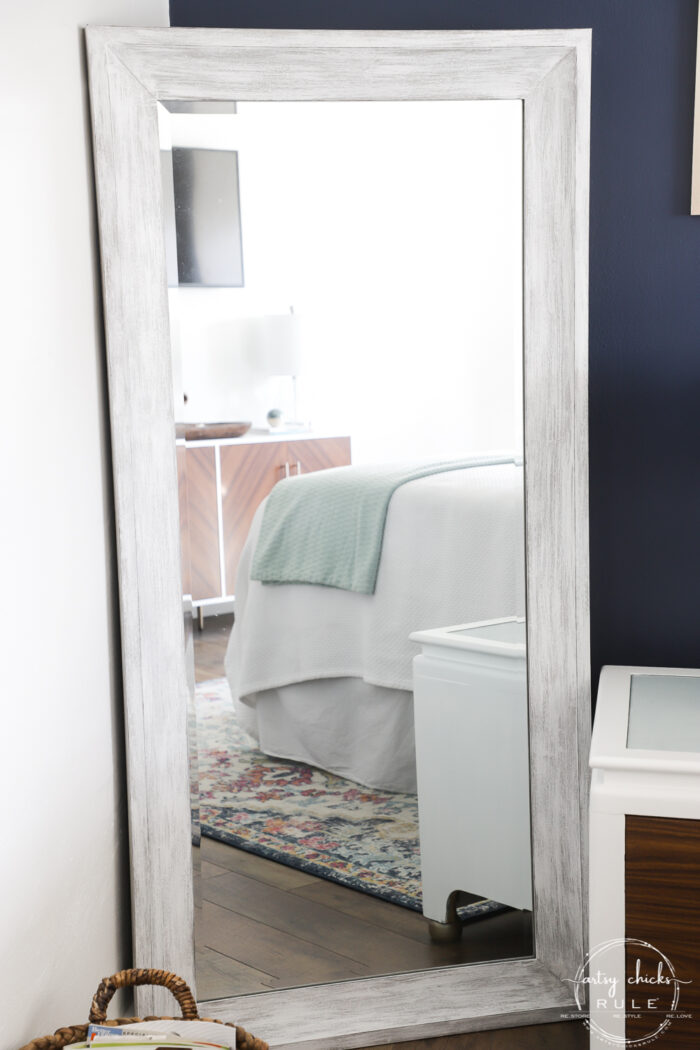
I still want to put something behind/above the lamps on each side but it’s been a bust so far.
I considered mirrors but I already have that floor mirror right there so that felt odd to me. So now I am looking for some cool artwork with these colors in the rug…abstract or something. I don’t know, I haven’t been able to find it yet.
If you have any ideas, please share! :)
Here are some of the items pictured if you are interested in any of them…
Your projects are such an INSPIRATION! Planning a similar project now—beloved family dresser using grass cloth-like peel and stick wallpaper! And here you’ve worked out all the details for me! Look forward to seeing every project you post! Thank you, thank you!
Hi Nancy! I would have never thought of this but ih love them. Very crisp and classy. I also love the. Color of your walls. Your room is looking so fresh.
OH yes, sorry about that, Ramona! It is part of the nightstands…just a piece of glass that came with them. I removed it to paint the tops and then put it back in place. :) (it’s made to sit down inside the top)
Hi Nancy. I really like the crisp, more masculine makeover. I know it’s a temporary fix for you, but if I were keeping them I might have sanded the drawers to the wood and stained maybe walnut. Then apply a “faux bois” effect with black or espresso for the graining. It might not be so convincing but would be artistic and durable. Either way, I like the overall look of the bedroom and admire your willingness to change things up!
I like the third makeover! Nice job with the vinyl. I would never have thought about using it, but it really is striking. I also like the German Silver Paste you used to tone down the brighter gold on the feet and the drawer pulls. Thanks for posting the materials you used in one place. It makes it easier to search. Can’t wait to see what you show us Thursday! Thanks for sharing.
I agree with Rose 🌹 Lefebvre; prefer the blue nightstands. I must say I am pleasantly surprised that the wood grained vinyl looks as nice as it does. I have seen some bad, bad stuff. Love the white bedspread. and the blue wall behind the bed. Don’t go too masculine; feminine touches 👗are way less boring.🥳
Yes, the blue was nice and I did still like them like that but was ready for a change. :) And yes, I am quite surprised at how nice the wood grain vinyl looks myself! Not at all what I would expect (well, the two I sent back were exactly what I expected…cheapie looking!) And no worries, not going too masculine at all! ;) xoxo
This is the set that keeps on giving!!! I like this make over the best!!! So creative you are!!!
Good job!!!! XXOO….getting excited for the drawing!!!!…HA!!!
I love how they turned out! When you showed the vinyl on Instagram, I thought “this will never work”. Boy, was I wrong. As far as what to do with the area behind the lamps–instead of lamps, what do you think of wall sconces in a brass color? To give you an idea, Wayfair has some called swing-arm lamps, but the brass is out of stock. Then you can play around decorating the nightstand top for added interest. Just a thought…
These look so nice! Would you say that this product is superior to typical contact paper? I have a large bookcase that is dark wood and I would like to line just the back with something lighter so my decor stands out better, and thought I might try the lighter colored option. Also, does the gold paste wax you use stay on well on things that are handled frequently, like drawer pulls? I’ve noticed other bloggers use a product called rub and buff on hardware, which I assume is similar, and I’ve wondered how it held up. I know you said this is a temporary fix and you are still looking for new nightstands, but I wonder if you might like them better with taller legs so they are closer to the height of the bed? Just a thought! Love seeing your projects, you are so creative! I would say you’ve definitely gotten your money’s worth but of these nightstands!
Thanks, Vicki! Hmm…yes, it does seem quite a bit stickier than regular contact paper I’ve gotten from the Dollar Store, etc. I haven’t had any issues with it coming up on the edges,etc, since I put it on but it’s only been a few days. I think lining it like you say might work just fine. I will say, and this probably goes for all types of peel and stick wallpaper/contact paper, is it sticks best to flat, smooth surfaces. (not rough, etc, like a raw unsanded wood type of finish) The paste wax stays on wonderfully. I have used it on several light fixtures, lots of hardware over the years. It’s my favorite. I don’t really use or like the Rub and Buff.
That’s funny you say that about the legs, I actually looked for new legs to raise them up higher when I was trying to come up with a new look for them. But they were pricey so I didn’t go that route. I would love to have taller nightstands eventually though!
Thank you for the sweet words, Vicki! And oh yes, I surely did get my money’s worth on these! :) xoxo
Yes, much more modern but we are loving the new look! It’s fun to change things up sometimes. Feels like having brand new, different nightstands! Thanks, Michele! xoxo
You know, Nancy…..it would be so easy to build a “frame” of sorts for the bottom of those night stands to make them taller by using a little plywood and trim that might mimic the top piece. Just a thought. And while this dark wood grain look with white isn’t MY style, I think you did a great job on it and if you like it then that’s all that matters!
Hi Sharon! Oh yes, we sort of did that on another piece (our coffee bar downstairs) but since we are wanting different nightstands eventually I thought I’d give these a “quick fix” for now. :) And thank you so very much for the thoughtful words. Hugs and happy weekend to you! xoxo
You mentioned today (1/21) that this wasn’t a hit with your fans. I haven’t read all the comments, but what I like the most about this makeover is that it shows your vision beyond what you normally do. I applaud your creativity and I personally love it.
Meg
Very cool! Change is the spice of life and I love how you repurpose your cherished objects! We just bought a 101 year old home and I’m inspired by your ideas and enthusiasm. I also think those side tables look great and I’m now thinking about how I can re-do my old nightstand.
Thank you, Leslie! And wow, lucky!! I’d love to have the opportunity own a home like that one day. Ahhh…so much a treasure. Have a beautiful weekend! xo
Had you considered using the veneer wood sheets … not a fan of stick on vinyl. BTW do like the stenciled on white set with the blue curtains … so upbeat.
I didn’t really on this one but I used that product on an old kitchen cabinet project years ago (pre-blogging days in another home). The vinyl is temporary and fits the bill for us right now! I just wanted to give them a little change up until we find something else there. Easily removed and painted when I’m ready to sell them. (I wouldn’t leave the vinyl on when I sell) And yes, that version was probably the most upbeat! :)
I read every one of your makeovers because they give me so much inspiration. I even took the painting plunge with a very old bookcase my dad made and changed it with chalk paint from white to a navy blue. I actually like all three of the looks on the nightstands and especially like the way you can envision updates using what you have instead of always purchasing new.
Hi Nancy! Thank you so much for the kind words. I am so happy to hear that my projects have inspired you. That is 100% what it’s all about. :) It’s so much fun making over old things, isn’t it?! xoxo
Now that looks really nice with your bedroom. I was shocked when you said it was wood vinyl…I really thought that was the front of the original drawer. Nice job! Even the little feet look good on there.
Don't Miss a Thing! Plus,Get My FREE ebook,"Creating Fabulous Finishes"!
Get My FREE ebook Now!
Want to be inspired, learn new skills, discover all the tricks to furniture makeovers, creating new out of the old and more?
You'll also receive my FREE ebook "Creating Fabulous Finishes" PLUS access to my private Printables Resource Library, too!
Sign up to get the Weekly Newsletter! Our emails include an unsubscribe link and you may opt-out at any time. Your information will *never* be shared or sold to a 3rd party.
Don't Miss a Thing! Plus,Get My FREE ebook,"Creating Fabulous Finishes"!
Don't Miss a Thing!! Plus Get My FREE eBook "Creating Fabulous Finishes"!


")


")
")


Hate to tell you I prefer the 2nd blue look.
Ah, well, can’t win em all! ;)
Your projects are such an INSPIRATION! Planning a similar project now—beloved family dresser using grass cloth-like peel and stick wallpaper! And here you’ve worked out all the details for me! Look forward to seeing every project you post! Thank you, thank you!
Oh yes, I love the peel and stick grasscloth too!! That is going to be fabulous, Tina!! Isn’t it fun to change things up like this? xoxo
Hi Nancy! I would have never thought of this but ih love them. Very crisp and classy. I also love the. Color of your walls. Your room is looking so fresh.
Hi Cheryl! Thank you so much. The dark blue is definitely a change for me in there but I am loving it too! It’s fun to change things up sometimes! xo
There is no mention of the glass top.
Is it inlaid on just sitting on the top of the side table?
OH yes, sorry about that, Ramona! It is part of the nightstands…just a piece of glass that came with them. I removed it to paint the tops and then put it back in place. :) (it’s made to sit down inside the top)
Hi Nancy. I really like the crisp, more masculine makeover. I know it’s a temporary fix for you, but if I were keeping them I might have sanded the drawers to the wood and stained maybe walnut. Then apply a “faux bois” effect with black or espresso for the graining. It might not be so convincing but would be artistic and durable. Either way, I like the overall look of the bedroom and admire your willingness to change things up!
Hi Sabrina! Oh yes, that would’ve been a great idea too. If I were keeping them that would’ve been a fun project to try. :) And thank you!! xoxo
I like the third makeover! Nice job with the vinyl. I would never have thought about using it, but it really is striking. I also like the German Silver Paste you used to tone down the brighter gold on the feet and the drawer pulls. Thanks for posting the materials you used in one place. It makes it easier to search. Can’t wait to see what you show us Thursday! Thanks for sharing.
Ah, yay! Thanks, Sue! That German Silver paste is the bomb! It works well to tone down. I really love it. xoxo
Yuck! Wood grain vinyl is for trailers.
I agree with Rose 🌹 Lefebvre; prefer the blue nightstands. I must say I am pleasantly surprised that the wood grained vinyl looks as nice as it does. I have seen some bad, bad stuff. Love the white bedspread. and the blue wall behind the bed. Don’t go too masculine; feminine touches 👗are way less boring.🥳
Yes, the blue was nice and I did still like them like that but was ready for a change. :) And yes, I am quite surprised at how nice the wood grain vinyl looks myself! Not at all what I would expect (well, the two I sent back were exactly what I expected…cheapie looking!) And no worries, not going too masculine at all! ;) xoxo
They turned out great. In the first pic, before they were made over, I wonder if the drawers were accidently switched?
Thank you, Lizzy! And yes, I bet they were, sure looks like it! xo
This is the set that keeps on giving!!! I like this make over the best!!! So creative you are!!!
Good job!!!! XXOO….getting excited for the drawing!!!!…HA!!!
Yes, Addie!! It surely is! lol And thank you so much, my friend! xoxo
I love how they turned out! When you showed the vinyl on Instagram, I thought “this will never work”. Boy, was I wrong. As far as what to do with the area behind the lamps–instead of lamps, what do you think of wall sconces in a brass color? To give you an idea, Wayfair has some called swing-arm lamps, but the brass is out of stock. Then you can play around decorating the nightstand top for added interest. Just a thought…
Thanks, Kimberly! And oh, I do love that idea. I will have to look into that! Thanks so much for the idea! :) xoxo
These look so nice! Would you say that this product is superior to typical contact paper? I have a large bookcase that is dark wood and I would like to line just the back with something lighter so my decor stands out better, and thought I might try the lighter colored option. Also, does the gold paste wax you use stay on well on things that are handled frequently, like drawer pulls? I’ve noticed other bloggers use a product called rub and buff on hardware, which I assume is similar, and I’ve wondered how it held up. I know you said this is a temporary fix and you are still looking for new nightstands, but I wonder if you might like them better with taller legs so they are closer to the height of the bed? Just a thought! Love seeing your projects, you are so creative! I would say you’ve definitely gotten your money’s worth but of these nightstands!
Thanks, Vicki! Hmm…yes, it does seem quite a bit stickier than regular contact paper I’ve gotten from the Dollar Store, etc. I haven’t had any issues with it coming up on the edges,etc, since I put it on but it’s only been a few days. I think lining it like you say might work just fine. I will say, and this probably goes for all types of peel and stick wallpaper/contact paper, is it sticks best to flat, smooth surfaces. (not rough, etc, like a raw unsanded wood type of finish) The paste wax stays on wonderfully. I have used it on several light fixtures, lots of hardware over the years. It’s my favorite. I don’t really use or like the Rub and Buff.
That’s funny you say that about the legs, I actually looked for new legs to raise them up higher when I was trying to come up with a new look for them. But they were pricey so I didn’t go that route. I would love to have taller nightstands eventually though!
Thank you for the sweet words, Vicki! And oh yes, I surely did get my money’s worth on these! :) xoxo
The new look on this piece is not my style. But…the method you used is fabulous!!
It looks so good! That makes it a winner!!
Thanks so much Barbara! :) xoxo
WOW! It is hard to believe it is the same nightstand, Nancy.
Well done – sure is fun and modern now!
Yes, much more modern but we are loving the new look! It’s fun to change things up sometimes. Feels like having brand new, different nightstands! Thanks, Michele! xoxo
You know, Nancy…..it would be so easy to build a “frame” of sorts for the bottom of those night stands to make them taller by using a little plywood and trim that might mimic the top piece. Just a thought. And while this dark wood grain look with white isn’t MY style, I think you did a great job on it and if you like it then that’s all that matters!
Hi Sharon! Oh yes, we sort of did that on another piece (our coffee bar downstairs) but since we are wanting different nightstands eventually I thought I’d give these a “quick fix” for now. :) And thank you so very much for the thoughtful words. Hugs and happy weekend to you! xoxo
You mentioned today (1/21) that this wasn’t a hit with your fans. I haven’t read all the comments, but what I like the most about this makeover is that it shows your vision beyond what you normally do. I applaud your creativity and I personally love it.
Meg
Thank you, Meg. I appreciate that so much! I hope you have a great weekend! xoxo
Very cool! Change is the spice of life and I love how you repurpose your cherished objects! We just bought a 101 year old home and I’m inspired by your ideas and enthusiasm. I also think those side tables look great and I’m now thinking about how I can re-do my old nightstand.
Thank you, Leslie! And wow, lucky!! I’d love to have the opportunity own a home like that one day. Ahhh…so much a treasure. Have a beautiful weekend! xo
Had you considered using the veneer wood sheets … not a fan of stick on vinyl. BTW do like the stenciled on white set with the blue curtains … so upbeat.
I didn’t really on this one but I used that product on an old kitchen cabinet project years ago (pre-blogging days in another home). The vinyl is temporary and fits the bill for us right now! I just wanted to give them a little change up until we find something else there. Easily removed and painted when I’m ready to sell them. (I wouldn’t leave the vinyl on when I sell) And yes, that version was probably the most upbeat! :)
I love love love the nightstand and crazy about those drawer pulls! Nice job!
Thanks so much, Suzi! Love ya! xoxo
I read every one of your makeovers because they give me so much inspiration. I even took the painting plunge with a very old bookcase my dad made and changed it with chalk paint from white to a navy blue. I actually like all three of the looks on the nightstands and especially like the way you can envision updates using what you have instead of always purchasing new.
Hi Nancy! Thank you so much for the kind words. I am so happy to hear that my projects have inspired you. That is 100% what it’s all about. :) It’s so much fun making over old things, isn’t it?! xoxo
Now that looks really nice with your bedroom. I was shocked when you said it was wood vinyl…I really thought that was the front of the original drawer. Nice job! Even the little feet look good on there.
Thank you, Shirley! I know, I couldn’t believe how realistic this one looked as well! xo
I love it, very modern looking! Now I want to buy some vinyl!!!!
Yes!! So much fun, Gloria!! :)