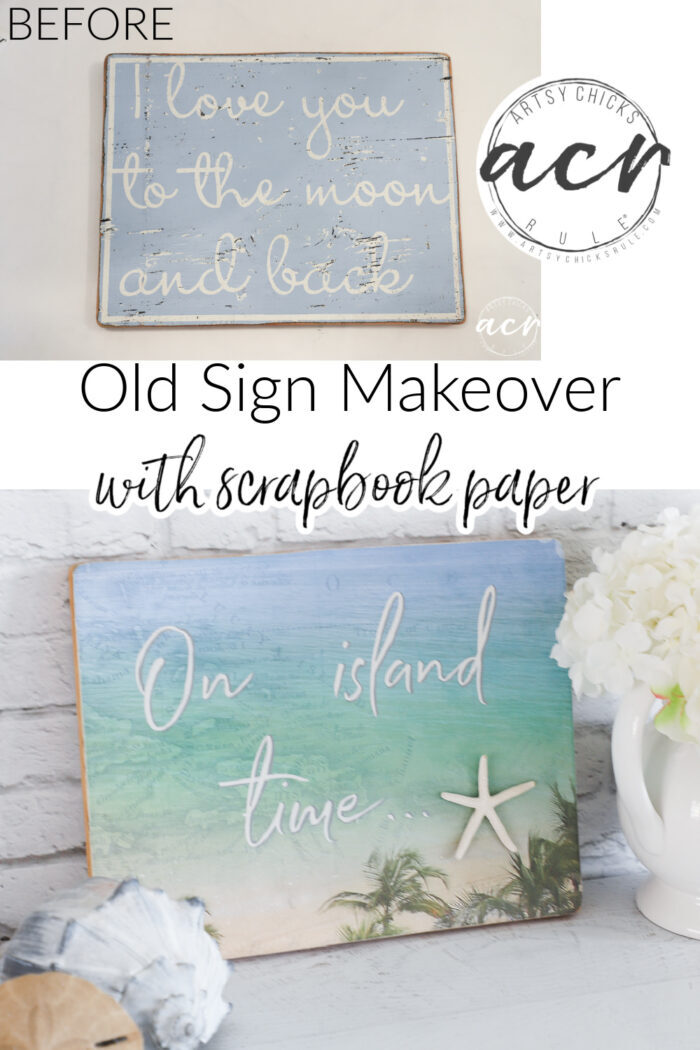
On Island Time Sign Makeover
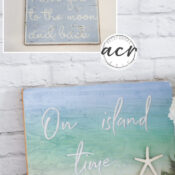
Create your own “On Island Time” sign simply with scrapbook paper and easily transferred lettering with paint!
Hey friends!
I hope you are having a wonderful week. We have been traveling and visiting family (and friends) in the wonderful state of South Carolina. (some in the Charleston area and some in the upstate)
If you follow along over on Instagram, you may have seen a little of the trip. Fun, fun!
On Island Time Sign
Today I’m back sharing this sweet little sign…
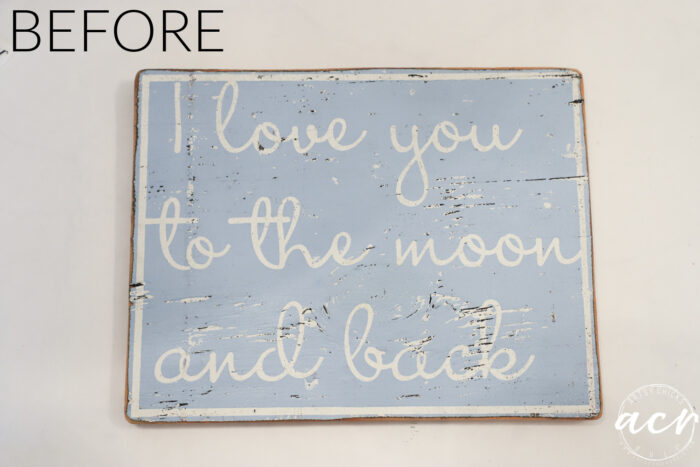
Since it’s already a sign and has a nice hanging wire on the back, I figured I’d keep it a sign.
Well, sort of.
You can hang it or sit it on a shelf, either way.
Here is what it looks like now…
Just a little different, huh? lol
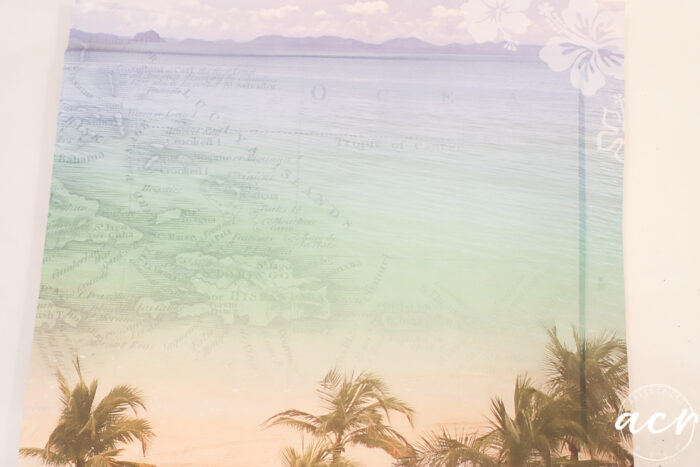
Well, guess what? Yep…I pulled out another sheet of that long-lost scrapbook paper I had stashed away and used it.
You can see above that I created a crease by pressing along the edges of the board for cutting.
See below?
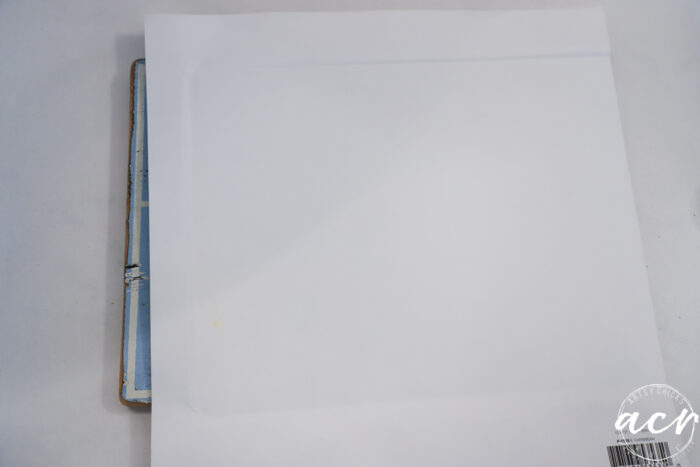
Then I applied a thin layer of my Decoupage Gel …
…and attached the scrapbook paper.
Once it was dry, I took a piece of sandpaper and rubbed the edges to get a nice clean line like you see below.
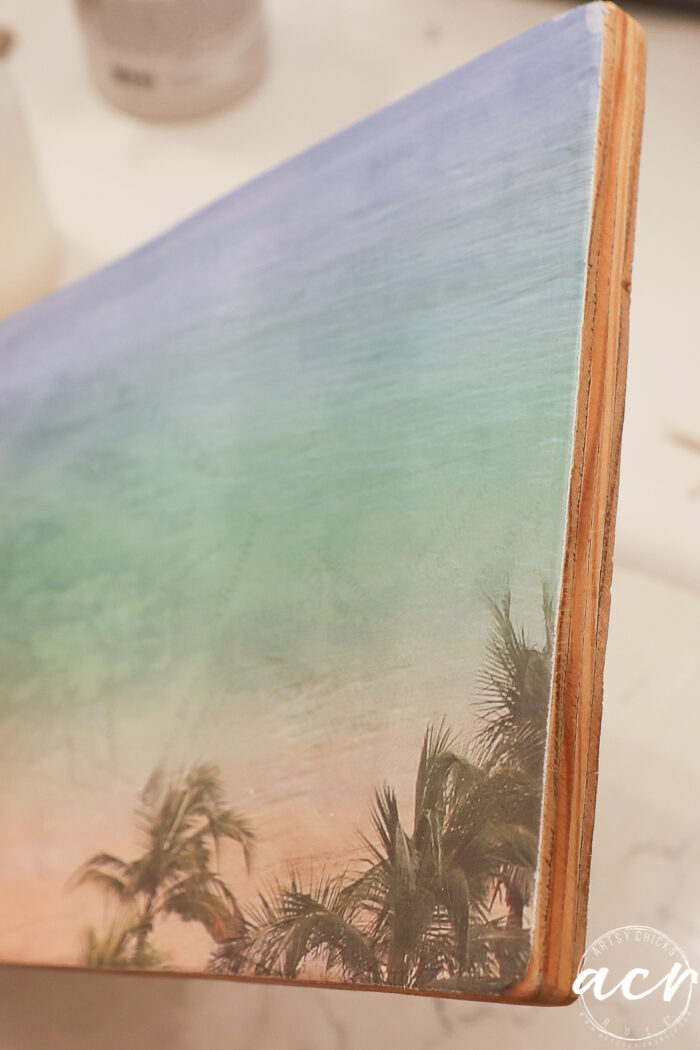
I love that little trick! Works so well. (on fabric decoupage too)
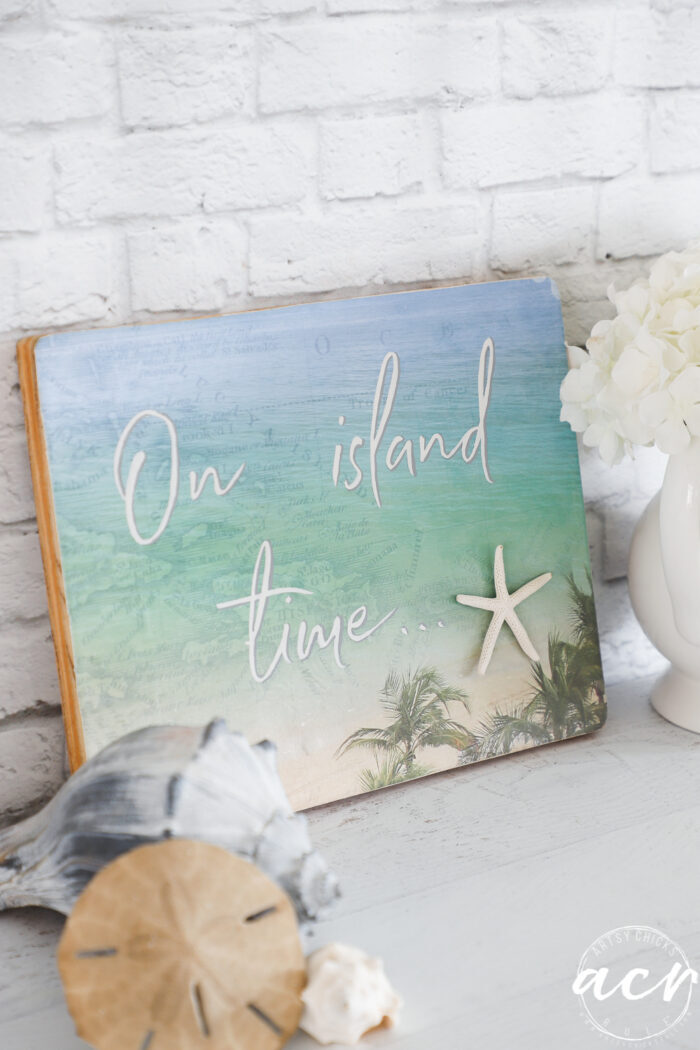
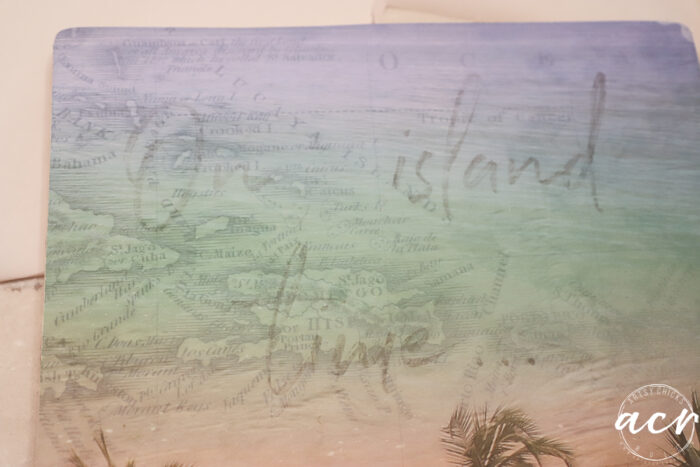
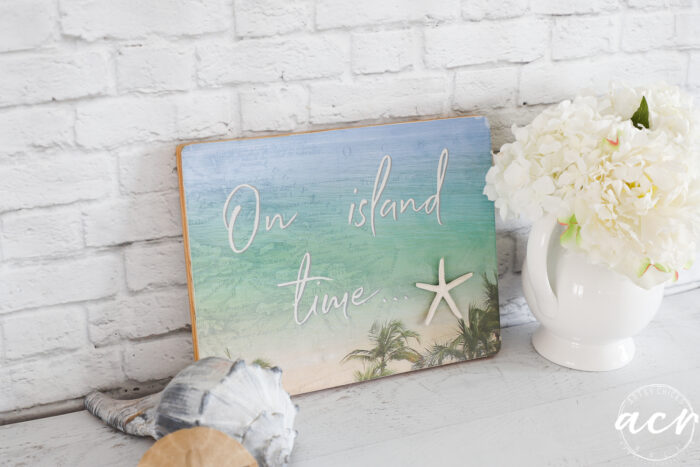
Then I printed (in reverse) out the words “on island time…” and arranged them on the sign where I wanted them.
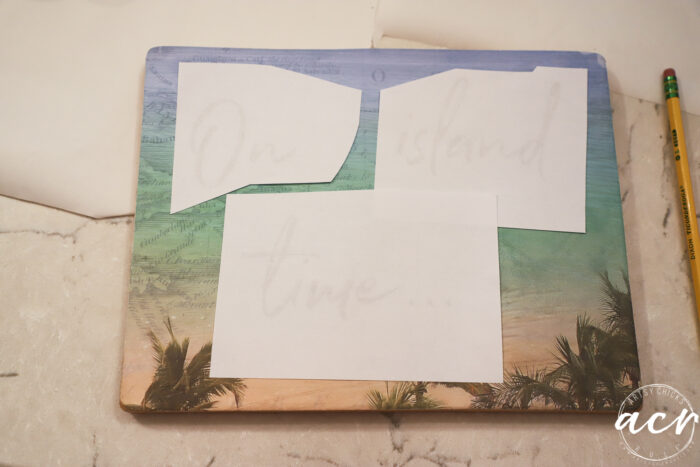
I rubbed over them with the pencil to transfer the ink from the inkjet.
Want to see more about this transfer method and others? Check out this post here >>> How To Transfer Graphics
You can see how well this works below.
Then all you have to do is use a small artist’s brush to paint over the lettering. (something like this brush works very well)
I used white paint for the letters.
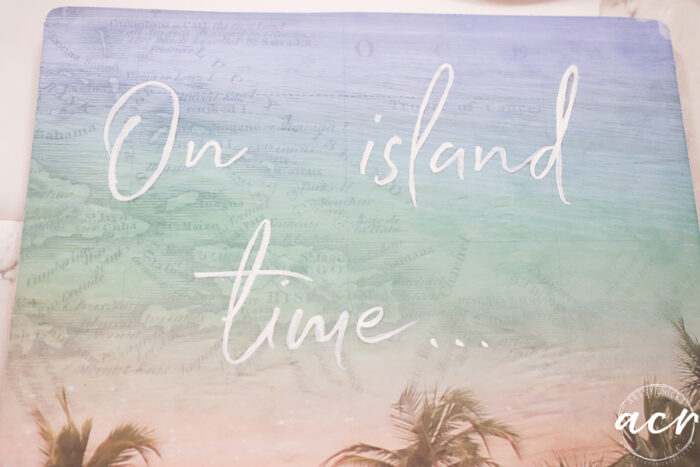
I went back over areas that were too thin and then decided to add shadowing.
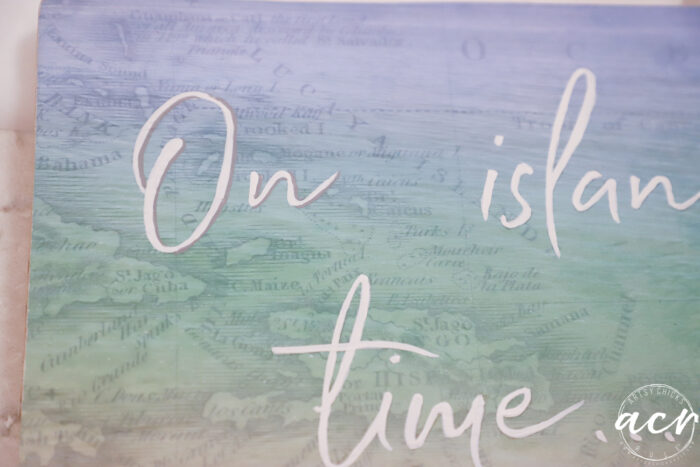
I like to print out the words with a “shadow” and it shows you everywhere you need to add it.

Doesn’t that just make the letters pop??
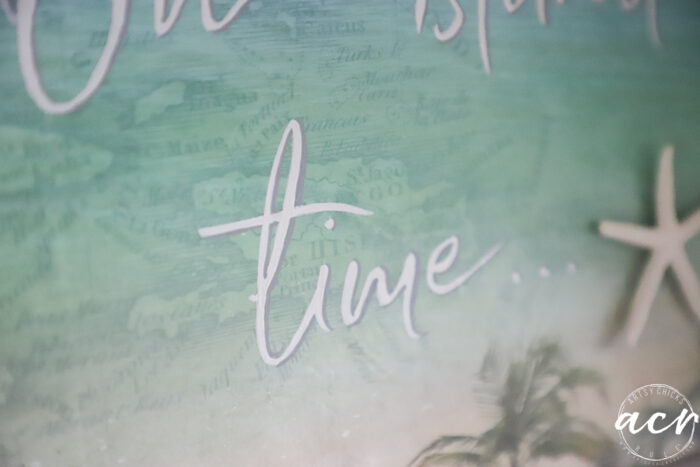
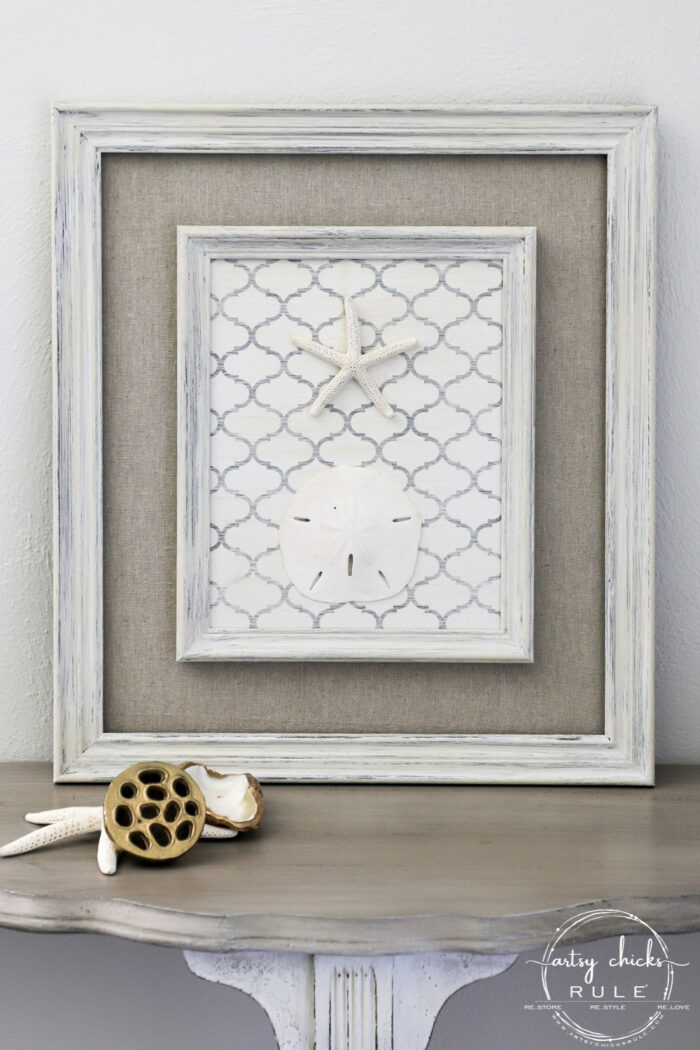
Lastly, I hot glued a baby starfish to the front to finish it up.

Perfect for that beach-themed home or cottage by the sea. :)
Another pretty simple one! Loving all the decoupage I’ve been doing lately.
It’s been so much fun to transform these old, tired pieces!
PIN it to save it!
I’ll be back next week with this one! (I LOVE how this one turned out and can’t wait to share it with you)
UPDATE!! See it now, here!
Have a wonderful weekend!!
xoxo


")

")


")


Ahhh, I love this Nancy! Just makes me sigh!!! Great use of some fun scrapbook paper too! Love your lettering. So glad you are out and about having fun!
Thank you, Christina!! Yes, so nice!!🥰
Want to try this with scrapbook paper. What weight paper are you using?
I’m not sure, Jill, but I think any weight would work well!
Love your sweet sign. It would light up any space. Perfect scrapbook paper for it.
Thank you, Edna! 🙂
Super cute! Enjoy your vacay! XOXO
Thanks, Christy!😘
So lovely and much easier than repainting the whole sign. I really thought you printed the wording, your painting is amazing, Nancy!
Love this! I have so.much.scrapbook paper!😬. You’ve inspired me to find fun ways to use it! I’m a bit of an addict to pretty paper (and fabric), and of course I need to use some of it in actual scrapbooks, but I have plenty! Decoupaging is so fun!
Ha!! Me too and I recently came across it. Hence all the projects with it lately! ;) I love pretty paper too! xoxo
I absolutely adore that. It’s amazing to me you think of such clever make-overs, Nancy!
Aw thanks, friend! Happy weekend to you! xoxo
Love this! You are so talented!
Aw, thanks so much! Happy weekend to you! xo