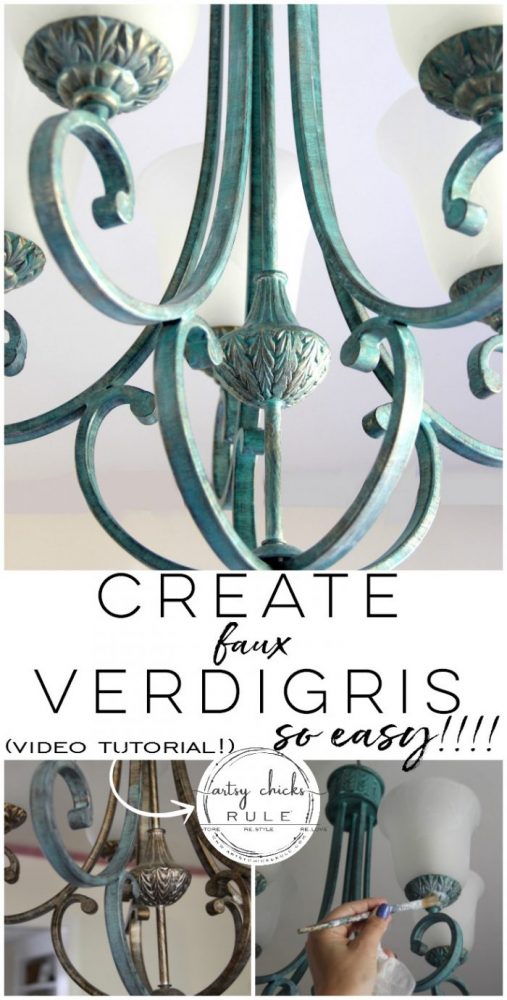
How To Create Faux Verdigris (so simple!)
Learn how to create faux verdigris…the easy way! So simple but gives such an elegant and realistic look.
I’m back today to share one of two tutorials I promised in this post I shared last week: “How To Paint Light Fixtures (without taking them down!)”
If you missed that post, pop on over and see the tutorial I did in that post for changing the color of your light fixture with paint…and yep, without taking down the fixture. :)
Today I’m I’m sharing how to create faux verdigris and I’ll be back on Thursday sharing the faux patina finish.
You can see both in the post I linked above.
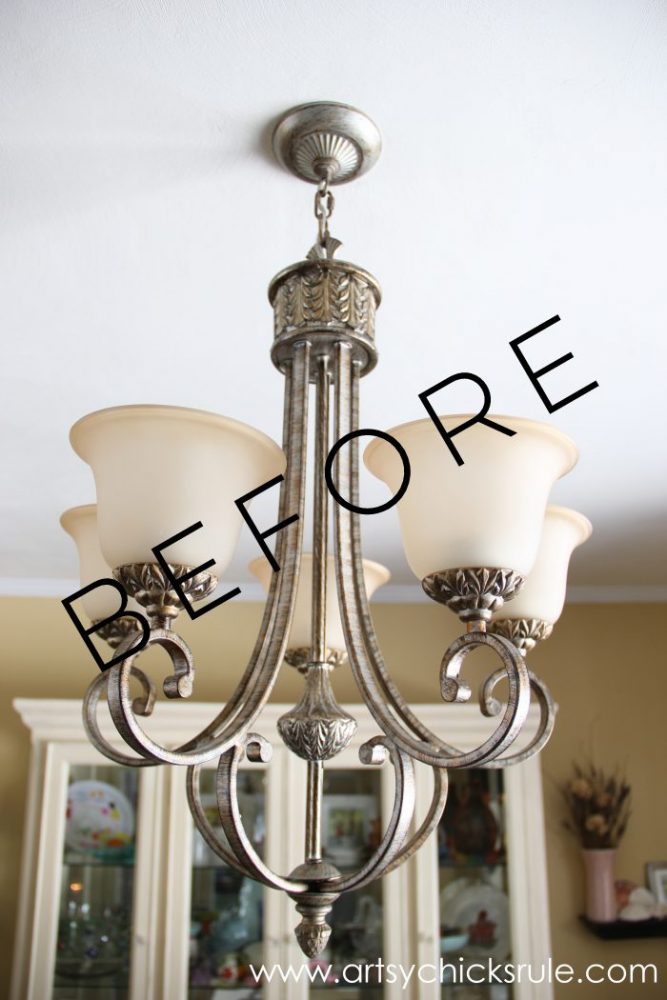
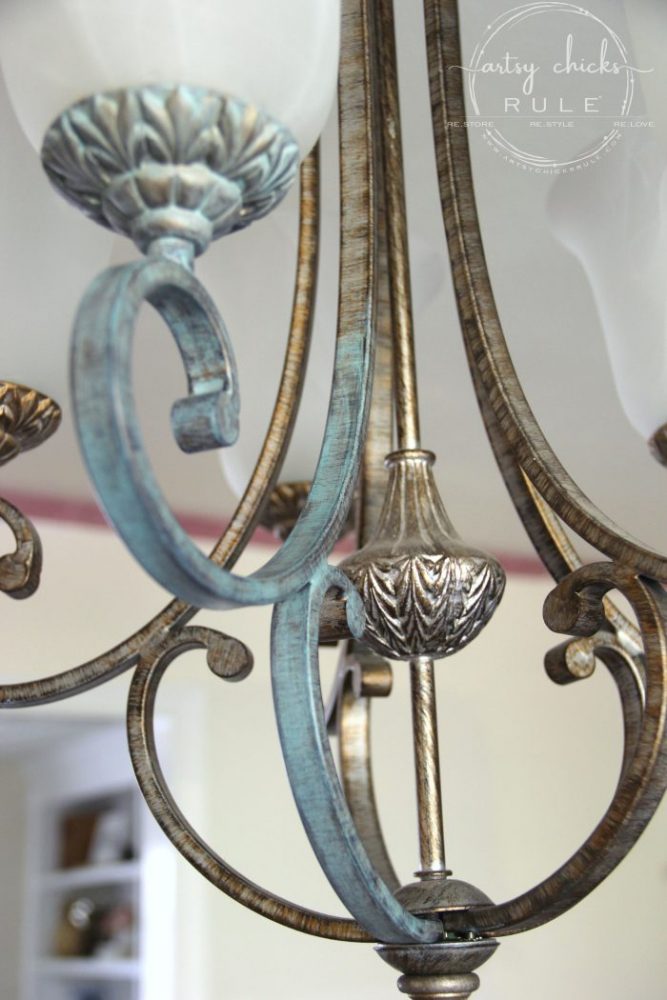
This is how my light fixture started…..
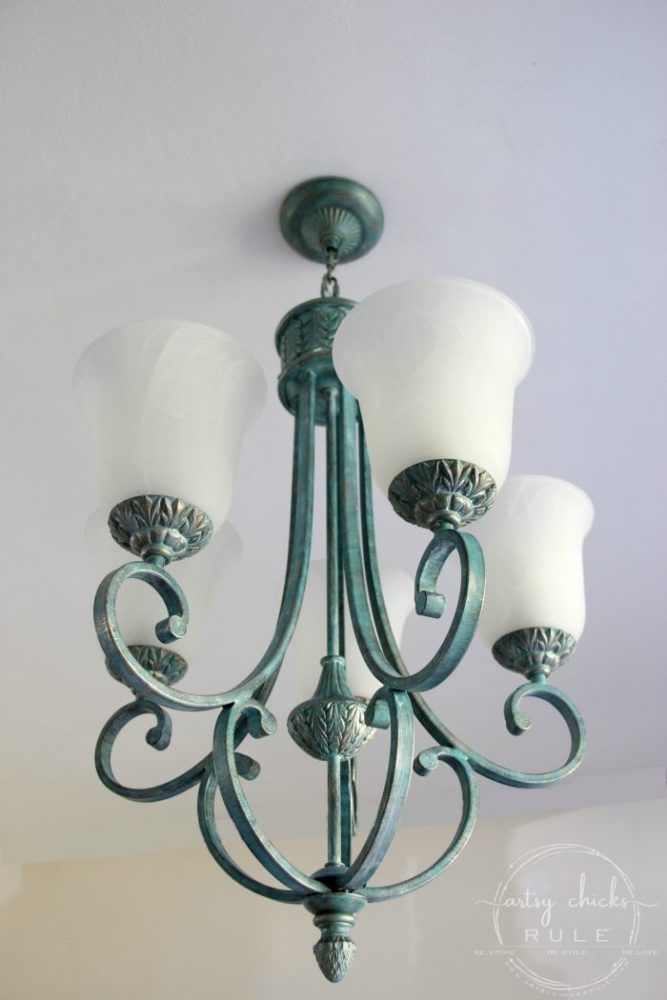
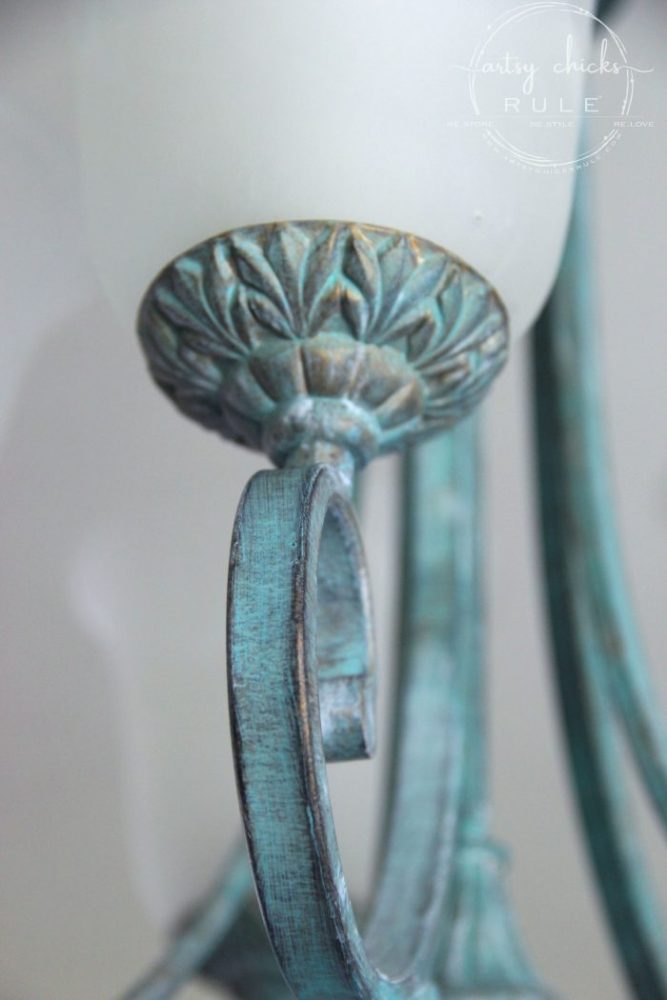
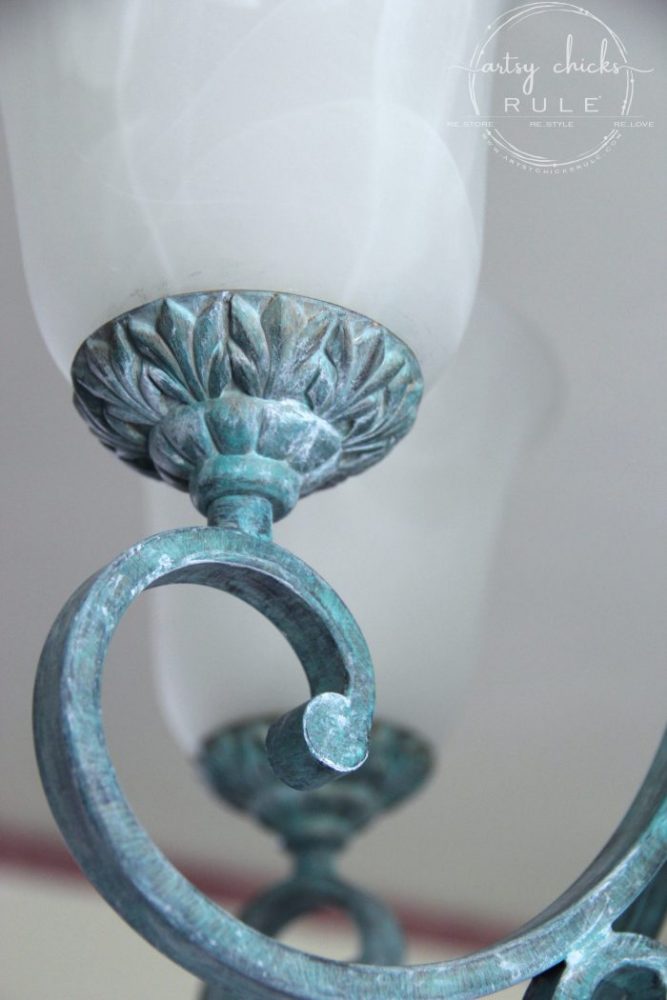
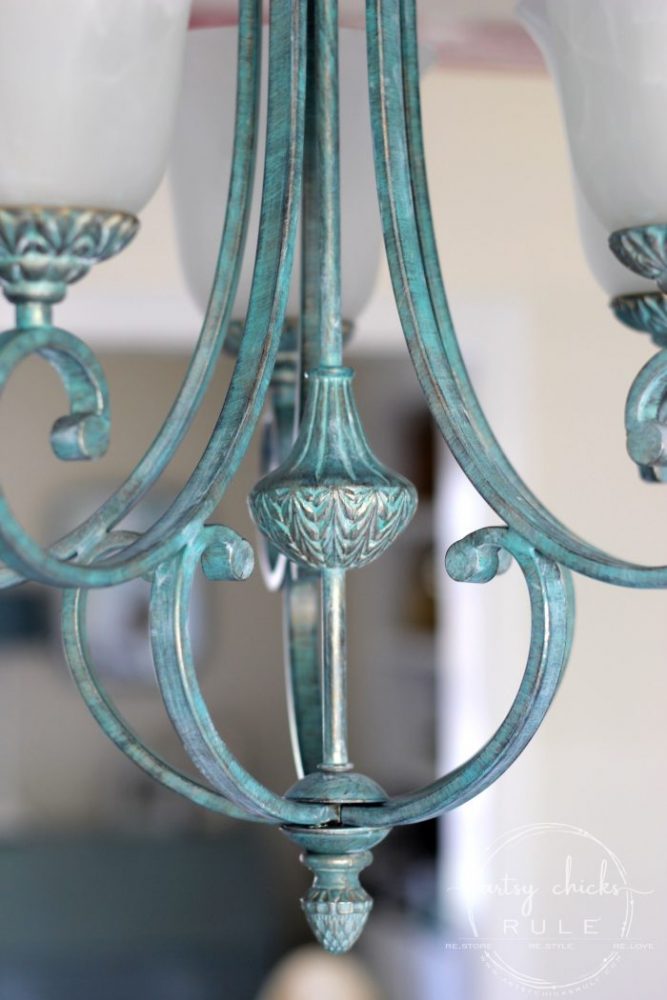
And how it looked after I gave it the faux verdigris finish….
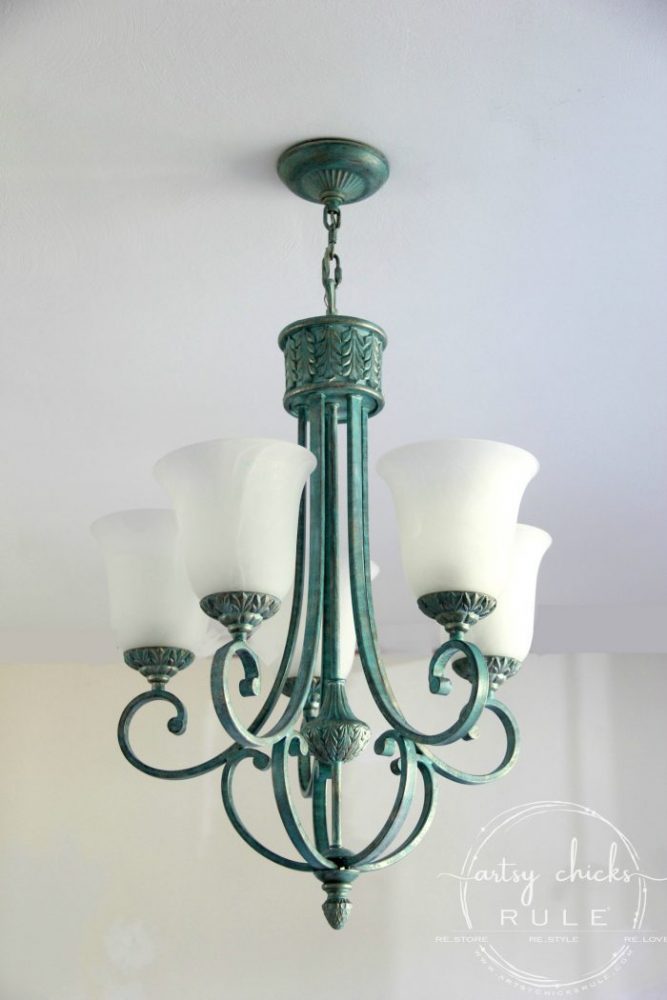
So much fun and truly so easy to do.
I’ve created a video on how to create faux verdigris finish because I thought it’d be easier to show you how than tell you how. ;)
But I’ll also give step by step instructions here too.
How to Create Faux Verdigris Finish:
- If the item you are giving the faux verdigris finish to is not already a bronze or copper color, you may want to give it a quick spray of Oil Rubbed Bronze or Copper Spray paint. If it happens to be a light fixture like mine that you don’t want to remove from the wall, you can use something like this product to brush on. Or any other liquid based metallic paint of your choosing.
- For this technique, I used Baroque Art Gilder’s Paste Wax.
- I create a brush-able product by adding a tiny bit of mineral spirits to the gilder’s paste.
- Using a small artist’s paint brush, brush on this gilder’s paste liberally. However, you don’t want full coverage so keep that in mind as you are applying.
Let some of the bronze show through. - Let this dry.
- Next, using an old t-shirt or rag, buff away a bit of the past wax to let more of the bronze/copper show through.
- Make a mixture of water/white paint, preferably chalk style paint because it has the correct texture finish for this next step.
(see video) - With a bit larger artist’s brush, brush on the very watered down white paint. Let it go into the creases but don’t apply so much that it turns white.
You want it to be almost haze-like. - Using an old rag or t-shirt, wipe some of the white paint away if you’ve gotten too much on there.
- Once that is dry, move on to the next and final step. Apply gold paint.
- For this step, you will use another small artist’s brush just slightly dipped into the gold paint. Wipe most away on a paper towel and then with a very light hand, hit the high points on the piece. You can apply as little or as much of this as you like.
- You are done! You can apply a sealer at this point but it’s really not necessary with these products. A little finish up buffing might be nice.
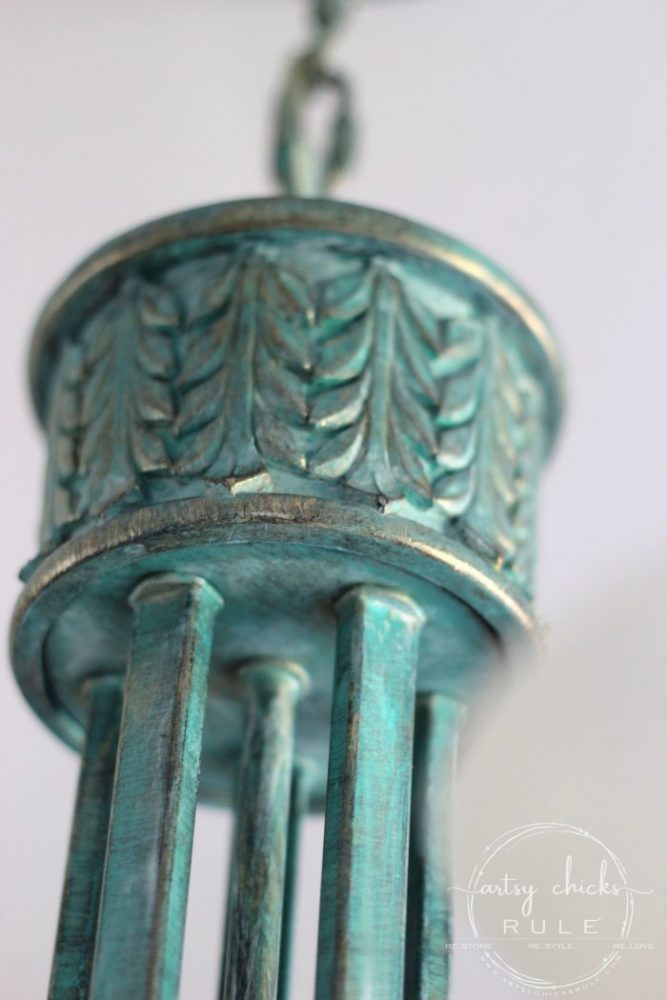
NOTE: Keep in mind, this is just a guideline. You can go darker on the green/blue or lighter. You can use more white paint or less and you can add more gold “highlights” or fewer.
I went a little heavier on the green/blue (gilder’s paste) on my chandelier than I did in the video. It’s a personal choice and will probably vary by piece and by style, so use your judgment and do what you like! :)
Here’s a few photos of the process described above on how to create faux verdigris finish:
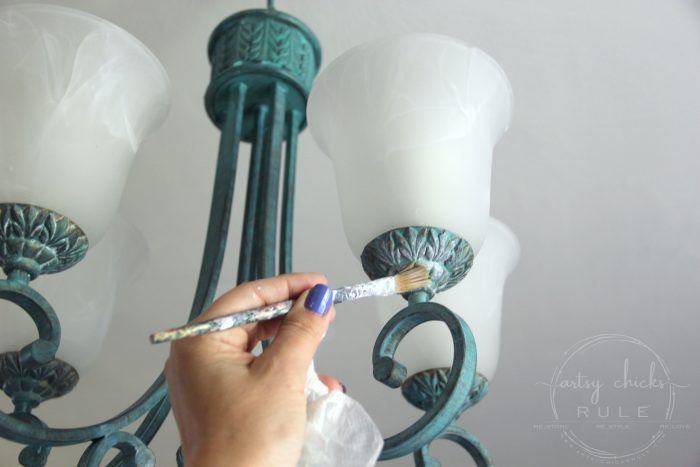
Painting on the gilder’s paste.
Rubbing back some of the paste to reveal more of the bronze.
Adding the watered down white paint….
You can see that hazy white here….
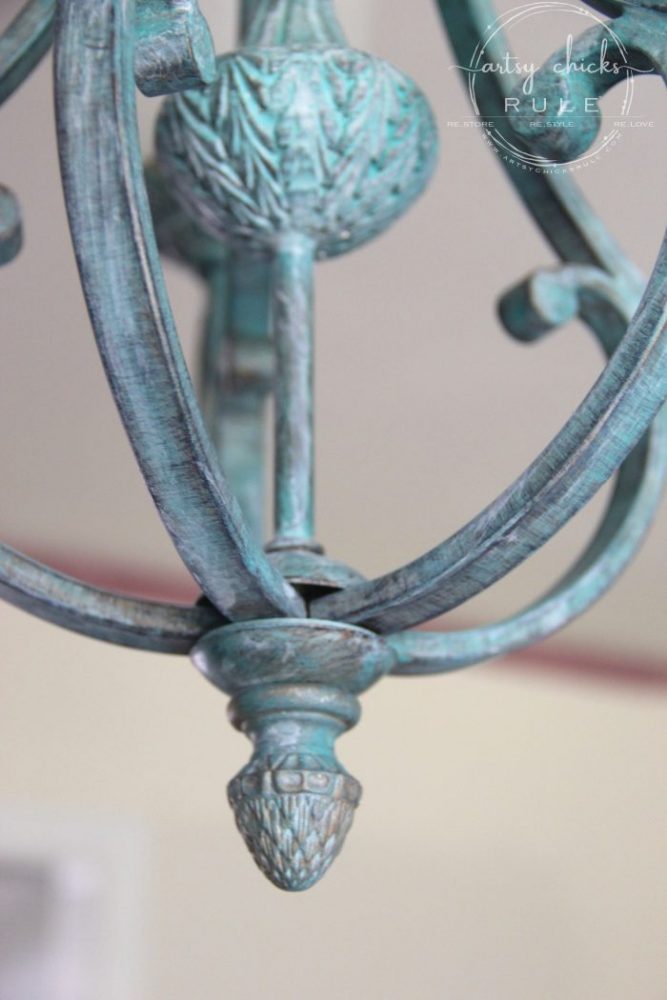
And here…
Finished up with gold….
Okay, onto the video.
Let me first say, I’m SO not a pro at this!! ;) And I don’t love my voice…or hearing my voice, lol. Eeek.
And I’m sure there are ums and awkward pauses and such but hopefully the tutorial will be easy for you to follow and understand regardless. :)
I hope that made sense! :)
If you have any questions at all, please don’t hesitate to ask in the comments below. (or email, if you prefer)
More posts in the “back to basics” series:
- How To Create Faux Verdigris (and video)(you are here!)
- How To Create Faux Patina (and video)
- How To Dry Brush
- 26 Different Types of Chalk Style Paint
- Pros and Cons of Chalk Paint For Furniture
- 5 Top Ways To Seal Chalk Paint
- How To Chalk Paint Furniture & More!
- How To Transfer Images
- How To Import Images Into Silhouette
- How To Restain Wood Without Stripping
- How To Use Gel Stain
Happy painting, making and creating!
xo

")


")
")


Wow, wonderful tutorial and makeover Nancy! The video is perfect and really shows how much work it was to do this to a hanging chandelier. Amazing!
Hey Christina! Thank you so much! :) It really wasn’t so bad at all, I did it in an afternoon. A step ladder is definitely your friend though!! lol ;) xoxo
Gorgeous technique! I’m drawn to anything turquoise anyway, and this is beautiful. I think I see a brass ceiling-fan makeover in my future. Thanks for the detailed video/photos.
Thanks so much Dyan! You and me both on the turquoise! :) And yay, that will be beautiful!! xo
Stunning results!! And I love your video!! ?
Thanks Christy!! :)
Oh I love this, Nancy! Thank you so much for the tutorial because it’s very timely. A few years ago we gave our daughter a brassy metal floor lamp and she doesn’t like the finish and it’s sitting in her basement not being used. I know she’d love this faux verdigris and I’m feeling hope for that very expensive light fixture again! Pinned to share with her and refer back to.
Thanks Marie! Sounds like the perfect plan for it!!
Great job on the tutorial AND video, Nancy! I actually think your voice is quite pleasant to listen to on the video. And it all made perfect sense. The depth of color you get on this is quite impressive! Lovely!
Thanks Julie! :) And aw, that is so sweet!! I’m not sure I believe you but I’m so glad you said it!! lol ;) xoxo
Well, just FYI, one thing I won’t do is give a compliment if it’s undeserved. :-) Sometimes I have to think very hard to give encouragement (which may make me a lousy blogger!), but this was not hard to ‘give’. :-)
Aw, I know Julie!! I was just being funny (and self conscious!!haha)! ;) Now my turn, it surely does not appear, from all of my interactions with you, that you have a hard time giving encouragement! Quite the opposite actually! I find you to be a very encouraging blogger/friend! xoxo
Awwww… Go on! Really… please go on! ;-)
I love the color! Great video, very detailed and easy to follow. My one question would be, do you use a top coat of any kind to seal this? How do you clean it?
No, the product I used is like a wax and doesn’t require sealing. Glad the video was helpful to you!! xoxo
Your explanation and skill in doing this technique is impressive! The finished products look great!
I’m going to do some metal hose guides which will stay outdoors. Would you recommend using a sealer in this case.? I’m thinking I might skip the wax to do this.
Your thoughts?
Thanks so very much, Marilyn! You don’t have to use a sealer with this wax product inside or outside. But I did do a light wash of white paint. You could use a light wash of exterior white instead and should be fine with that.
You can add a poly exterior topcoat if you want extra protection but I think since it’s this type of “wax” and exterior paint it should be fine. You mentioned skipping the wax, the gilder’s paste wax here is part of what gives it the effect of verdigris. Did you mean another type of wax on top as a sealer? If so, I wouldn’t suggest doing that. :) Hope this helps!
I don’t have mineral spirts what can be substituted
You don’t need to use that unless your wax is very hardened.
I love this process…looks so easy! I have a baker’s rack I’d like to finish like this but it completely smooth. No nooks and crannies to hold the colors. It is a smooth black. Will this process turn out well on it?
So easy! You would probably get something similar to the straight parts of my light fixture. Which I think looks good! I say go for it. If you don’t love it, you can always paint over it! (I would probably spray paint over the black with a bronze or dark gold color first) Have fun! :)
Okay, I will! Thanks so much!