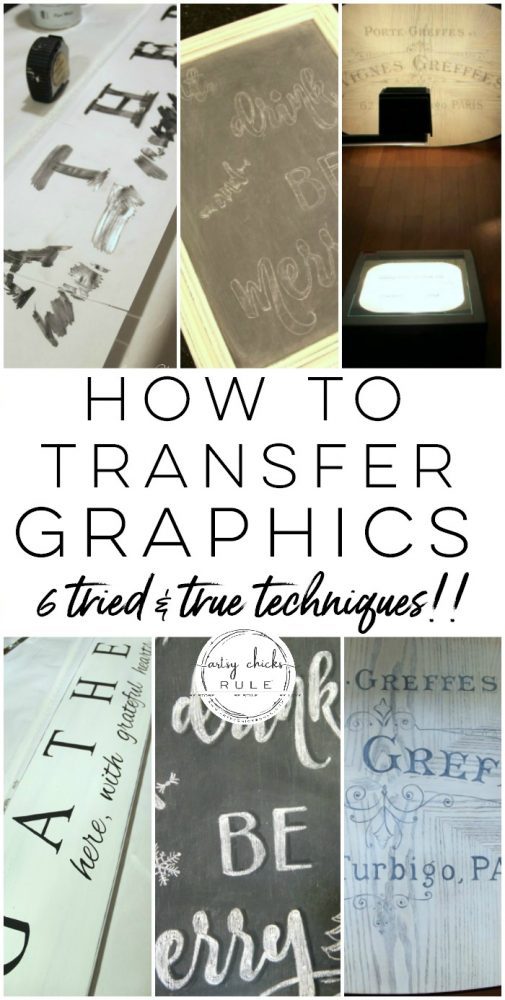
How To Transfer Graphics (transfer methods for signs, furniture & crafts)
Hello Friends! Today I’m going to share “How To Transfer Graphics & Images” all in one post.
It’s something I do quite a lot on this blog but it’s a bit spread around, here and there, in the posts.
When creating something new, I will usually link to another post that gives the basic tutorial on a particular transfer method but that really isn’t ideal.
The ideal would be, being able to link to an entire post, that included every single type of transfer method I use here on the blog.
All in one place.
So, welcome to that post. :)
This “how to transfer graphics” post is part of a “back to basics” series that I’ve begun. All parts to this series are linked at the bottom of the page.
Hope you will find them helpful!!
How To Transfer Graphics & Images:
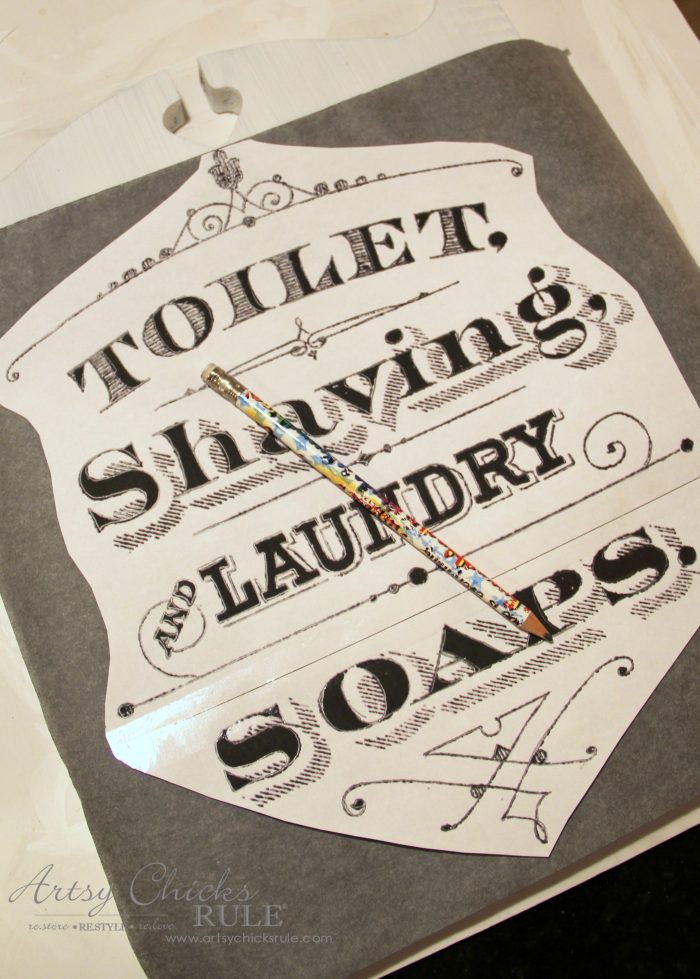
- Reverse Inkjet Transfer Method
For this one, you only need an inkjet printer. It’s about as simple as it gets.
Simply print out your desired graphic in reverse, then align it onto your project, tape in place and (with firm pressure) trace over the entire printed graphic area.
I’ll include a few affiliate links of all the items I’ll be talking about in the post, down below. See disclosure here.
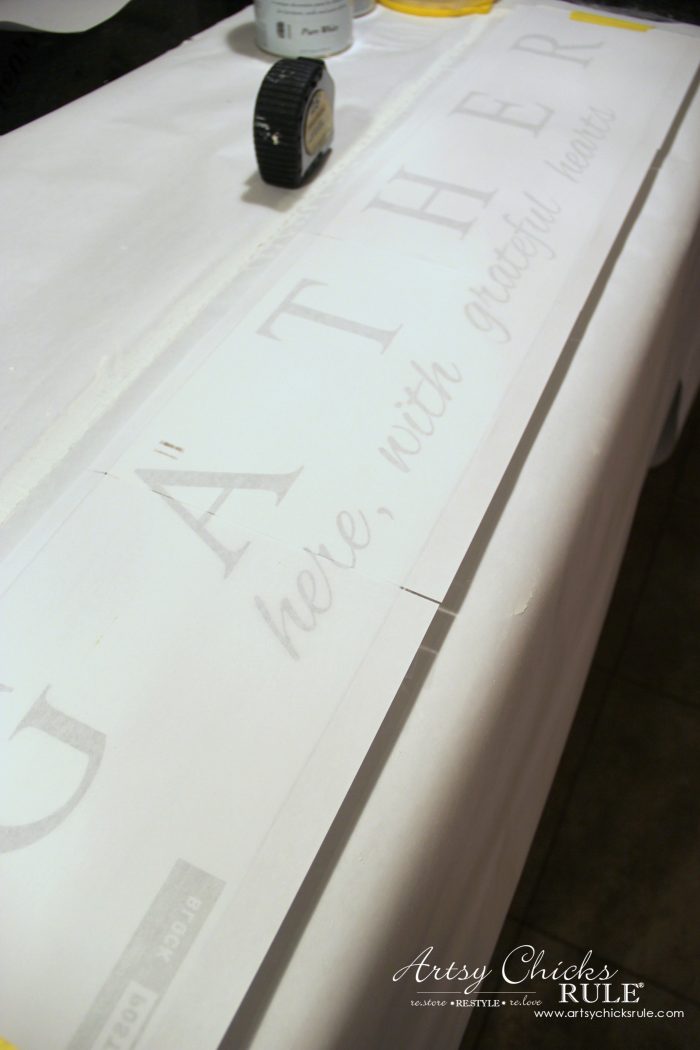
A tape measure is your friend here! Trust me on that one. ;)
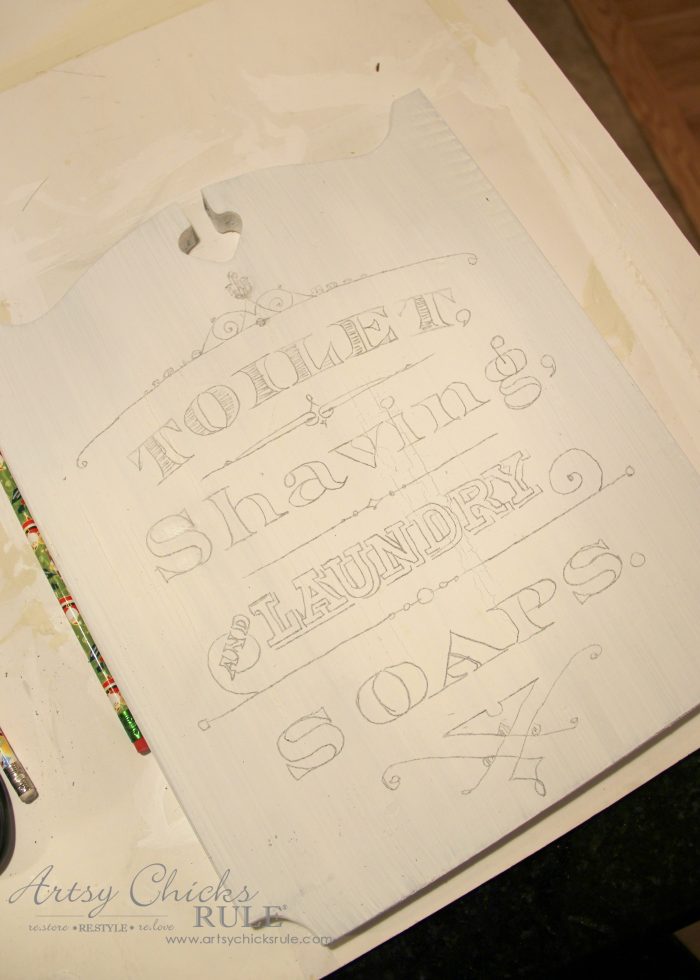
Once you remove the paper, the ink from the printed paper will be transferred to your project.
***You can even do this days later, the ink doesn’t have to be “wet”.

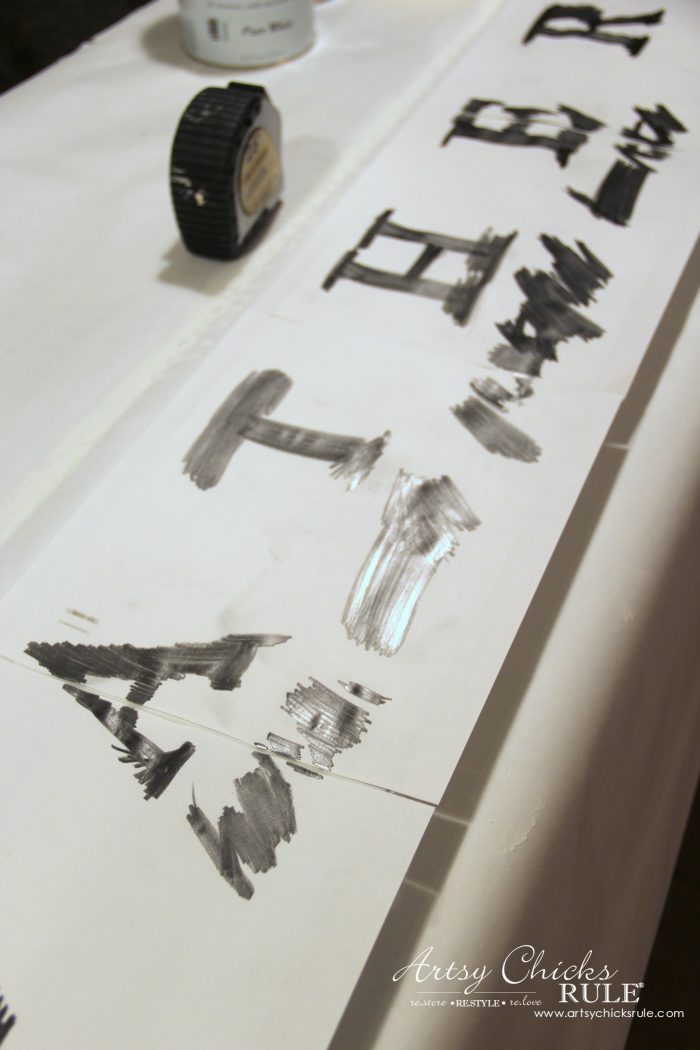
All that’s left to do it paint it in.
Script liner brushes are my very favorite for painting in lettering and graphics.
I find that it gives me the most control plus it enables me to create those thin, fine lines when needed.
REVERSE YOUR IMAGE DIRECTIONS:
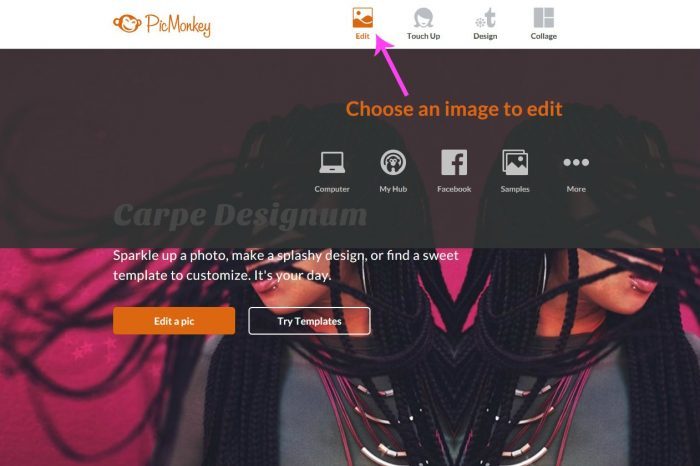
I know there are several programs that will reverse an image for you but I do it in Picmonkey.
Go to Picmonkey, click EDIT to upload your graphic…
Once it’s in the window, as below, click ROTATE….
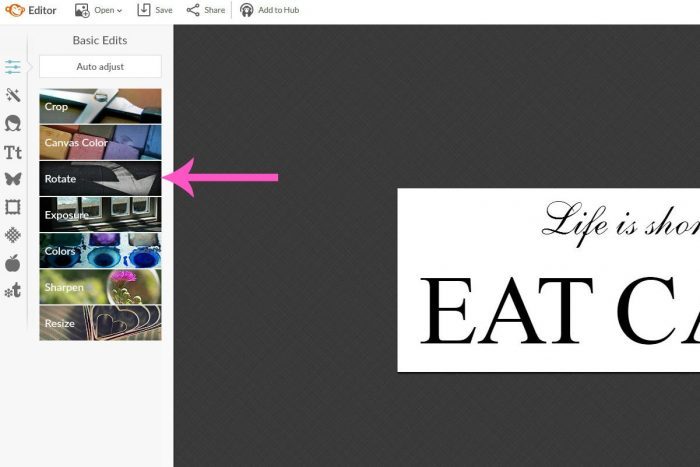
…then click the arrow button I have notated….and then APPLY.
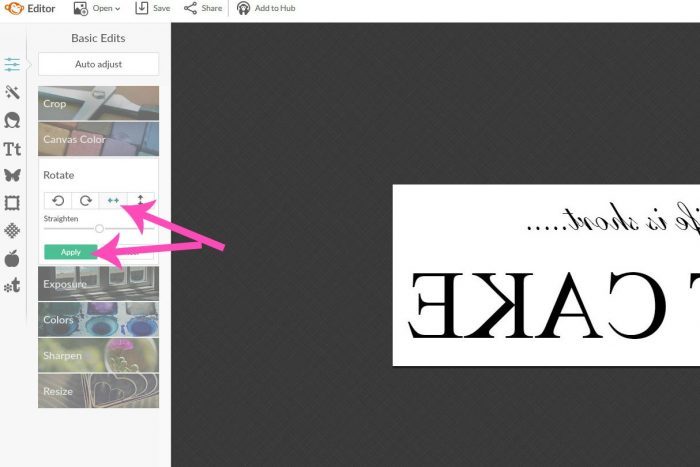
That’s it!
Click SAVE and you are done. :)
Here are a few projects I’ve done with this method:
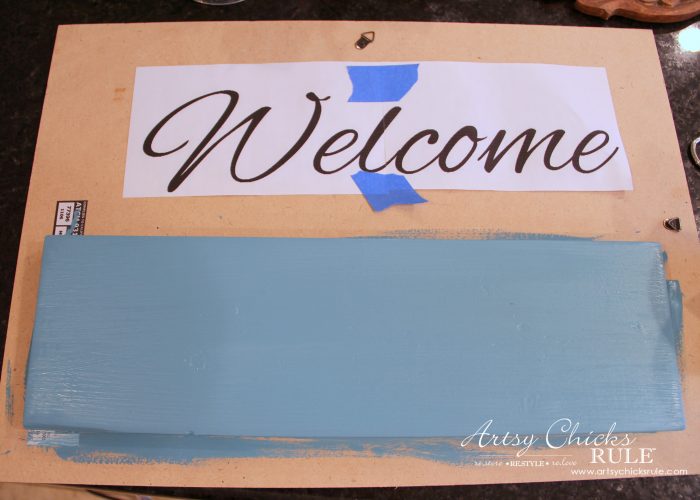
- Pencil Shading Transfer Method
This is pretty similar to the above method.
Print out your graphic the right way (not in reverse). Then shade the backside of the paper where the letters/graphic are with a pencil.
Do it rather firmly so there will be enough pencil lead to transfer.
You can use a regular pencil for most projects that you will be painting in black.
I’ll talk about transferring images onto colored or dark backgrounds that you want to paint in white, further below.
Trace the letters so that the pencil lead you shaded in will transfer onto your project….
Then hand paint in.
Here are a few projects I’ve done with this method:
- “Beach Box“
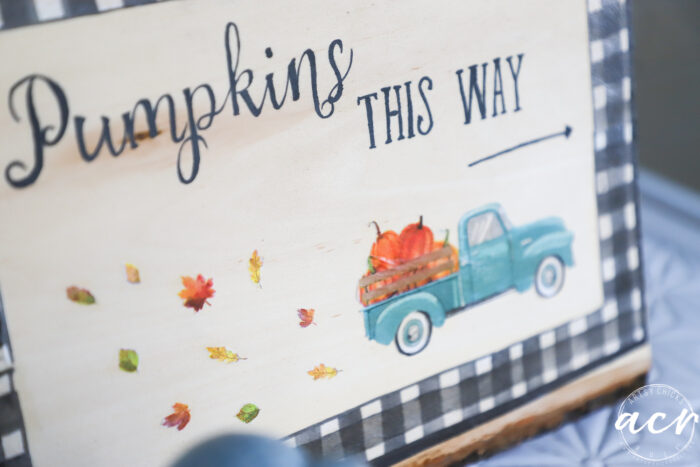
- “Welcome Sign“
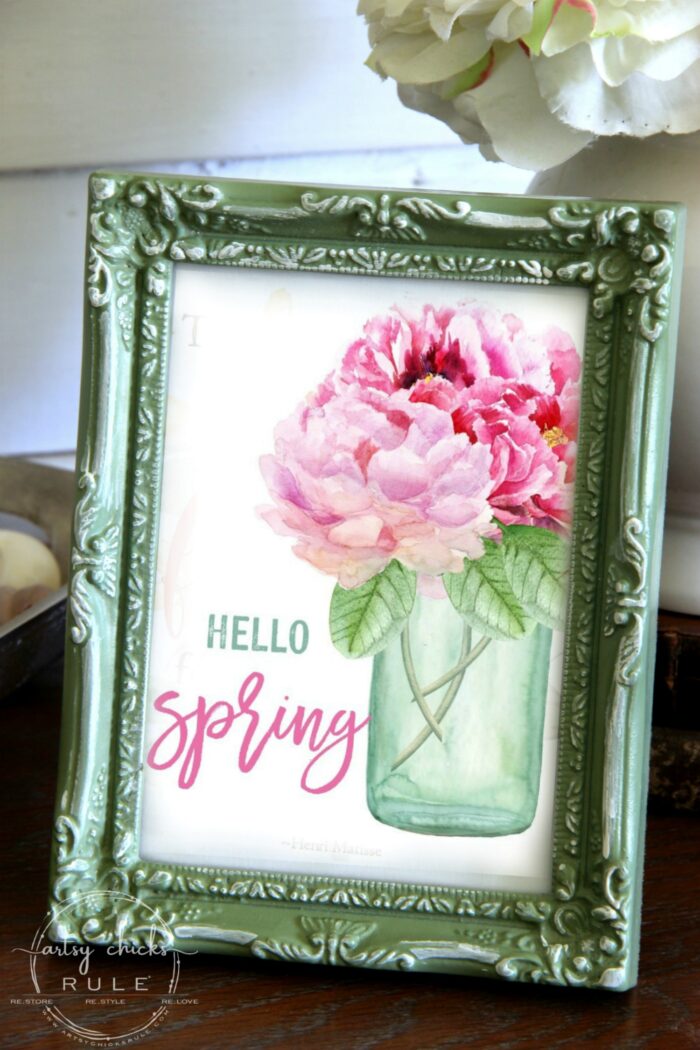
- “Spring Sign“
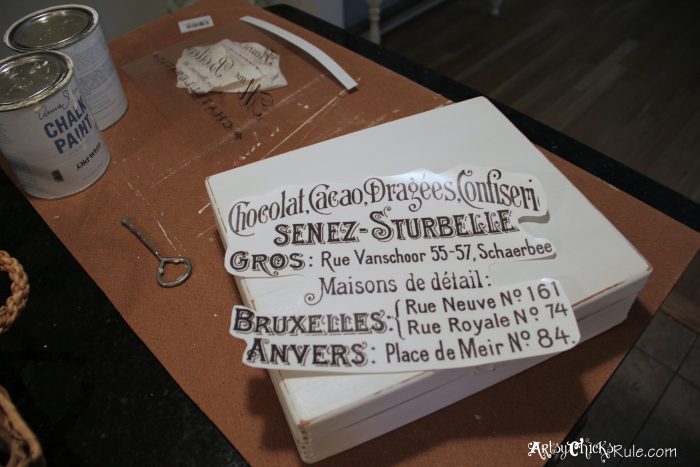
- Carbon Paper Transfer Method
This is really simple too. Print out your graphic, place a piece of carbon paper in between it and the project.
Tape into place, and trace.
So simple!
I really love this one and should use this technique more often.
Here’s the brand I use >>> Graphite Transfer Paper (it also comes in white for those dark colored projects!)
Now all that’s left to do is paint in the letters.
You can see this project I did with this method:
- Waterslide Decal Paper Transfer Method
This is not actually painting in any of the graphic but it is still technically a “transfer” method, so I included it.
You have to buy the specialty paper, print out your graphic on it and then apply to your project per the directions.
It’s not my favorite method and why I’ve only used it once, but you may love it!
You can find waterslide paper >>> HERE
You can see this project I did with this method:
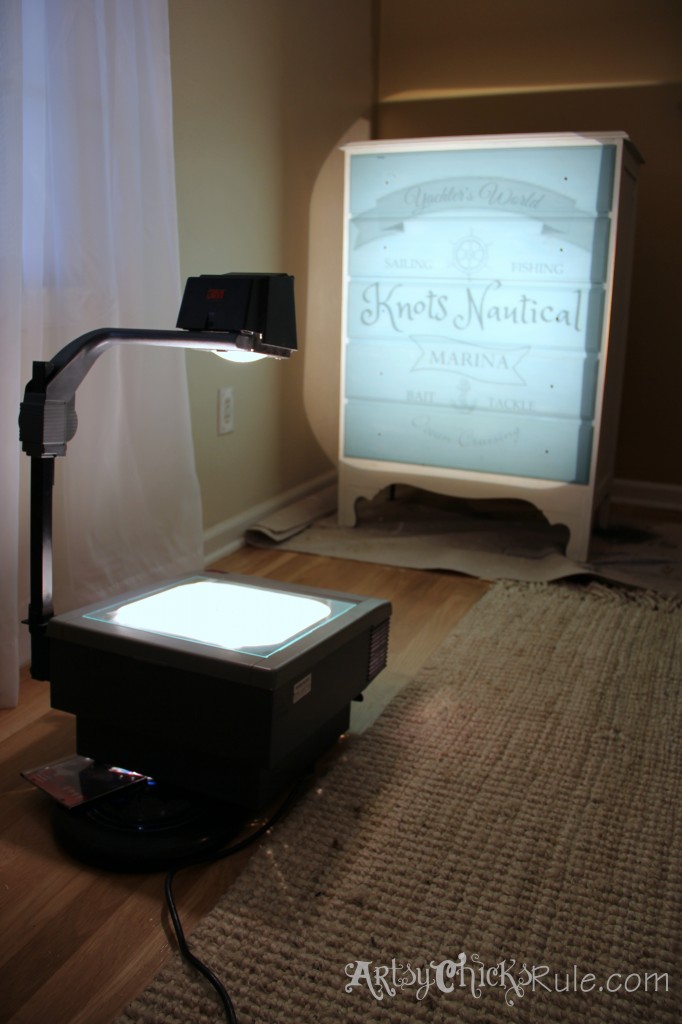
- Projector Transfer Method
This is one of my favorite methods for large pieces, like furniture.
I found my projector on Craigslist for $35 so don’t let that scare you off.
Simply print out your graphic onto clear sheets or save to a thumb drive and take to an office store to print onto transparency paper.
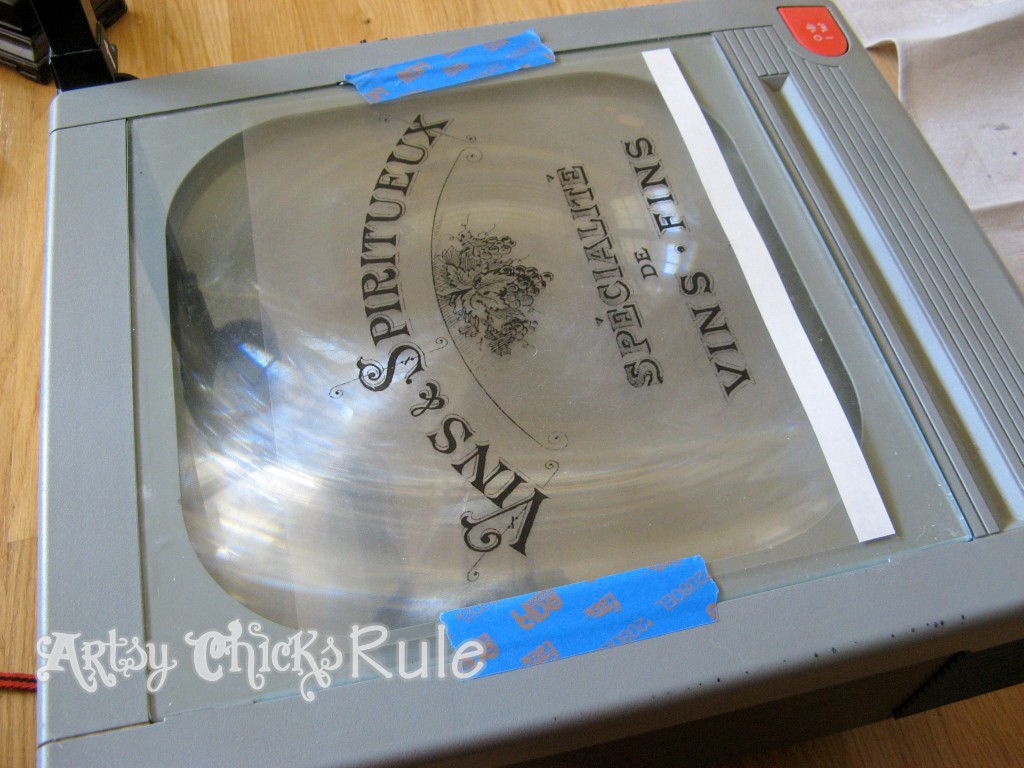
Get your projector set up and move it about until it’s in the desired location on your project piece.
Then simply trace the letters/graphics … (either white watercolor pencil for white paint or a regular pencil for dark or black paint)
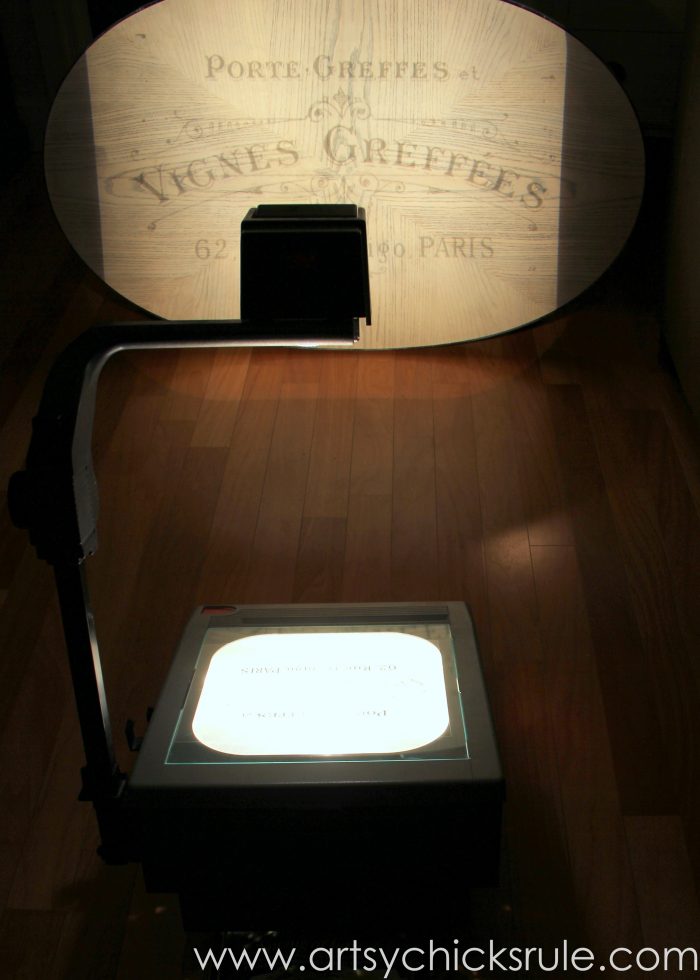
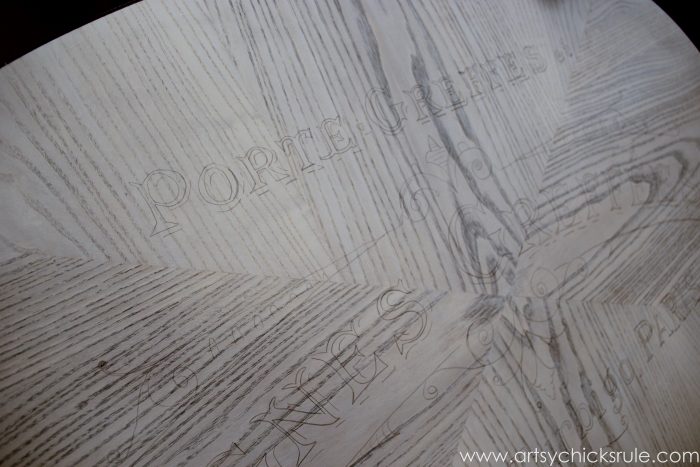
Hand paint it in and done. Perfect for those large pieces.
![]()
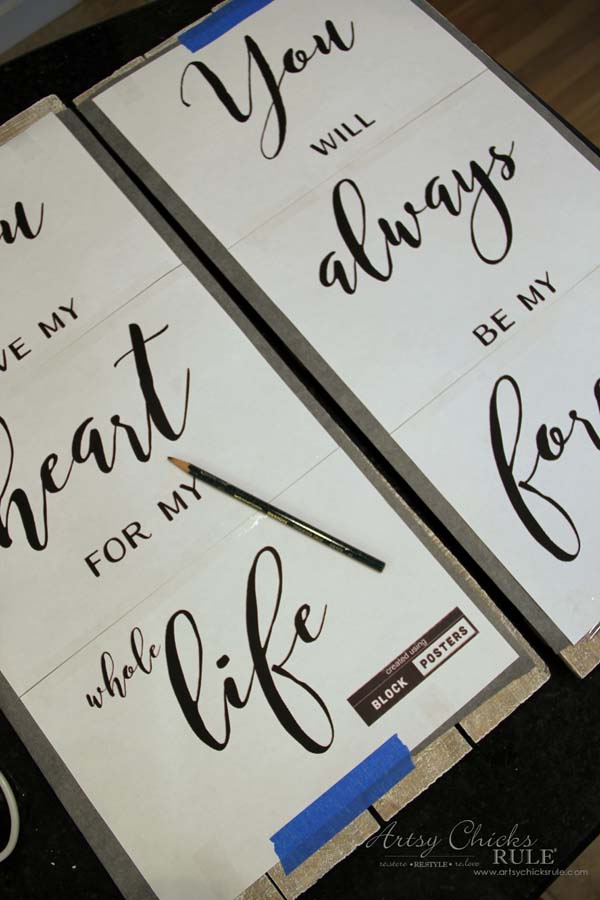
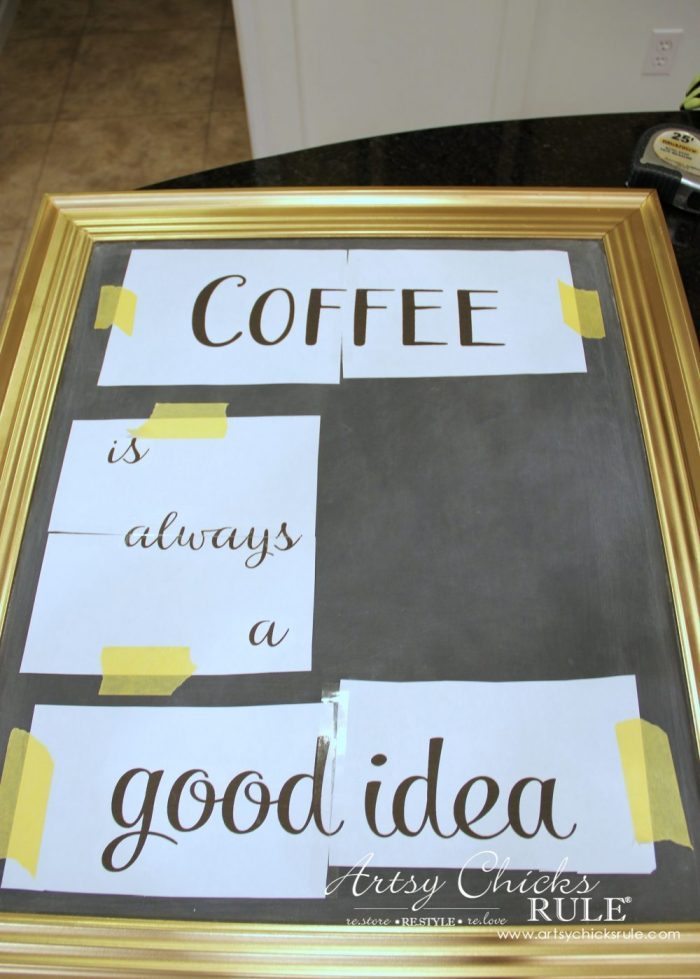
***If you don’t have a projector and don’t want to buy one, you can also use BlockPosters . com for large graphics.
Upload your graphic there and print it out whatever size you need (you can adjust and make it however big you like).
You would then need to attach the pages together but this works very well.
You can see how I did just that on this sign here, “Gather Sign“.
Here are a few projects I’ve done with this method:
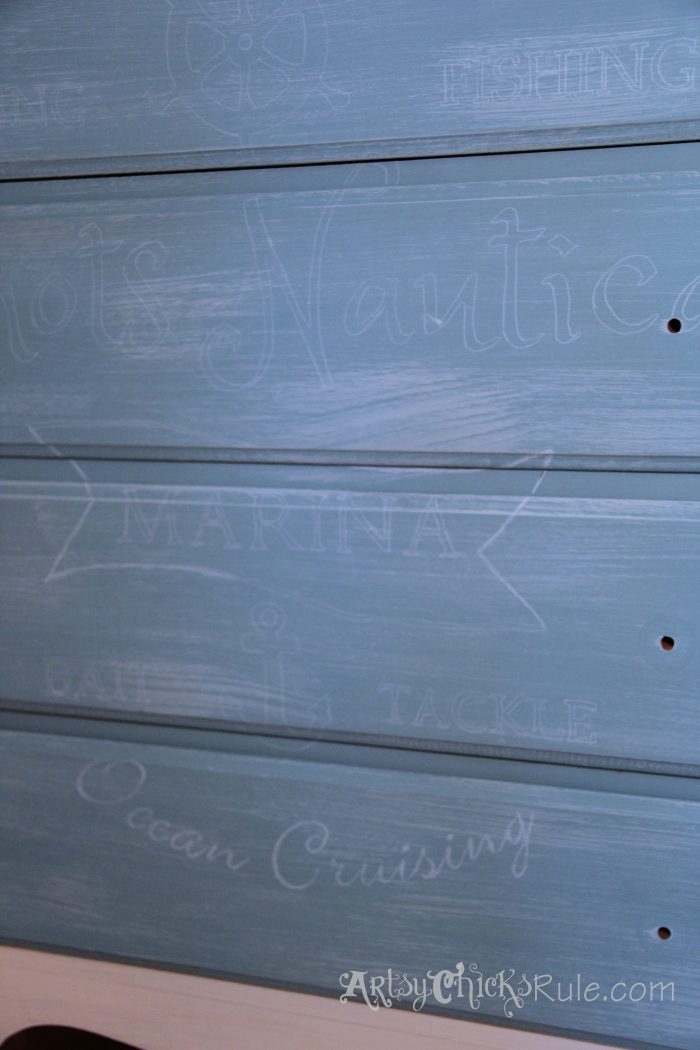
- Chalk Transfer Method
This method is perfect for transferring your images/graphics onto a chalkboard.
It even works well for furniture or signs where you want to use a white paint for the letters/graphics.
Print out your graphic in regular view (not reverse), shade the back heavily with chalk.
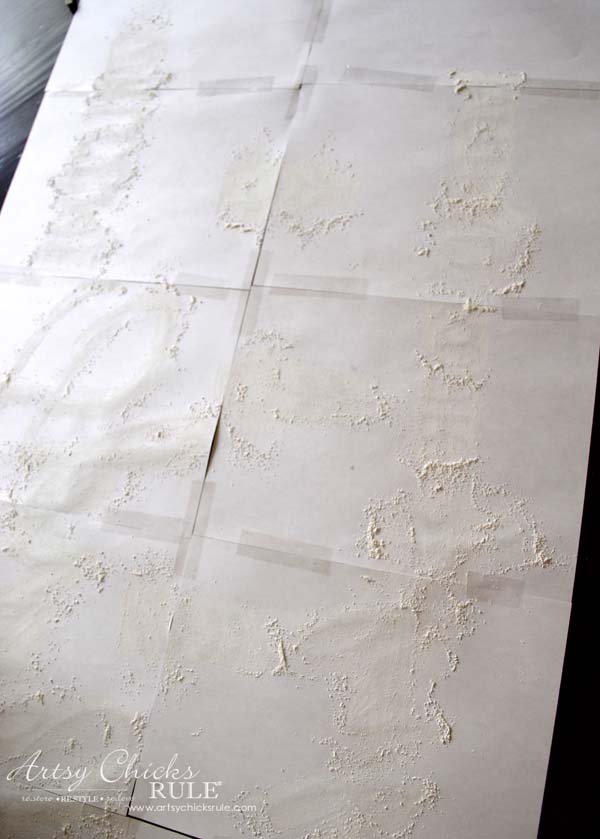
Shake the paper to remove excess chalk and gently attach to your project.
Lightly trace around the letters with a pencil to transfer the chalk onto the chalkboard or furniture.
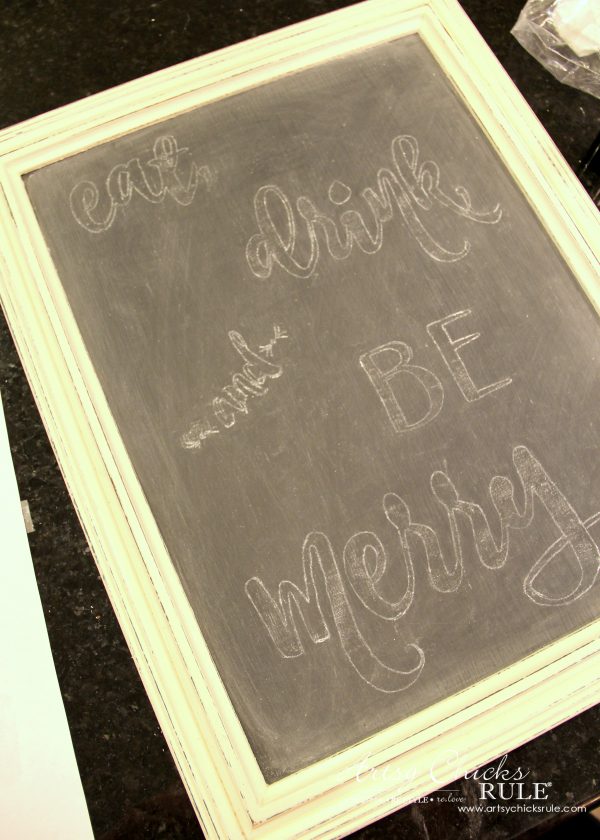
This method works very well.
Here’s a little tip I learned…
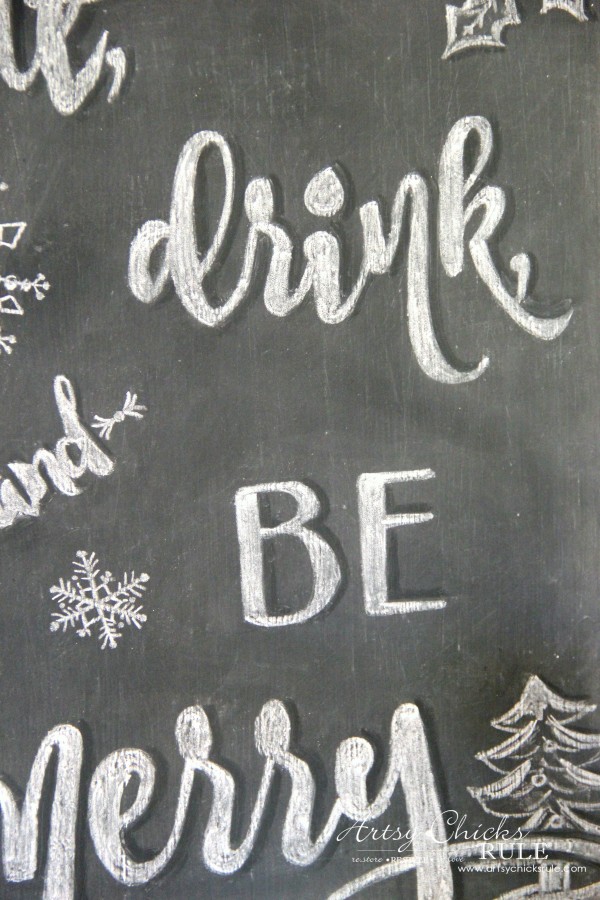
Want those chalkboard letters to pop?
Once you are finished “coloring in” all your letters, take a damp q-tip and carefully wipe the right side edge of each letter. (like shown above)
Anywhere a natural shadow would be. (I’ve got a handy guide further down the page)
I LOVE the look it gives chalkboard art.
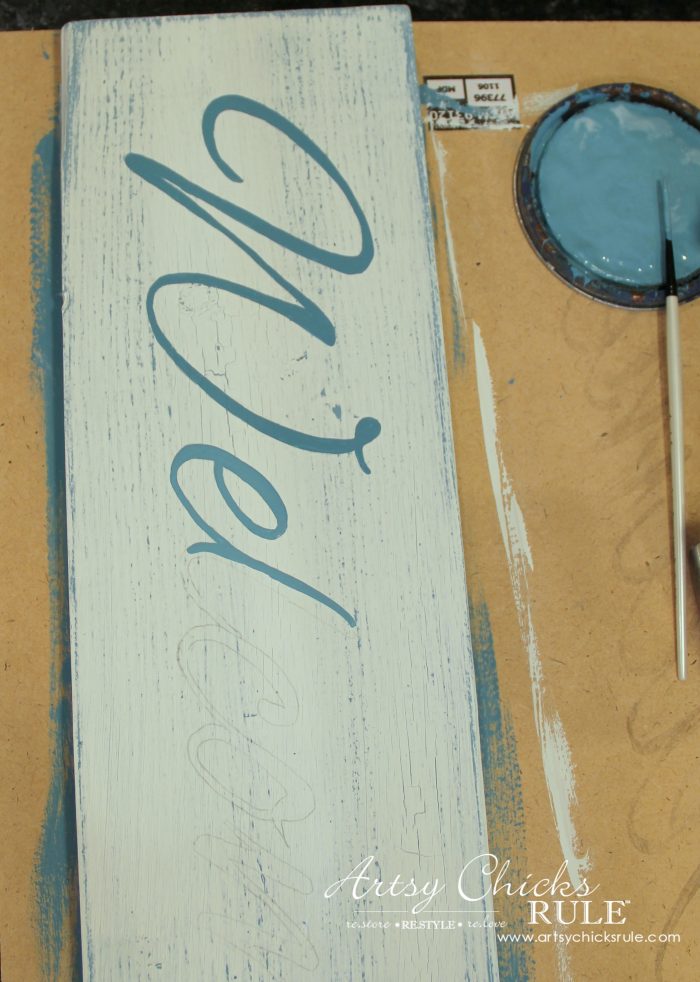
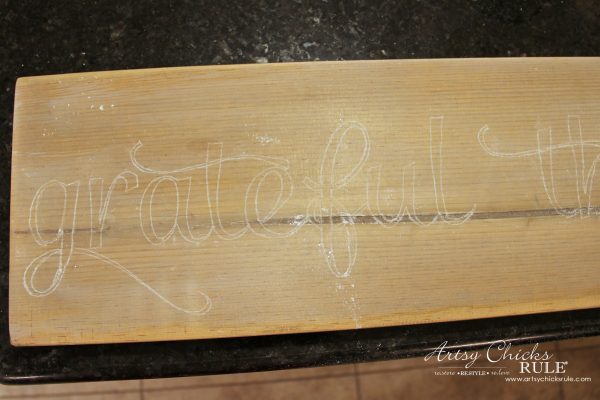
Here is another example of white chalk transfer but on a wood sign, not a chalkboard.
It works well for dark colored furniture pieces too.
Here are a few projects I’ve done with this method:
……………………………………………………………………………………………………………………………………………………
I’ve mentioned that you can use a white water color pencil to draw your image onto your project, like I did here using the Projector Transfer Method….
I then used white paint to hand paint in the lettering.
So you can match whatever color you’re painting in your image with a coordinating water color pencil.
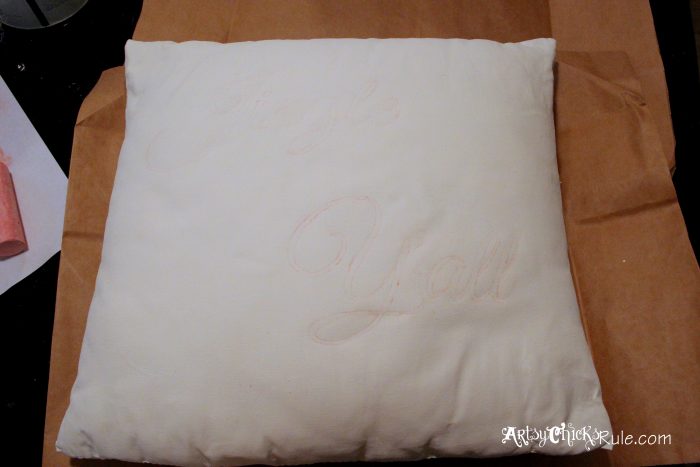
The same goes for the chalk transfer method. You can use different colors of chalk to transfer like I did on this Chalk Painted pillow….
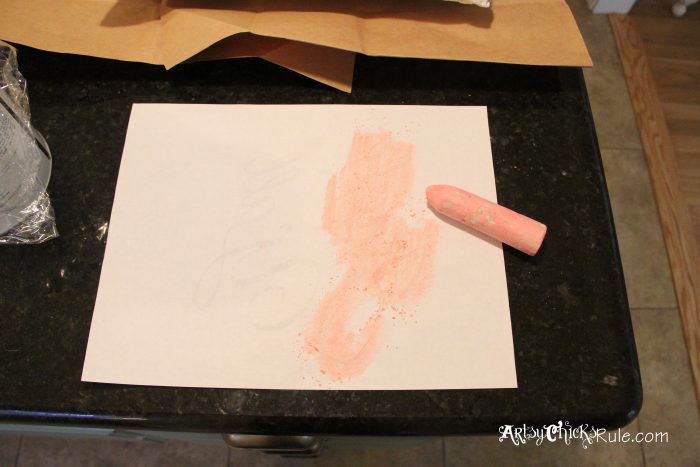
Pink since I was using red for the paint color. (and because white would not have shown up)
On something soft like this, fabric, etc, chalk is your best bet.
Pencil and watercolor pencils wouldn’t transfer well.
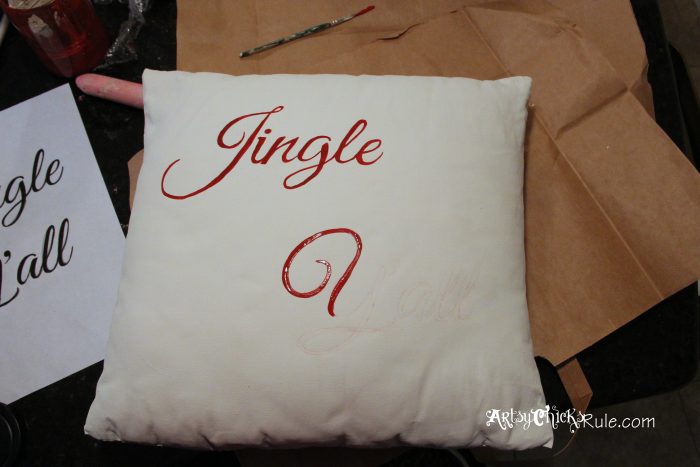
And here’s another thing, you aren’t always limited to hand painting in with a brush.
Not comfortable with a brush? There are other options out there.
You can use things like, chalk pens, paint pens and even permanent markers.
I have several times and it does make the job oh-so-easy!
Here are a couple projects on how to transfer graphics & images with other options besides a brush and paint.
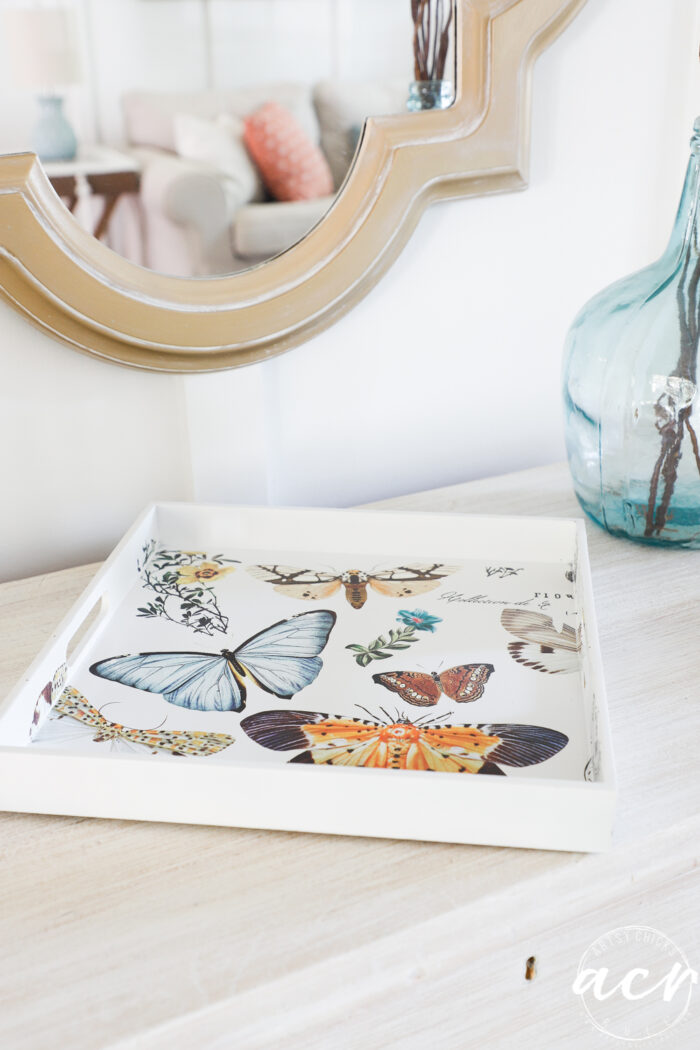
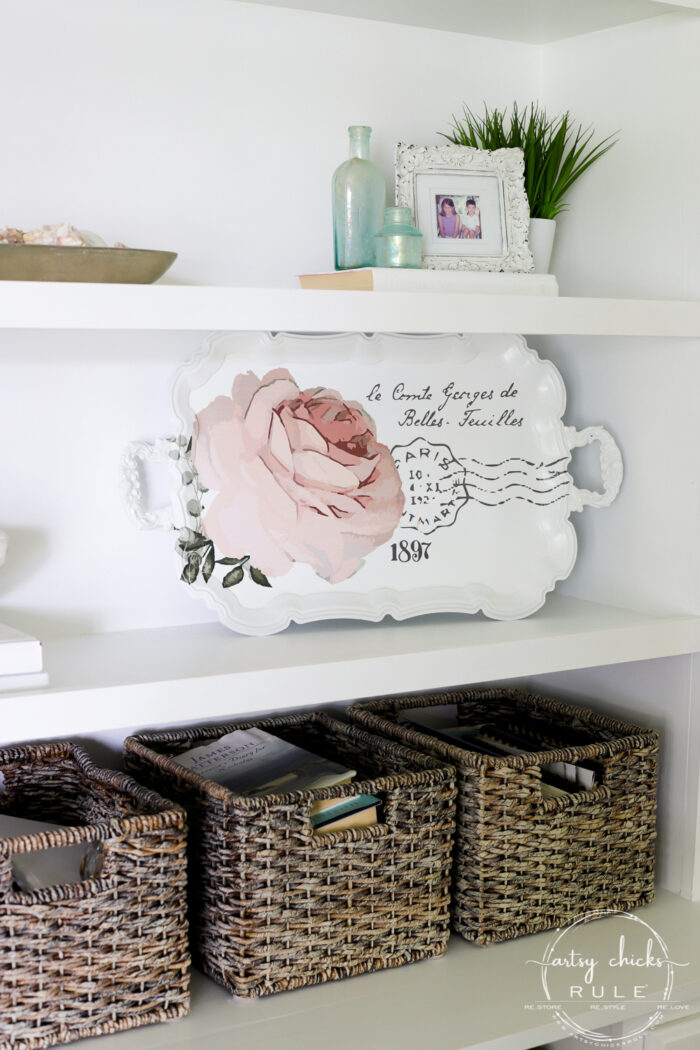
Chalk Pen – “Thrift Store Coastal Tray”
Paint Pen – “Thrift Shop Shakedown”
Here are a few various items needed to do some of the image transfer methods I’ve talked about above:
- waterslide decal paper
- carbon paper
- permanent markers
- colored paint pens and metallic paint pens
- chalk ink pen
- watercolor pencils
- chalk (colored and white)
- projector (mine came from Craigslist, $35)
- script liner paint brush
Here’s a Handy Shadowing Guide I created for you.
You can print it out and use it as a guide to creating those shadows on your chalk art with a q-tip that I mentioned above.
Or even adding a bit of gray/black paint to your newly hand painted letters, like so…

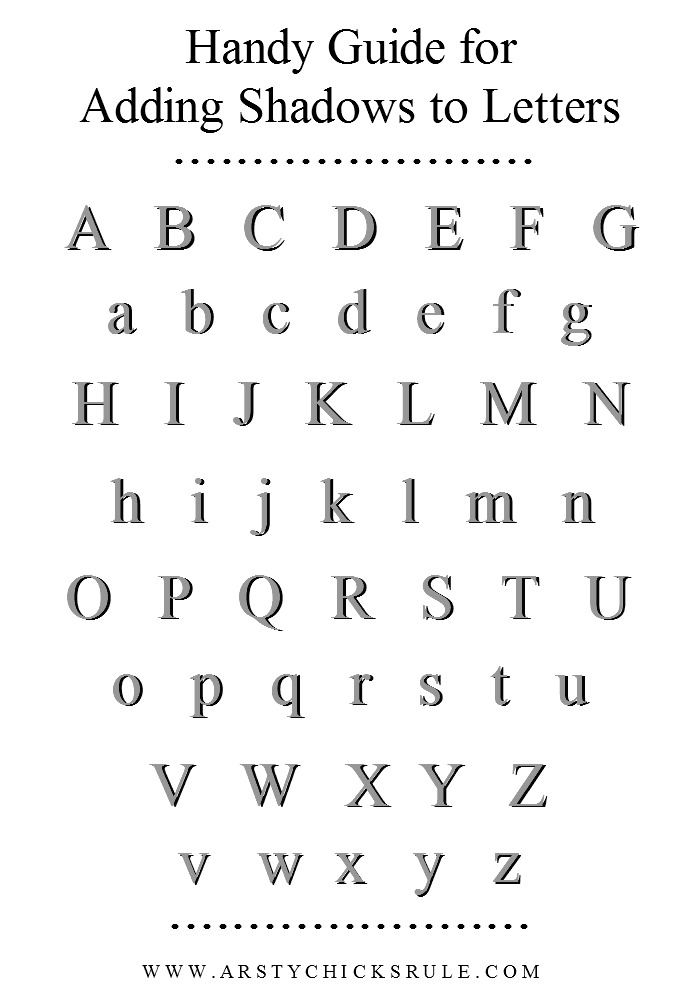
Download it >>> here.
…………………………………………………………………………………………………………………………..
There are other methods, and I’ve used a few of them, but these are my tried & true favorites, by far.
They are also ones that I think are the most simple that anyone can do.
Mostly foolproof and that’s always a good thing! ;)
I hope this “How To Transfer Graphics & Images” post is and will be, helpful to you.
So, are you ready to create your very own treasure?
You really can! It’s so much easier with simple little shortcuts like these.
You don’t have to be a master at calligraphy either. I’m certainly not! (at all! ;) )
Just create something pretty in Picmonkey, or download a free printable, print it out and go!
You’ve got this! :)
Be sure to bookmark this page for future reference and PIN this to save it!
More posts in the “back to basics” series:
- How To Create Faux Verdigris (and video)
- How To Create Faux Patina (and video)
- How To Dry Brush
- 26 Different Types of Chalk Style Paint
- Pros and Cons of Chalk Paint For Furniture
- 5 Top Ways To Seal Chalk Paint
- How To Chalk Paint Furniture & More!
- How To Transfer Images(you are here!)
- How To Import Images Into Silhouette
- How To Restain Wood Without Stripping
- How To Use Gel Stain
Happy Creating!
xo

")


")

Nancy I have done just a few of these methods. They work good. I do have a question when you have time. I want to paint my cushions for my outdoor furniture (this furniture stays on our screened-in porch). How much water do you mix with the paint when you use Anne Sloan chalk paint (or do you mix any). Thanks for any help you can give me. By the way, you and Christy are my favorite. Always look forward to your projects.
Hi Janice, I’m so glad to hear you’ve used a few of these already! :)
As far as the cushions, yep, definitely add water. It’s hard to say how much because each one of those colors has a tad bit different thickness. You want to add enough water so that the paint sinks into the fabric but not too much that it’s so watery and doesn’t impart much color. Hope that makes sense. You can mix in a little, try painting the cushion, and if it seems to “lay on top” of the fabric, add a bit more water. Try doing it that way, adding little water, and continuing when you see it soak in a bit but still give color to the fabric. I would spritz the cushions with water before application, then methodically cover each area with your paint/water mixture.
And thank you for sharing that about Christy and I. So happy you enjoy our posts. I think she is amazing too! :) xo
Thanks for the info on painting my outdoor cushions. Help is appreciated.
Thanks for the awesome post Nancy! I’ve never tried image transfers yet but one day I know I will so this is a good reference :)
You are so welcome Annie!! And oh yes, with the beautiful pieces you do, you should give it a go! :) xo
Very informative post, Nancy and so well written! I chuckled at your handy shadow guide because I thought I was the only one who needed one of these (mine is tacked onto the workshop wall). Pinned
I’m so glad you like it Marie! :) And yes, a shadow guide is a must!! ;) Thanks for the pin!! xo
Nancy, I love reading your posts, you are by far the most informative and so creative. There is always so much information here, it’s awesome. Keep it up please. Us know nots need this info. Thanks again :)
Aw thank you so much Karen! I’m so glad you enjoy my posts! I do hope that I can convey and explain well enough so that others can recreate what I’ve done. Glad to hear it sounds as if I do! :) xoxo
Oh my goodness! How generous of you to share so many wonderful techniques with us! I’ve been following and learning so much from Christy, so watching the 2 of you thrift shop, is a hoot! Thank you and God Bless!
You are so very welcome Kim! It is fun, I’m so glad you enjoy the videos!! We hope to do more regularly in the future! :) xo
WOW! What a helpful post on transferring lettering to different projects! Thank you SOOO much for putting this post together. I am saving it to Pinterest for handy future use. I know it probably took a lot of time to do this, and I am sure there are many others who appreciate you taking the time and effort to put this post out here for us. Best of all things to you!
Aw, I’m so glad this will be helpful to you! Hope you have fun creating projects using these techniques. And the very same to you too, Sue! xoxo
O.M.GEEE,
THANK GOODNESS…Finally…1 PLACE…
To have it alllll basically laid out.. I am older and have looked in various places to learn and gai. Some insight and BY FAR, my girl…
THANK YOU ! THANK YOU! THANK YOU !
Love all you do.
I’m SO glad this is helpful to you! I put this together because I had it all over my blog and it got a little confusing as to the different methods I use. I thought this might be easier to have it all in one place. :) Happy to hear it is! And thank you so much as well! xoxo
Hi? I just discovered your site in tonight and I have been on it for a few hours already. I was wondering if you have ever used the freezer paper method to transfer. Freezer paper is a LOT cheaper than transfer paper!
Hi Barbara! :)
Actually, yes, I sure have! It’s been quite a few years ago but I tried it on a long sofa table and it worked pretty well. It’s not a method I kept on using since I used these other methods more often, so didn’t think to include it here. But it is a lot cheaper, for sure!! xo
Thanks Nancy that was a great tutorial. .clear and precise and I understood the lot. Cleared up all the concerns I had.
Cheers
Kaz 😊
So glad it is helpful to you! :)
I loved this. I am an older person that doesn’t know how to work all the new machines that are out today to do things and can’t afford them. Have always loved crafting but have never felt confident with my end results. Was thrilled when I read this and realized I was on the right path. What I haven’t been able to find yet however is where to find the lettering. In example the fonts different sizes etc. Am loving this so much. Thank you
Hi Diana,
I am so happy to hear this is helpful to you!! I do a lot of my lettering in an online program called PicMonkey. You can find it online! It’s great to create things with. :) xo (plus if you are a subscriber here, you will have access to all of my graphics and printables for free :) ) xo
I am so impressed and excited about your transfers! I was browsing for fun and thinking that i will never use them but then i read the instructions! i think i can! i think i can!
i thought i had to use one ofthose machines. This is a lovely gift for your readers. The transfers are all so nice and i am believe i will give it a go. Thank you, thank you, thank you!
Apologies for the ignorant question in advance… I’m tech savvy, not craft.
So here is the application. I am building various fishing rods and want to put the blank type, line weight, as well as “Hand Crafted By:” on them. Is it really as simple as inkjet printing in reverse on any type of paper and then rubbing it into place? Again apologies, but I would think that it would require a special backing and ink… no?
If it is that simple (or anywhere close), you just saved me hundreds of dollars in getting a special printer.
Thanks in advance, Matt
Hi Matt, it really is that simple. No special ink required, it does indeed leave a very light transfer of regular printer ink on many things. I am not sure how well it will work on something small and round like a fishing rod but you could give it a go! Plus, it will transfer better to some things than others. I would say, print something out and try transferring on something flat to get a feel for it first. :)
What printer do you use for your projects? What particular features should I look for?
I use an Epson 7710 but I don’t think it really matters too much. :)