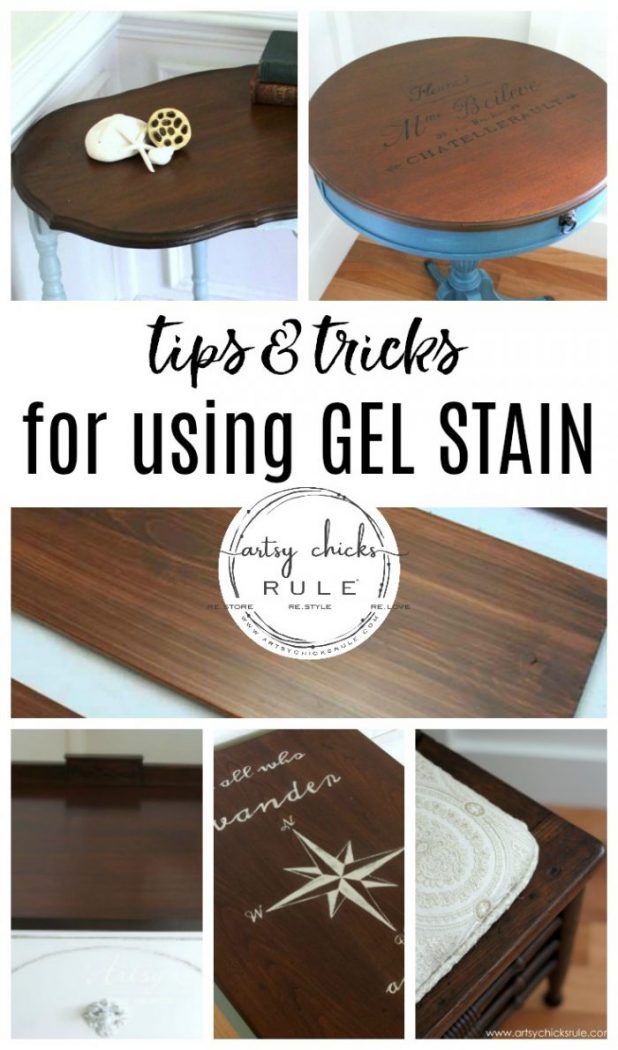
How To Use Gel Stain (and many project examples!)
It’s all about how to use gel stain today and bunches of past projects I’ve used it on!
Hey friends!
I’m continuing on the “back to basics” series that I’ve been working on and today it’s “How To Use Gel Stain“. (I’ve linked them all at the bottom of this post in case you missed any of the series)
But first…..we have a WINNER! If you missed it, I sponsored a giveaway here on the blog for my birthday last week.
Well, the winner is Nancy M. I have emailed her and can’t wait to send the goodies off ….plus 2 little extra surprises! ;)
For all the non-winners, no worries, I plan to do more giveaways this year.
Things I love and use around here so you guys can try them out and I may even give away a few of the things I make and share here on the blog.
As long as they are not too big and I can wrap them up in a box pretty simply! lol
How To Use Gel Stain
Okay, let’s talk about one of my loves in furniture updating.
Gel Stain
A week or so ago I shared another great product for updating old wood. I have used and love that one too.
I have to say, gel stain is probably my favorite, though. However, they really have different uses and purposes, in my opinion.
Or how and when I decide to use them, anyway.
That one is a stain and poly in one type of product, and you can find out all about that method of updating old wood, here. >>> “How To Restain Wood Without Stripping”
So, for the first part of this post, I’ll go over tips of use, best practices, topcoats, and just basically how to use gel stain, etc.
I mainly use this product for refreshing old finishes so most of this “how-to” post will speak to that. You can absolutely use gel stain on raw, unfinished wood too, however. ( I have and shared those projects further down)
Then I’ll share links to 10+ projects I’ve done using gel stain.
What kind of prep is needed for gel stain??
First things first, clean (and dry) the surface you are going to apply gel stain very well before beginning.
Quite honestly, I’ve not had to do very much prep for any piece I’ve done before using it.
However, there are some things to consider and keep in mind.
Shiny, well intact finishes will not play very nicely with gel stain or any stain, for that matter. If you have a very shiny surface, this stain is going to sit right on top and not really do very much good. It doesn’t sink into the wood like traditional stain does, but it does soak in somewhat. (unlike the other stain product I mentioned above, which completely lays on top)
If you have a shiny finish, you will need to lightly sand it with about a 320 or so grit, sandpaper or sanding block.
The best rule of thumb, for almost anything you are “reviving”, is to at least quickly run the sandpaper over the finish before applying the gel stain.
Be sure to wipe down all dust before applying.
If you are applying to natural, unfinished wood, the prep would be the same as any traditional stain application.
In this case, you can either use a wood conditioner beforehand or simply apply the stain. It’s not necessary, however, but I like to use the wood conditioner because it helps things stay more even and if using something like Java Gel Stain, it will keep it from overpowering the piece with color. (unless that very dark shade is what you are after)
It’s always best to test your chosen stain color on the wood you are using, if possible. (test on the backside, inside or underside, if that is available to you)
How do I apply a gel stain?
First, be sure to stir the gel stain well.
You can apply it with a natural bristle brush, foam brush or cotton rag (this last one being my favorite way).
If you are applying it in layers, and not wiping away, you will want to apply it similarly to how you would apply a poly product. (my least favorite way to use gel stains)
With this type of stain, you don’t want to apply too thickly. Apply sparingly.
Be sure to pull the stain away from the edges where it will pool, etc., otherwise, it will look darker in those areas.
The best way to get a feel for this type of stain and application is to practice applying it on a scrap piece of wood before you begin your project.
If you will be applying more than one coat in this manner, be sure to wait 3 days before applying a second, or subsequent coat.
And again, be sure you don’t apply the coats too thickly.
If you are using it to darken, or simply refresh a finish, then use a cotton rag to apply and then wipe away some of the excesses.
Apply liberally, gently wipe away the excess. Be sure you don’t wipe too hard to remove all the stain you just applied. (you don’t want to wipe in the same way you wipe traditional stain)
If you want more color, apply more coats with the same process, waiting about 24 hours in between.
This is my favorite way to use a gel stain.
You can mix the different colors to come up with a color that is a better fit for your project than what is available.
Be sure to let it cure before applying a topcoat.
What kind of top coat can I use with gel stain?
I like to use High Performance Top Coat (water-based) over this stain. However, since one is water-based and the other is oil-based, you must wait at least 3 days to apply the water-based poly. If the stained finish is still tacky, wait another day or so to apply the poly.
You can also use oil-based poly products to seal the finish as well, such as this one and this one.
You can use up to 3 coats of poly, depending on how much use and abuse your piece will get.
Cleanup for oil-based products like this type of stain is mineral spirits.
Why should I use a gel stain?
It is different from traditional stain in many ways. One of which is consistency.
It is pudding-like unlike the liquid consistency of traditional stain and because of that is easier to control.
Which translates to easier to use. That’s always a win in my book.
Since it mostly lies on the surface with less penetration than traditional stain, it’s a little more predictable and produces a more even color.
You don’t have to strip the wood down bare to use it.
You can easily and quickly update old, worn furniture.
Shortens the time of any project where staining wood is required.
………………………………………………………………………………………………………..
Have you used a gel stain before?
I hope this will help you to learn how to use gel stain so you can use it on your projects too!
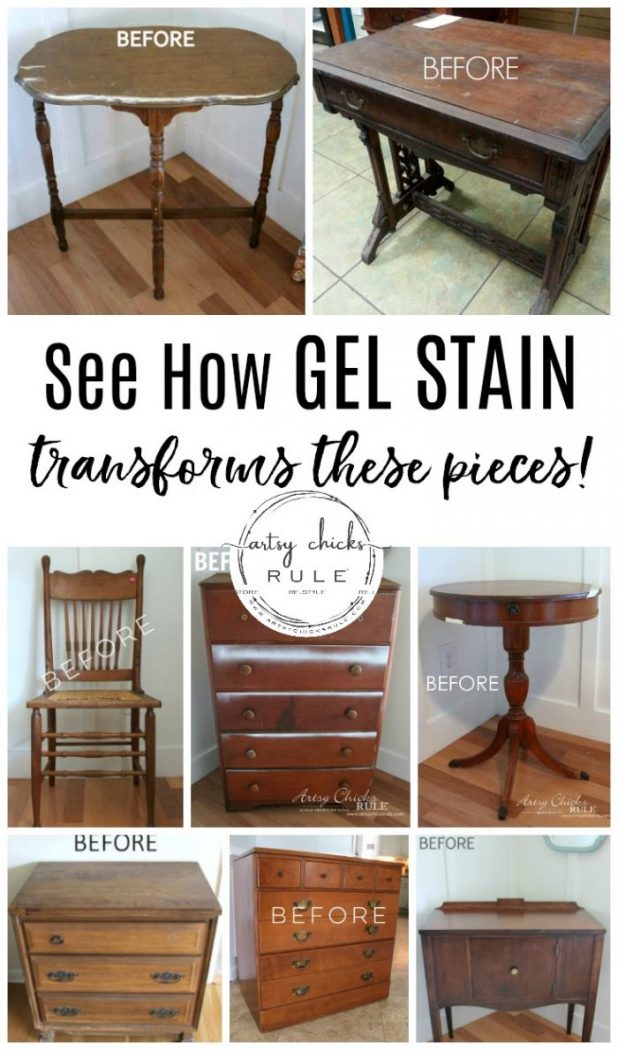
Here are a few of the projects I’ve used gel stain on so you can take a look at each.
How they began and what this product did for them. (and how simply it did so)
Be sure to pop over and catch the “BEFORE” photos on all of these.
You’ll want to see the magic it created on all of these beautiful finishes!
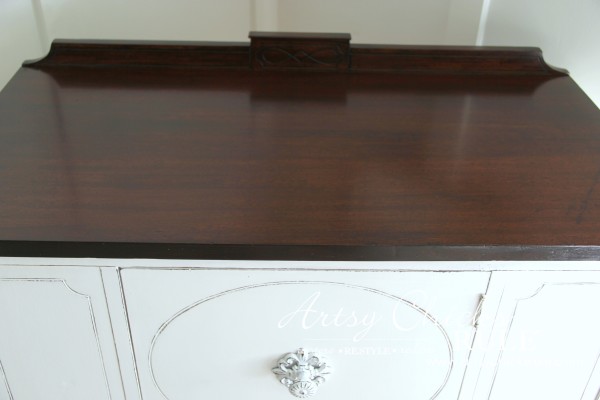
See the before and details, here >>> Antique, Spoon Carved, Writing Desk Makeover
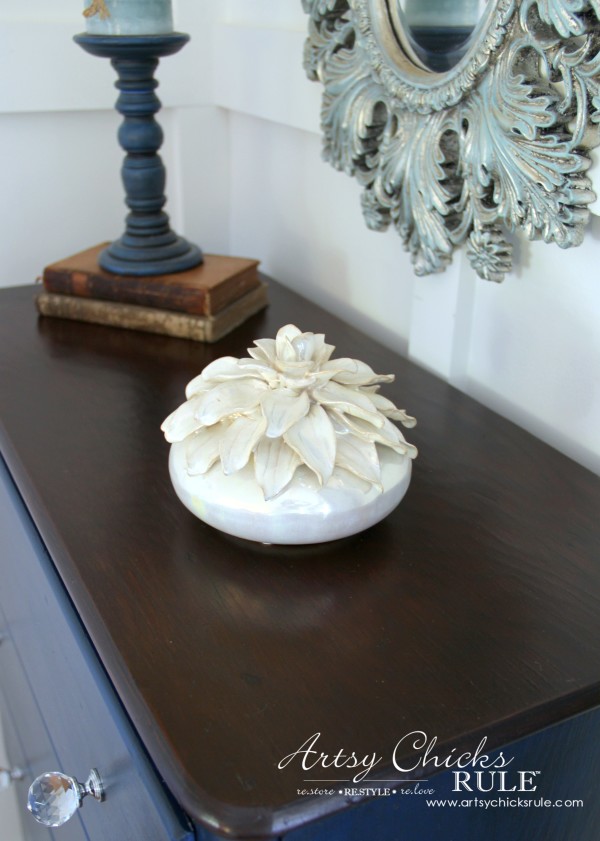
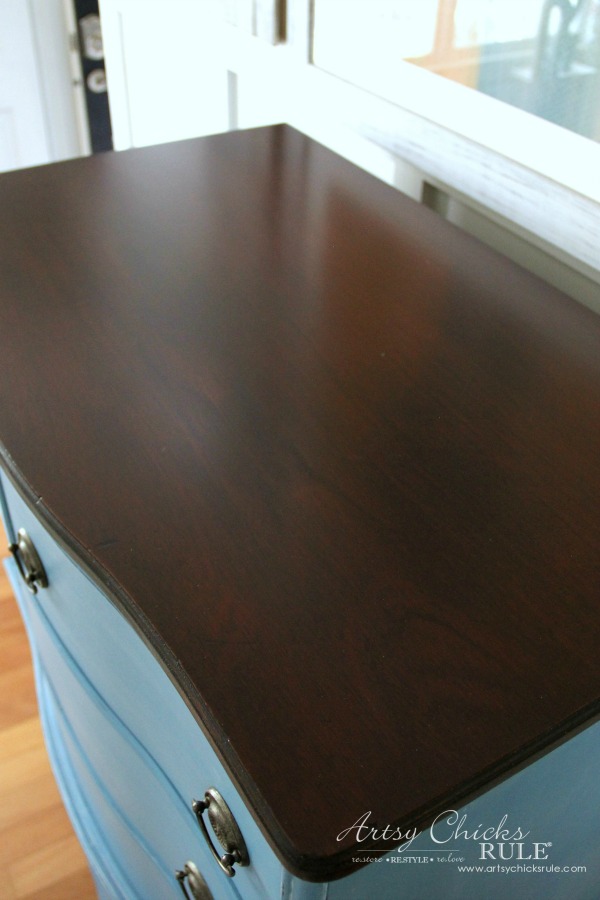
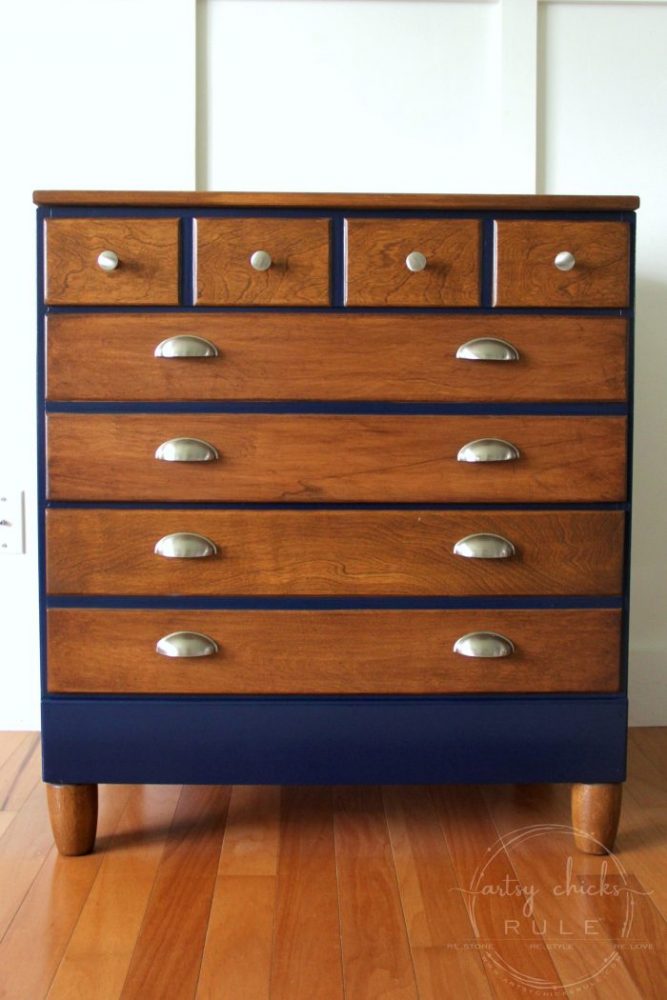
I know we are talking “how to use gel stain” today, but the blue on this chest of drawers was one of my favorites!
See the “before” and all the details, here >>> Blue Chest Makeover
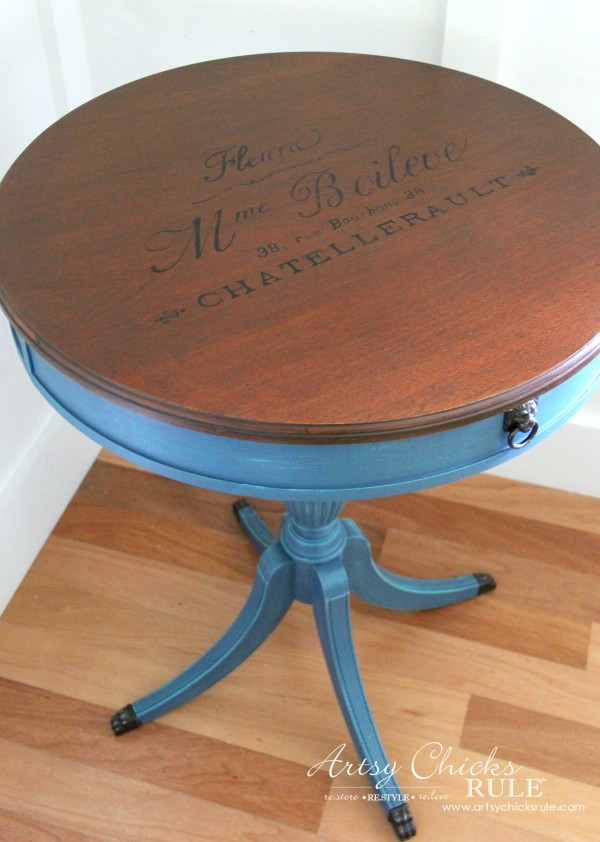
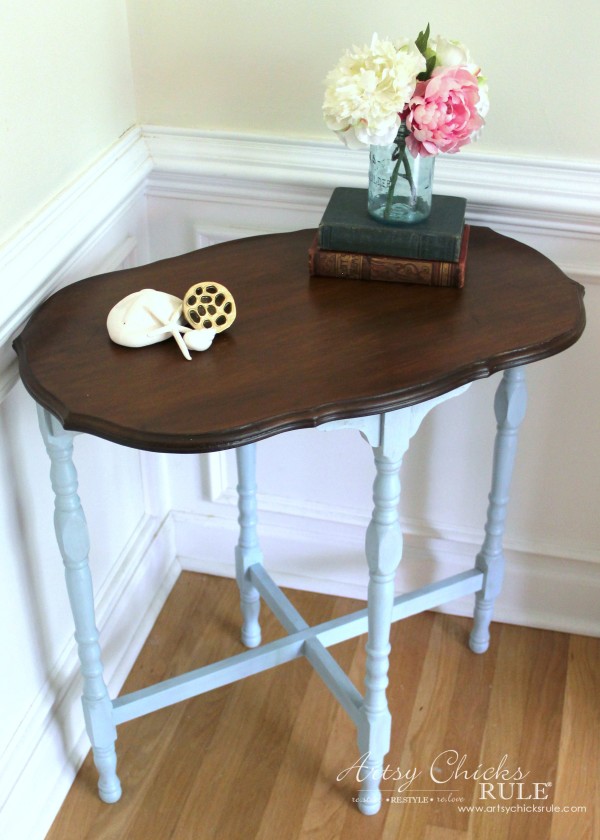
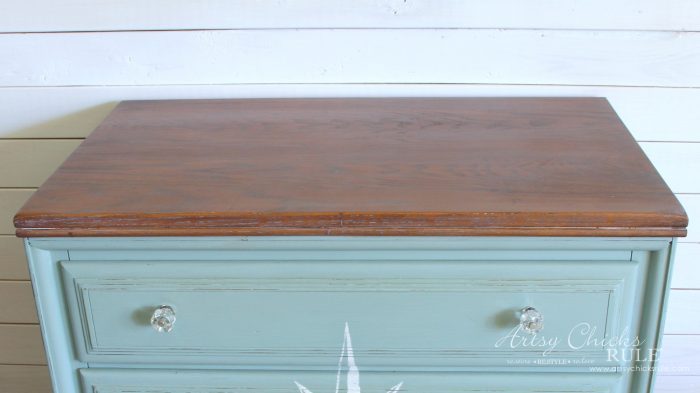
Another blue favorite! And a 2 step dry brushing effect. (with 2 different colors)
See how the top just shines now compared to what it looked like before, here >>> French Round Table Makeover
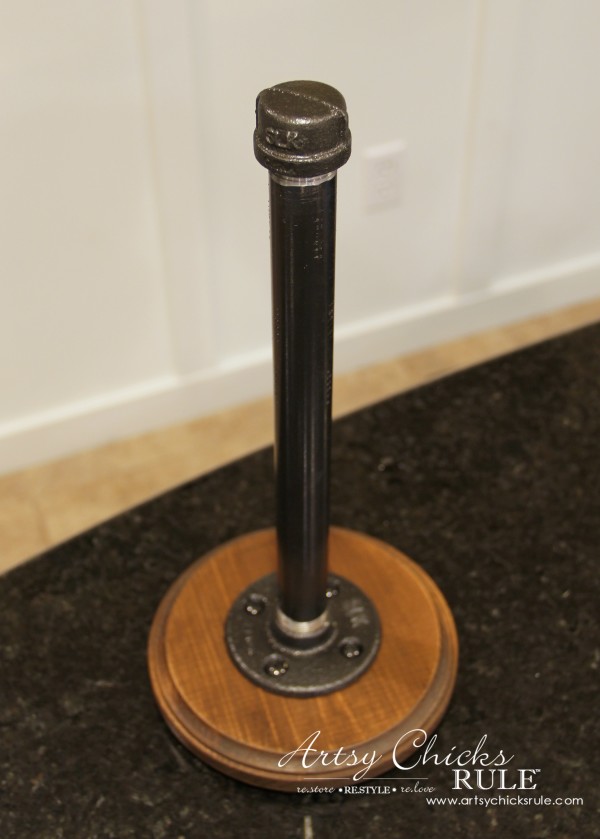
I made this paper towel roll holder out of a pipe and a wood medallion.
Hop on over to see how I used this stain raw wood for this one, here >>> Industrial Style Paper Towel Holder
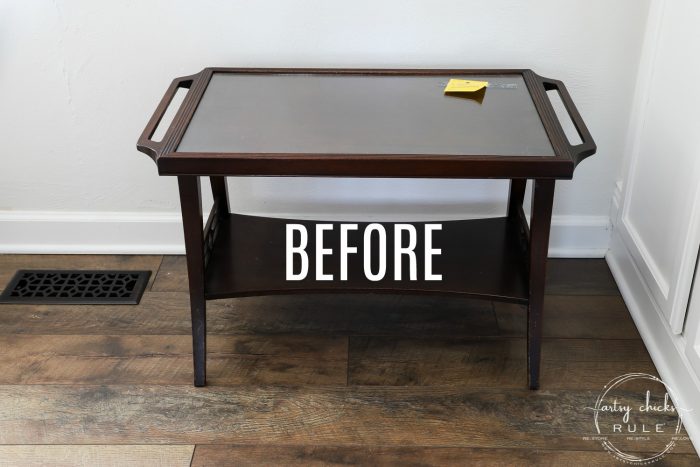
You won’t believe what this one looked like before! Gel stain for the win, for sure.
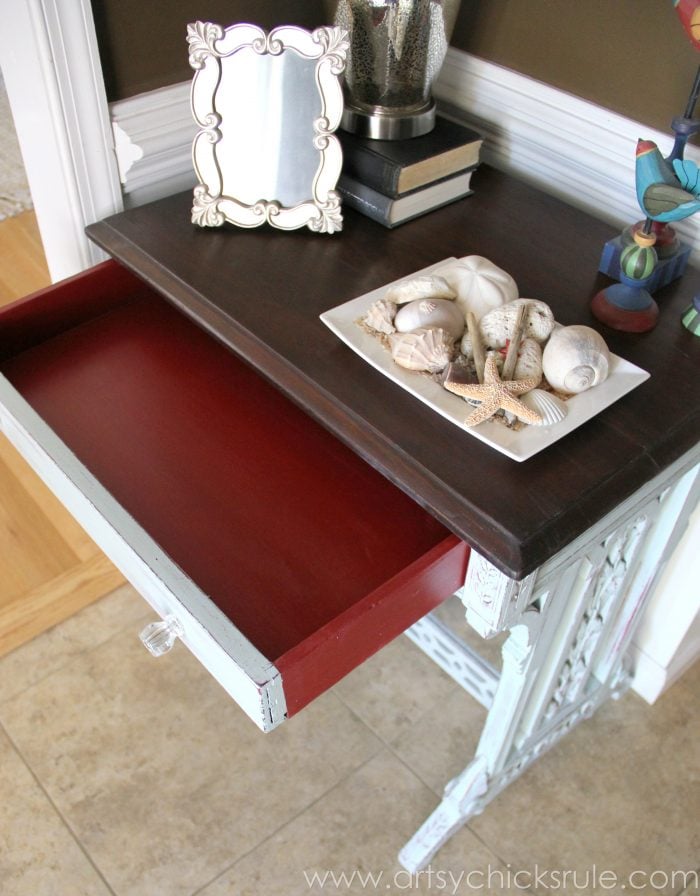
See it “before” here >>> Side Table Makeover
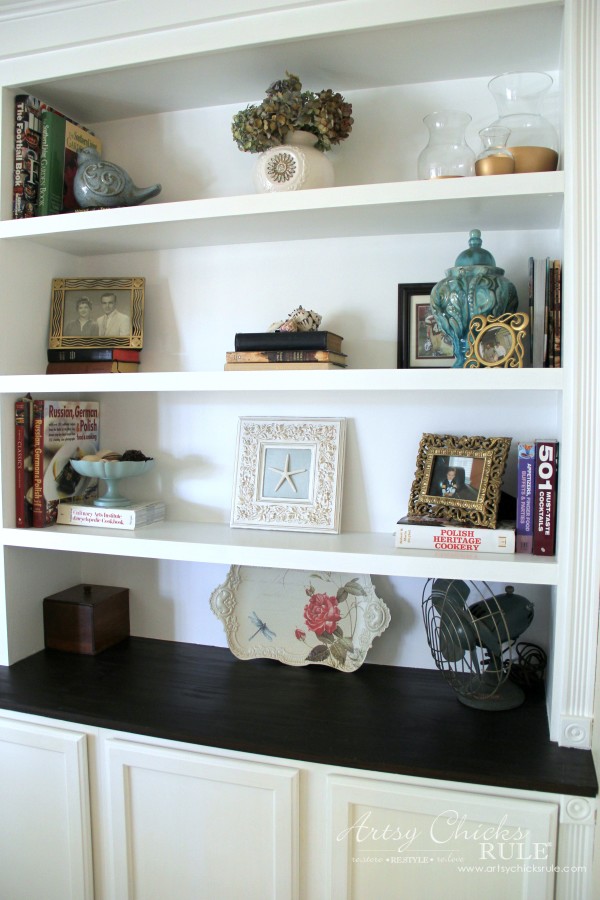
And as an example of just how dark Java Gel can be on natural wood.
Hop over to see more, here >>> DIY Built In Bookcase
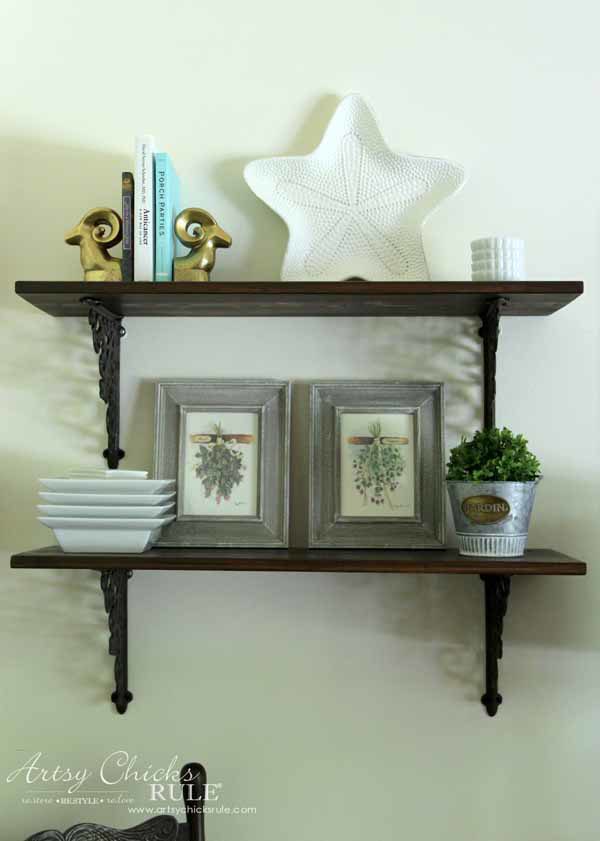
Dining room shelves we made and used this stain on.
Another raw wood use BUT with a mixed stain which came out a very nice color.
See what we used and the details here >>> DIY Wall Shelves
I actually removed the old finish on this one with Citristrip (so easy, this stuff!) and then applied the stain.
Turned out great!
See what it looked like “before”, here >>> Giverny Dresser Makeover
This is another one that I used Citristrip on first.
See it “before”, here >>> $20 ReStore Dresser Makeover
It’s amazing stuff, I tell ya!!
See the “before” state of this one, here >>> Sideboard Makeover
This was an oak-y orange color, believe it or not!! Gel stain to the rescue. (basically no prep other than a good cleaning!)
See it “before”, here >>> Press Back Chair Makeover
Another one that was a totally different color before I began.
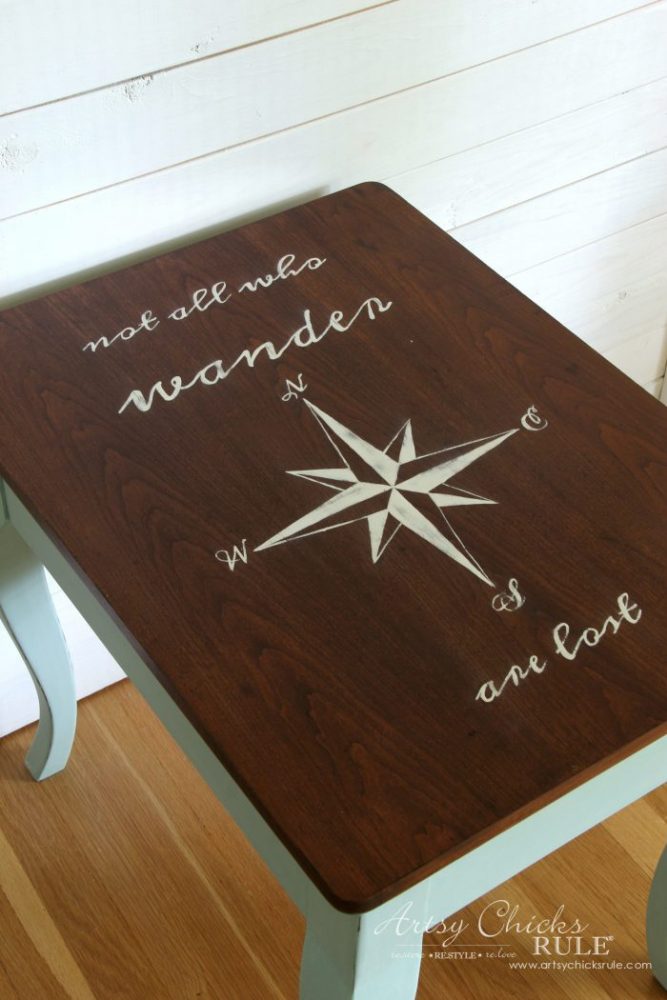
See it “before”, here >>> End Table Makeover
One of my absolute favorites from last year.
This one got all kinds of gel stain love. (and one I actually sanded first…but it didn’t turn out as expected!!!)
See how I turned it around with it, here >>> Coastal Blue Dresser Makeover
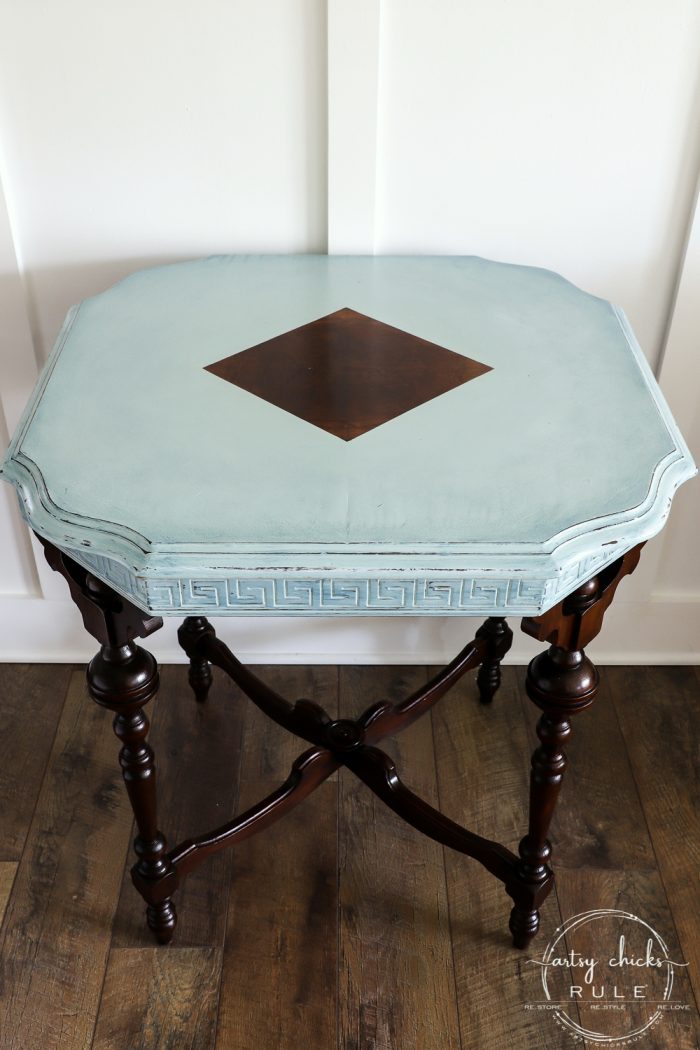
This beauty….seriously only needed the tiniest of “touch-ups” with gel stain.
See it “before”, here >>> Antique Table Makeover
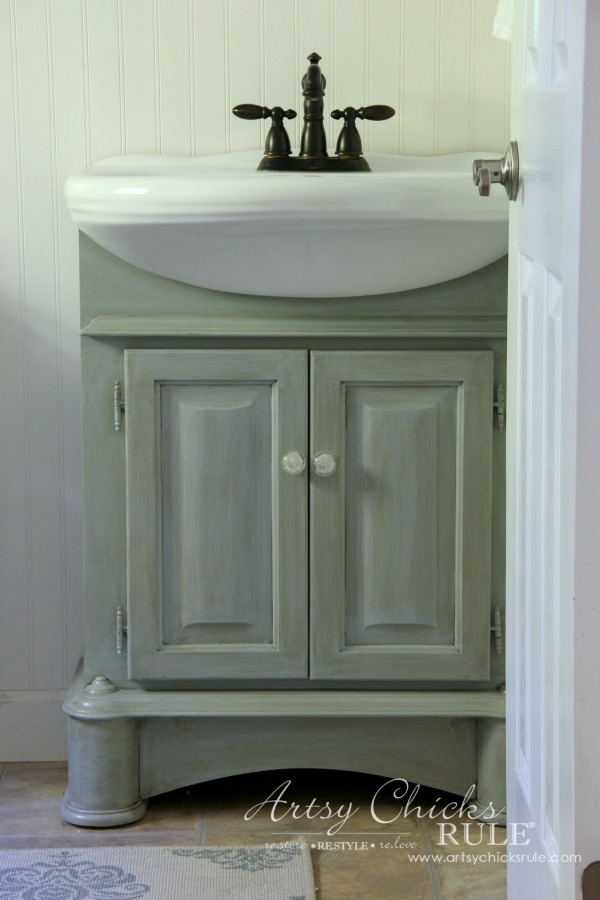
And the very latest project with gel stain…

A true labor of love! (but it was simple ;) )
See how it started and what I had to do to it, here …….”Gel Stain Cabinet Makeover”
…………………………………………………………………………………………………………………..
Clearly I’m a fan. ;)
Here are a few of the products I’ve mentioned (or are related) in this post:
- Java Gel Stain
- Antique Walnut Gel Stain
- High Performance Top Coat
- Arm R Seal
- Gel Top Coat
- Wood Conditioner
- Citristrip
- Foam Brush
- Natural Bristle Brush
- Cotton Rags
- Sandpaper
I hope this will help you with your next project!
PIN it to save it!
More posts in the “back to basics” series:
- How To Create Faux Verdigris (and video)
- How To Create Faux Patina (and video)
- How To Dry Brush
- 26 Different Types of Chalk Style Paint
- Pros and Cons of Chalk Paint For Furniture
- 5 Top Ways To Seal Chalk Paint
- How To Chalk Paint Furniture & More!
- How To Transfer Images
- How To Import Images Into Silhouette
- How To Restain Wood Without Stripping
- How To Use Gel Stain(you are here!)
I’ll see you back here on Thursday with this brand new makeover!
See you then!
xoxo


 Giveaways!")
")
")
")

")


Hi Nancy! I just read back on the sweet writing desk makeover and loved the explanations of all the repairs. I found a beautiful old chest that was going to be thrown out of a building that is being renovated and could not let it be destroyed. However, it is Godzilla size and needs new feet and some Bondo magic. This piece is solid wood with dove-tail drawers! I have not played with Bondo but read about how fast it sets up. What is your recommendation for repairing the chips and details on a piece? The little desk was a lot of work and it turned out to be a real jewel. Thanks for providing such helpful information with nice pictures. XOXO
Hi Cecilia! OH yes, that one was in much need of love! And oh wow, the one you found sounds like a treasure! I don’t use Bondo but for something like that, you could use wood putty or filler. It’s hard to say though, without seeing the chips, where they are, how big, etc. But for me, if there are small repairs like that to be made, I use wood filler and then sand it smooth to match. Always works great! I typically paint over that but you can buy stain-able wood filler too. :) xoxo
I don’t know if your schedule allows for this but have you considered redoing numerous things for reselling? Maybe have a sell every 3 mos or so? Imagine the money and following you could have locally. That may be far too much with your family duties but you could make a small fortunate and take on consignment things. A lot of work and time for sure.
Hi Helene! Oh yes, I do sell a lot of what I create here for the blog but it’s not my main business focus. The blog is actually the main focus as it is quite time consuming! ;) I love it but it does take up much of my time with all of the day to day running of it. So, I just sell whatever I create either myself on CL or through a consignment shop here and there. :) xo
Thank you soooo much for this post! I ordered a can of General Finishes gel stain a while back but have been rather intimidated to use it. I really want to try it to darken some orangey wood pieces in my home to darken the color, and also on an antique treadle sewing machine cabinet that just needs a refresh. I plan to experiment on something small I have around or pick up something inexpensive at the thrift store before I tackle something important. Love your projects so much, you have really inspired me to start doing wood furniture makeovers and perhaps even selling some to make extra money❤️.
Hi Vicki! You are so welcome!! I am thrilled this is helpful and inspiring to you. The gel stain will work great on those pieces you have! And you’ve got the right (and smart!) idea. Trying out a new product and getting a feel for it and how it reacts on a small piece before tackling a large project is really the way to go! Good luck and have fun!! And yes, go do it!!! :) xoxo
This post is timely. I have an old chair that belonged to my great-grandmother that desperately needs a makeover. I was wondering whether gel stain would work on it, but after reading this I think it’s worth a try. I still have to figure out how to redo the upholstery (which one of our cats made worse by scratching on it) but that might be the easiest part of the job. Gel stain, here I come. Well, when It’s warm enough to work in the garage, that is.
I’m so glad, Ginny! :) Oh, it’s hard to say without seeing it but I am sure it would work great with it. Can you try it out on the underside anywhere first? And gosh, don’t I know!! It’s too cold to do my work where I’d rather right now too! xo
I love seeing all your projects. They are so beautiful! I have a few older pieces of furniture that need some love. I decided to test the stain and the paint on the pieces with a lead test kit and both were positive for lead! (I knew old paint contained lead but did not know old stain did too). Do you take any special precautions when stripping old furniture?
Thanks so much, Marni! :) And oh wow, that’s a bummer!! As far as stripping, I don’t really have any advice for the lead based stuff as I don’t really deal with that. But one big rule of thumb I try to follow on anything old though, is to not create dust, if possible. (and wear an approved mask while working on old pieces) I use something like Citristrip to remove the finish instead. If I found that a piece I had was indeed positive for lead. I would not refinish it, personally. Sorry I’m not much help there!
Hi Nancy,
I love the results you achieved with gel stain. I have used a black gel stain on a mid-century side table that sustained a very small chip to the top wood layer at a top corner that is just big enough and located such that it will be noticeable if it is simple re-stained. Do you have any personal experience with filling and smoothing a blemish like this and using gel stain on top of the filler? Thank you in advance for any insight you may provide.
Hi Kathy,
I haven’t had to use gel stain over stainable wood filler but I would think you should be fine. It may be slightly noticeable but if you fit it well and smooth it out well before it dries (for minimal sanding), then you should be able to touch up that small area. It’s hard for me to say exactly without seeing it though. Just be sure the wood filler you get is stainable. :)
Thank you so much for the “stainable” filler reminder…that was not on my radar. Will give it a go and carefully shape the filler before re-staining with gel.
You are very welcome!
I used a gel stain yesterday and did not end up wiping much off. I really liked the look I gave it with the paint brush and only wiping away in some areas. I used Miniwax gel stain Coffee color. My question is, I left it on in a thicker coat the way I wanted it to cure and look. I left it outside and it was no supposed to frost or dew but it did end up frosting. Most of it still looks great but where the gel is thicker mostly around the sides and end of the table it looks a little water damaged almost. How do i get this off without having to redo the whole table? Should I try to sand it a little and see if it comes off or re-gel stain it to cover up those areas?
Oh gosh, can you possibly send me photo so I can see what happened? It’s hard to say without seeing it. You can send it to nancy @ artsychicksrule dot com, and I’ll do my best to help you! :)
Is Polyshades the product “that sits on top”?
Yes, pretty much that is what it does. It does not “soak in” like regular stain, no.
Thank you so much for your response. It truly is appreciated!
You are very welcome!
I recently acquired a bedroom set in blond wood. I would love to change to a more brown/grey restoration hardware color of wood. Any ideas what colors and ways to achieve this?
Hi Sheila!
Yes, you could try a gel stain like this in another color (something “weathered” etc). You can go right over your finish with that. OR you can apply a paint “wash” in a light taupe-y shade (preferably a chalk or mineral type of paint) and paint it on, then wipe it off. That will give you the base shade. If your wood has open grain (is not smooth) then you can go over that with a white wax or white glaze. If you use the white glaze you would want to wipe away excess so it only ends up in the crevices of the wood. Alternatively, you can also use a dark wax or glaze if that is the look you prefer. If your wood does not have open grain you can add that dimension with dry brushing. You can see my post/video on dry brushing here. There are other “faux” ways you can achieve a similar look with paint, here and here and here. Hope this helps! :)
Thank you so much, I am excited to try this. Thank you for answering my question so thoroughly
You are very welcome!
Hi there!! Loved your furniture makeovers with the gel stain over the orange wood. I cam to your site for some help with staining some older orange ladderback chairs and hutch. What color gel stain did you use on the makeover with the cabinet? Also, Im not understanding your help in the way to apply the stain, I will be using an old rag. Thanks for you help
Hi Kathy! I used Java Gel Stain by General Finishes. :)