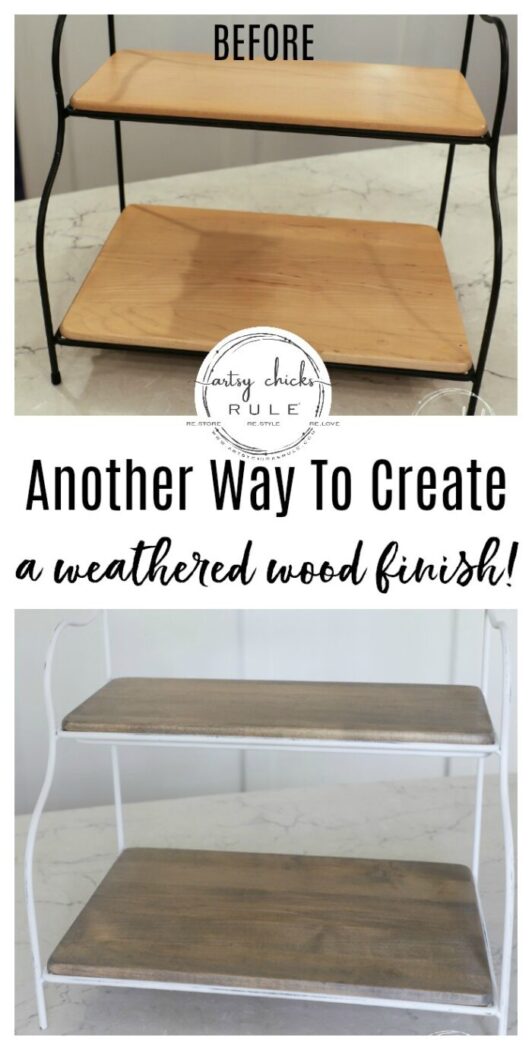
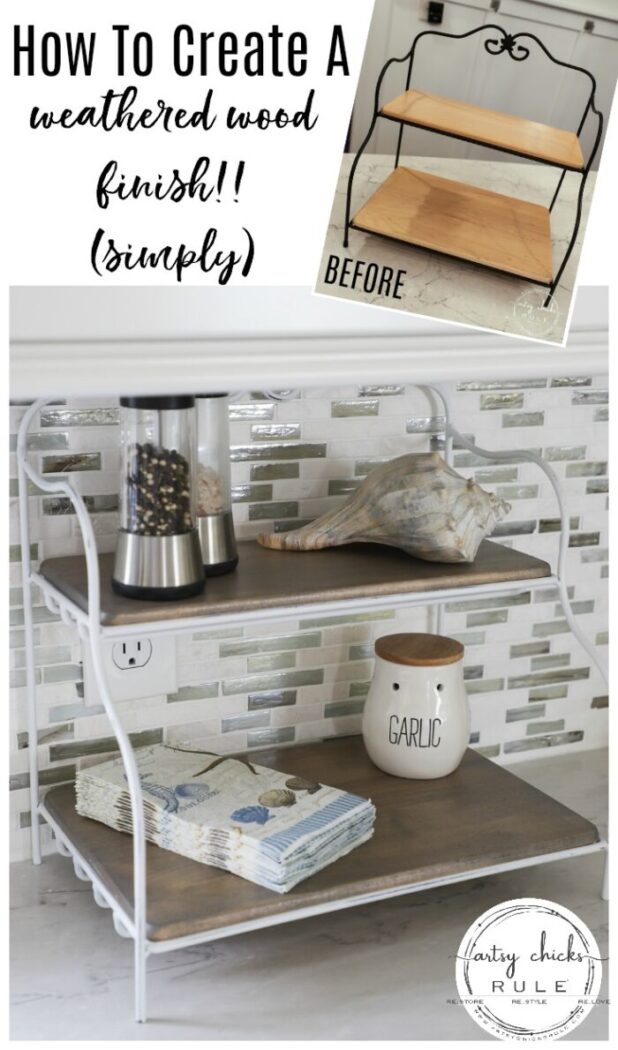
Creating a weathered wood finish is easier than it seems. No lengthy instructions involved. Just a little time with minimal effort to create this fabulous look!
Hello friends!
I’ve talked about “weathered wood” quite a lot on the blog here over the years. And I’ve done quite a few projects with the look of weathered wood.
But not all of those projects are done the same way. I use different techniques to create a weathered wood finish depending on the wood finish that I’m starting with (painted, stained, etc) and the end result I am after.
I have said it for a while, but I am planning on doing a video for y’all on all of the ways I do it. So you can see it all in one place.
And hopefully, the video will help to see me do it “live”.
Today, however, I’m going to show you how to create a weathered wood finish with stain.
But first, have you entered my latest giveaway? If you missed it on Sunday, you can click here to see.
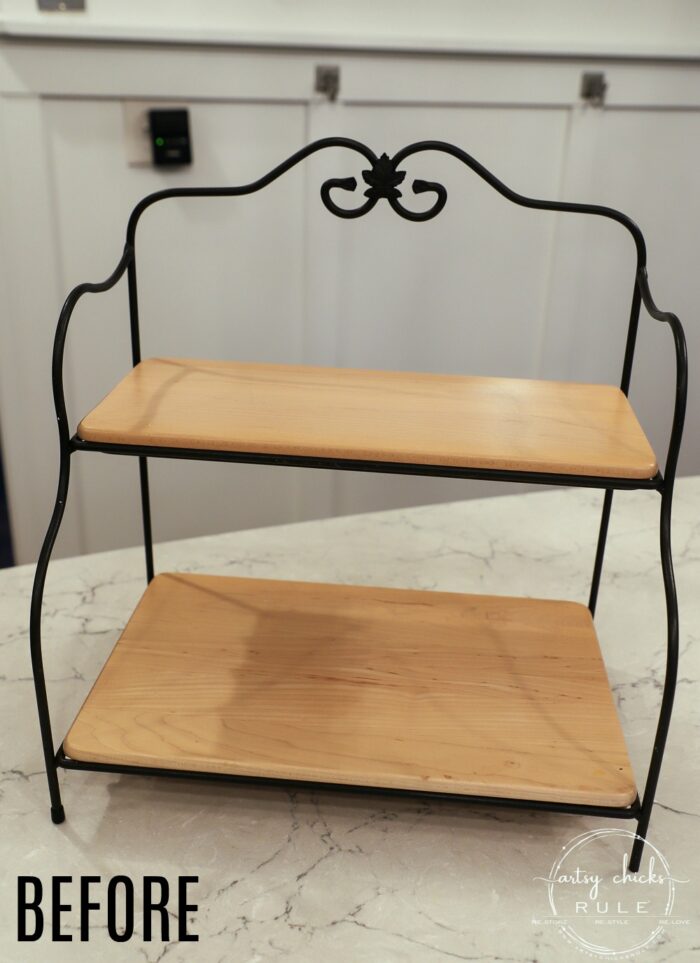
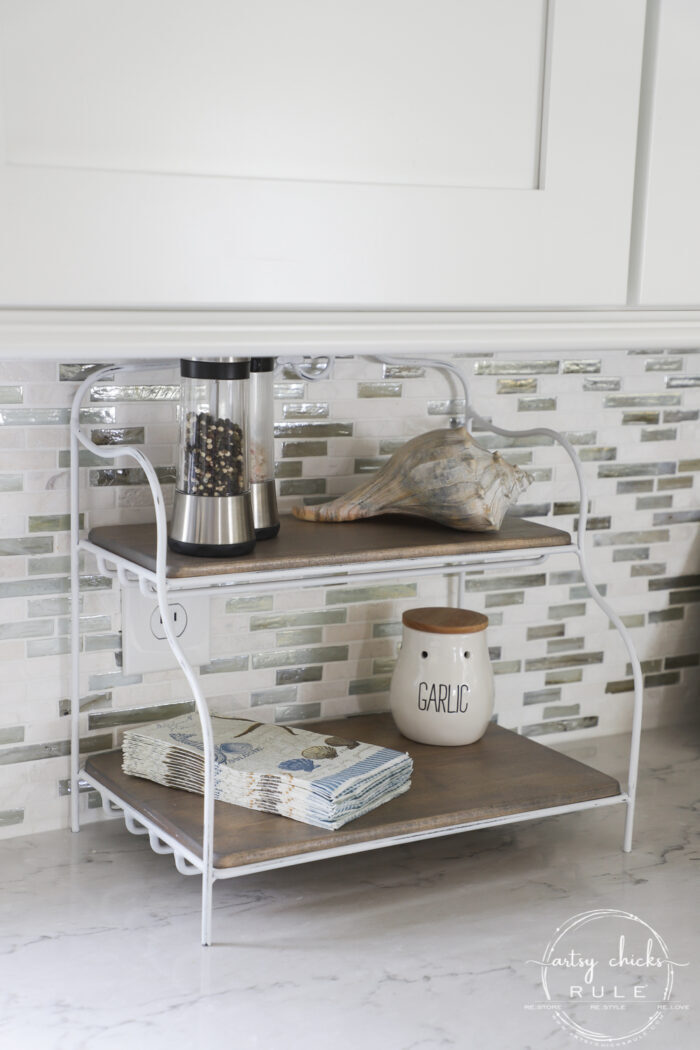
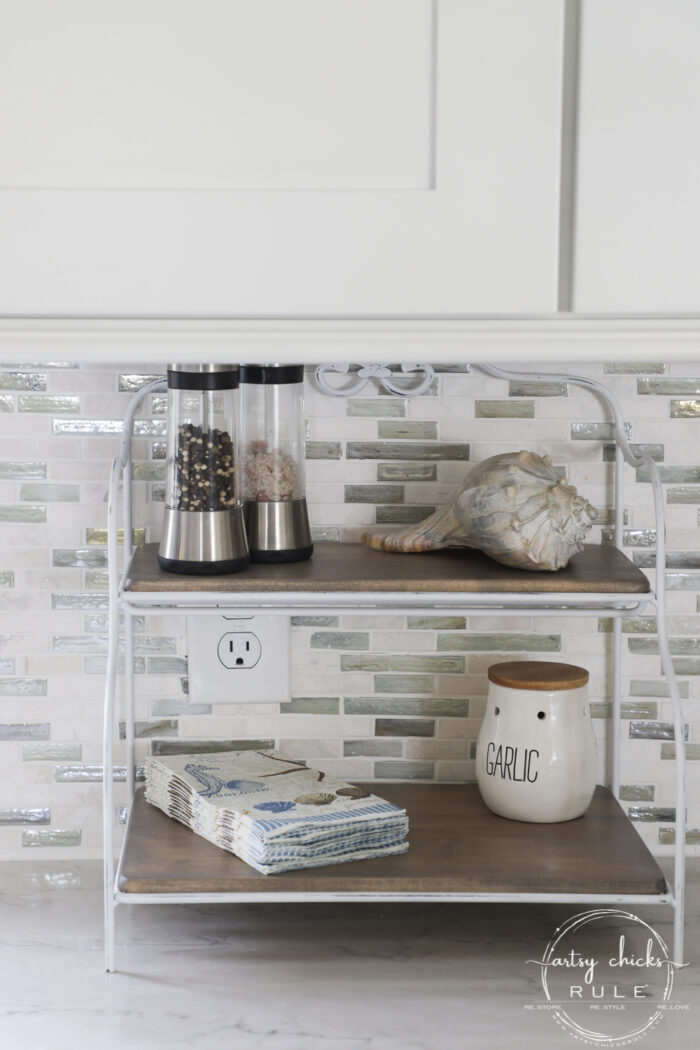
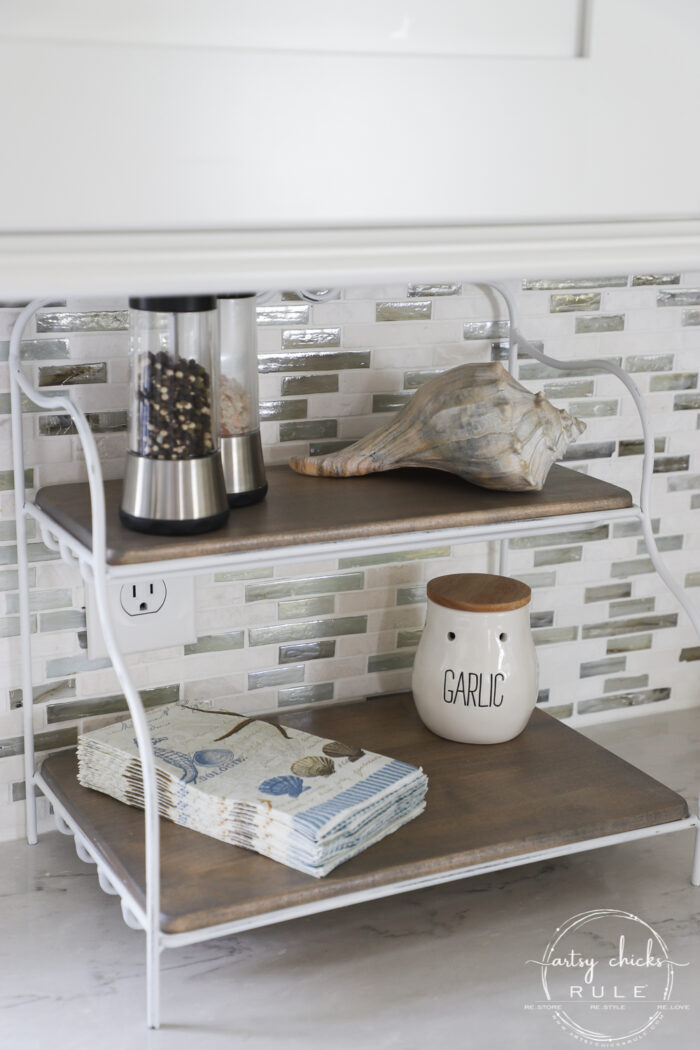
I pulled this old Longaberger countertop stand out of my stash to give it a long-overdue makeover.
Were you a Longaberger fan? I was, I have many baskets still that are stashed away. I used to have them everywhere around my house but I tired of them. I have held onto them but not sure what I will eventually do with them.
Anyway, I used to use this little wood and iron shelf on my kitchen counter for many years.
It has been well used and loved.
Here is it in my kitchen right here on this blog…
We are going back a few years in this photo, though. Our old kitchen before the remodel.
Featuring the first tiled backsplash I tackled, old appliances, etc. But there you see that Longaberger stand.
Although I loved the natural look of the wood, it just really didn’t match my decor any longer.
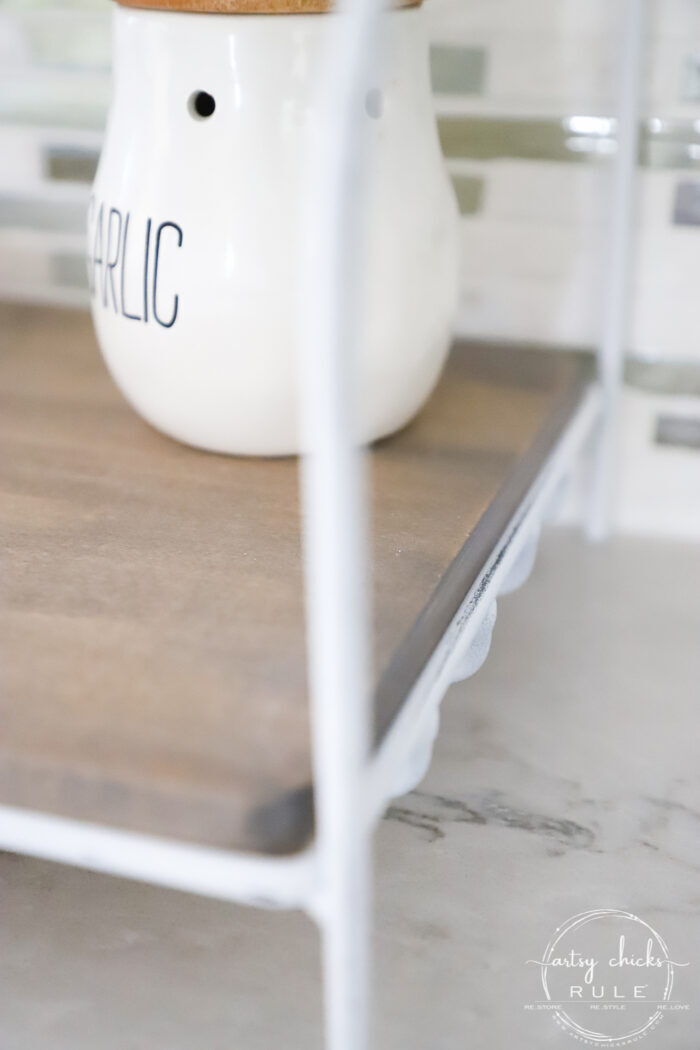
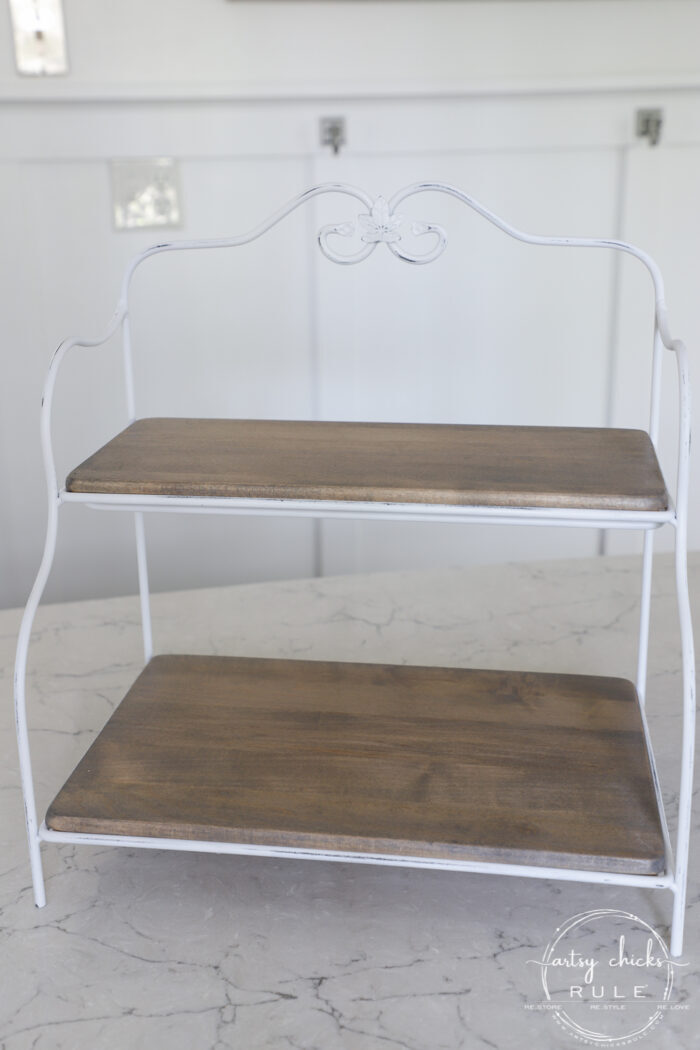
The black iron did not either. So I decided to paint that white.
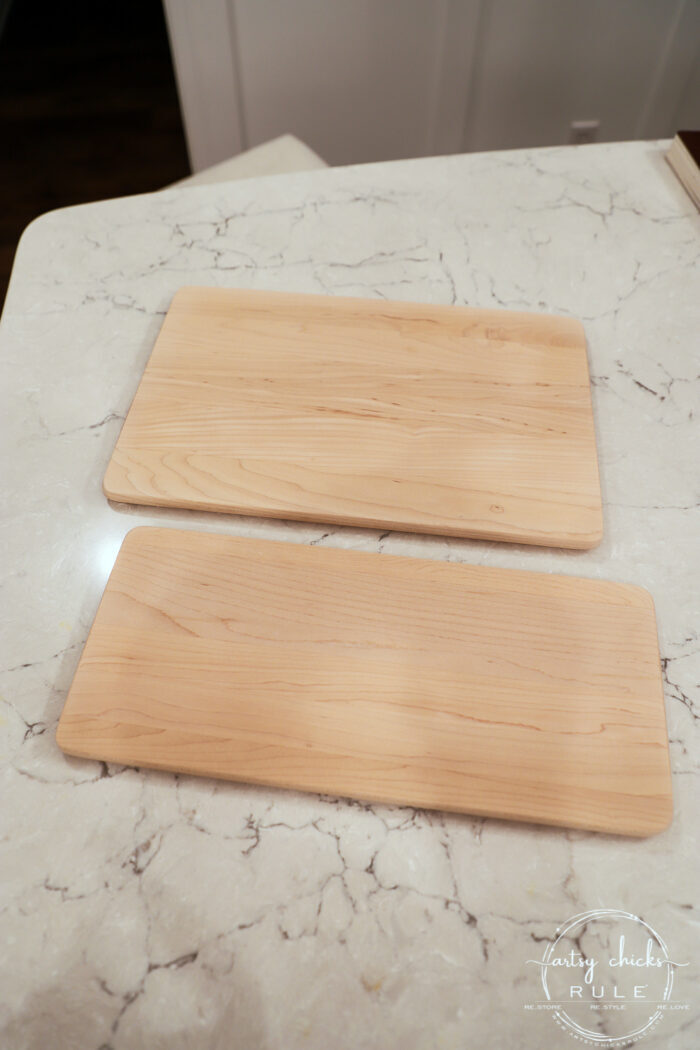
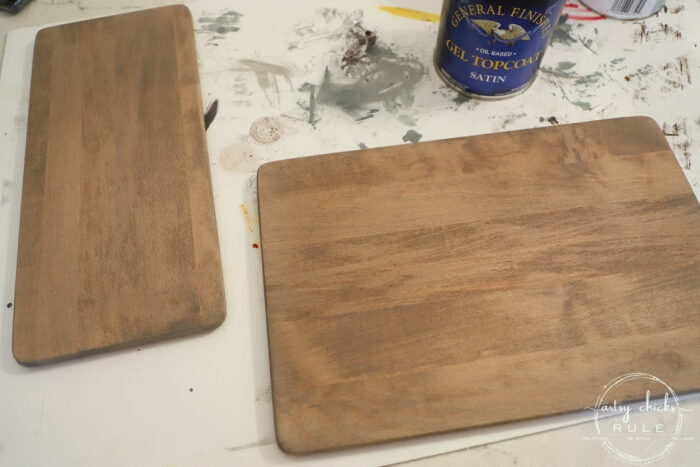
For the shelves, I lightly sanded enough to remove the clear finish these had and then followed these steps:
Clean the loose dust away
Apply a pre-stain wood conditioner (following directions on can)
Apply the gray stain (following directions on can)
Apply gel topcoat…3 coats total.
That’s it!
Now, it sounds simple because it was. BUT when using oil-based products there is a time factor involved.
As far as the sanding goes, I used my new cordless sander and started with 150 grit, then moved to 220 before staining. You want to make sure you have removed all of the shiny finish so the stain can absorb into the wood. I had to go back and sand a little more as I could tell the pre-stain conditioner was not soaking into a few spots.
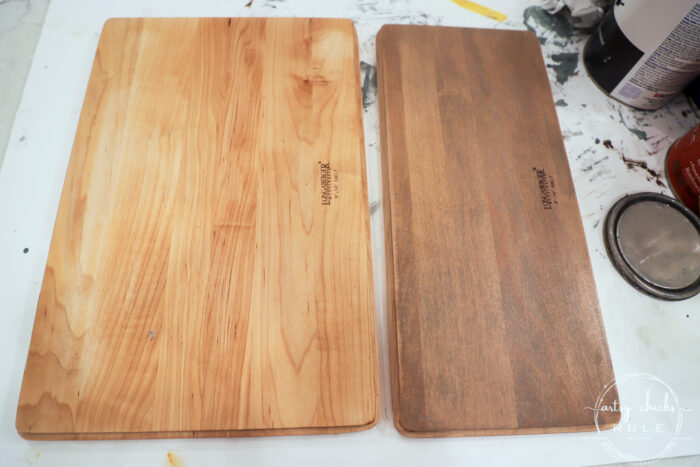
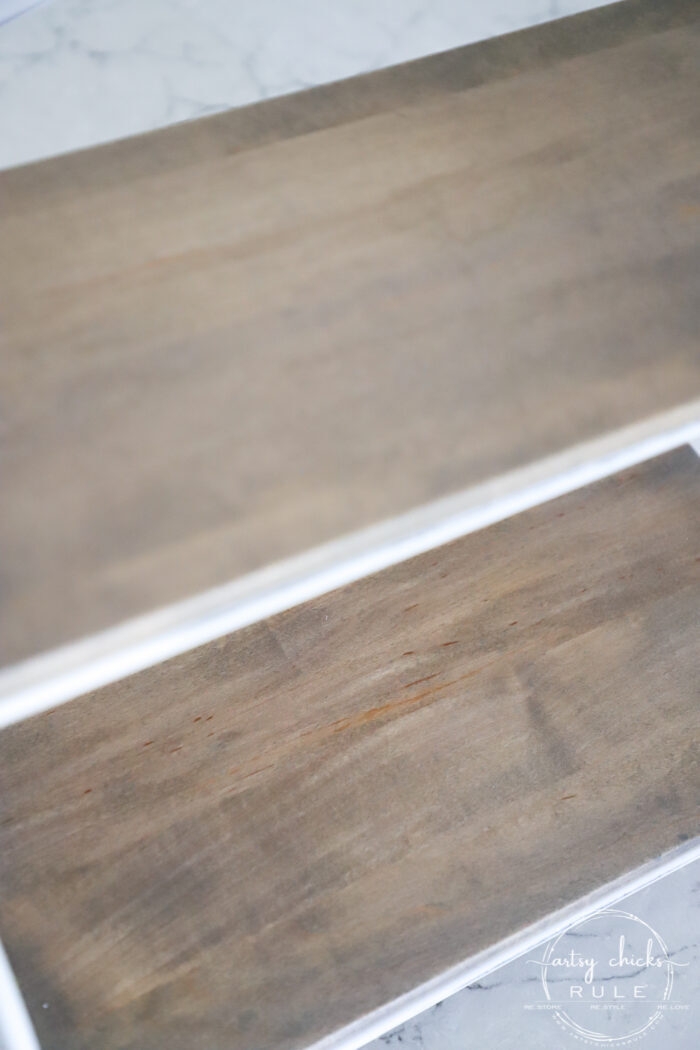
On the left is the wood shelf already sanded, “pre-stain conditioned” and awaiting stain.
On the right, the stain has been applied. I just use a paper towel to do these 2 steps. (you can also use an old t-shirt but I don’t want to bother with clean-up of those with oil-based products when I can help it)
Here are the links to the products I used for this project…
After letting those sit overnight, I applied the first coat of the gel topcoat. (one of my new favorite finishes for stained wood)
The next day, I lightly sanded with 320 grit sandpaper, and then applied another coat of the gel topcoat. I repeated the process the next day.
For the black iron stand, I simply painted it with white paint and once dry, lightly sanded to distress.
Want to see some of these projects in “live” time? Hop on over and follow along with me on INSTAGRAM. I’m always sharing in my stories as I’m doing projects, finding new furniture, fun finds….just all the day to day behind the scenes.
I like the relaxed feel the slightly distressed white finish gives. It goes nicely with the more relaxed finish on the wood.
You can find the garlic container, here.
The salt and pepper grinders, here. (I love these!)
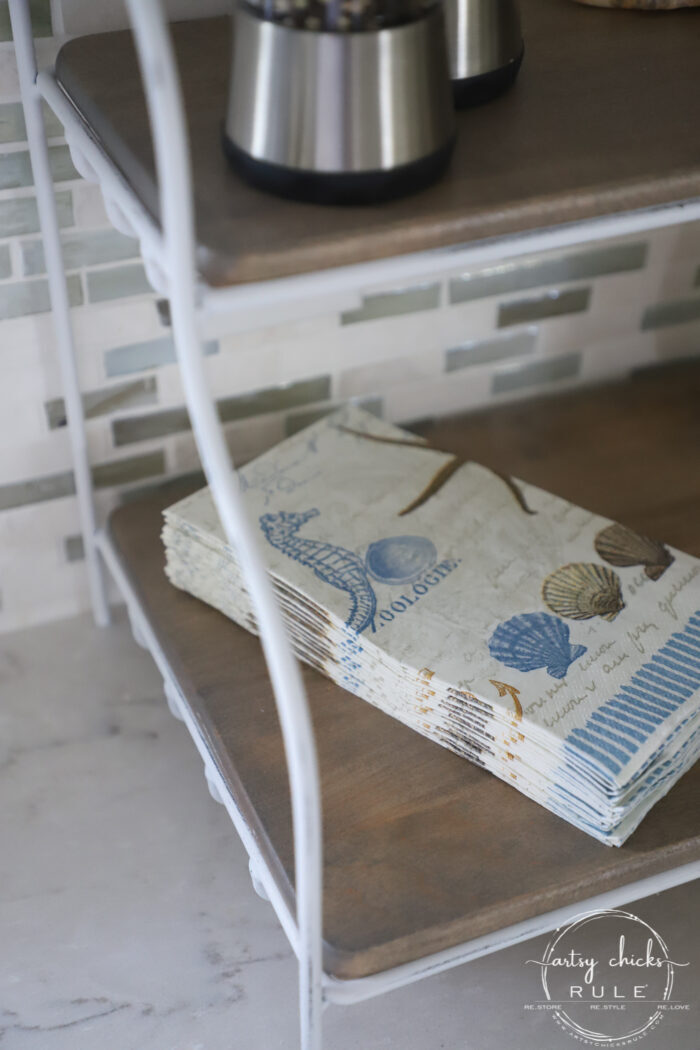
It’s amazing how different it looks. I am really loving it all over again!
Goes so nicely in this space with the new kitchen.
Info on the kitchen remodel can be found, here. Info on the tiled backsplash can be found, here.
Although, I have decided to take it down to the beach. I don’t have a lot of countertop space there so this will work nicely to maximize it some.
We are hoping to get back down there soon! We’ve been so busy (and sick) that we haven’t been down in a while.
Lots still to come there. I cannot wait to get started but things to finish up here first.
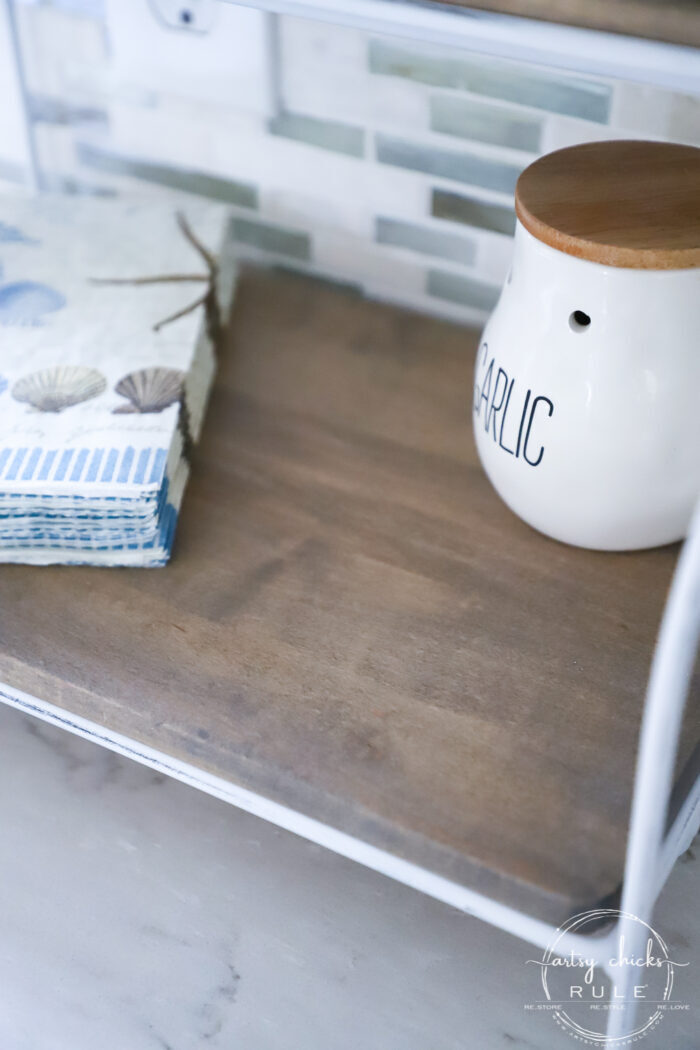
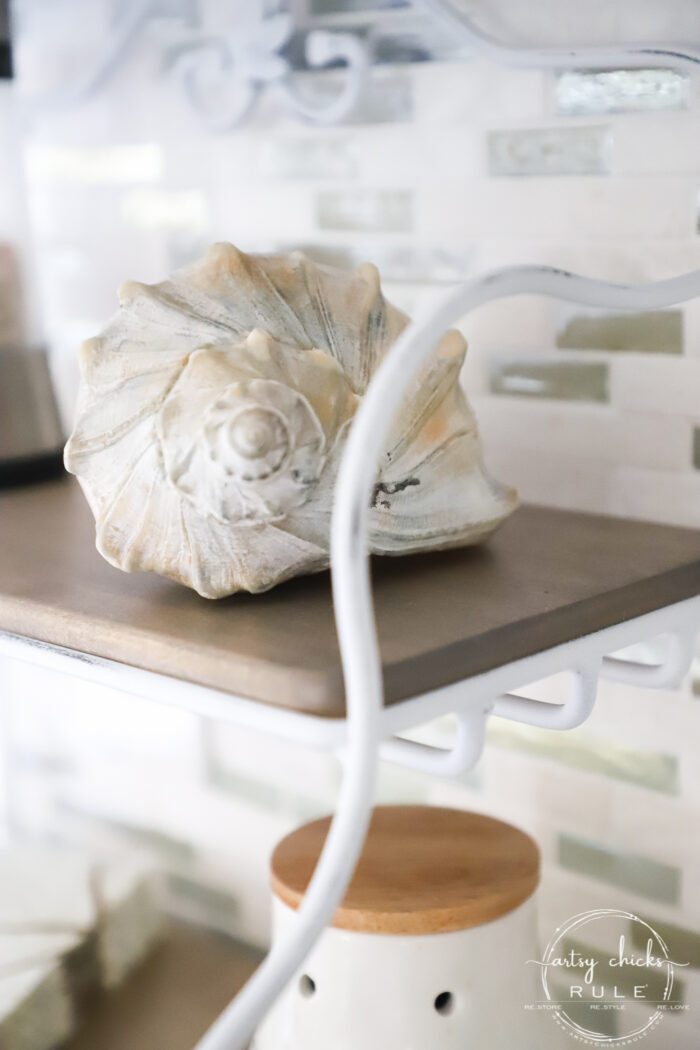
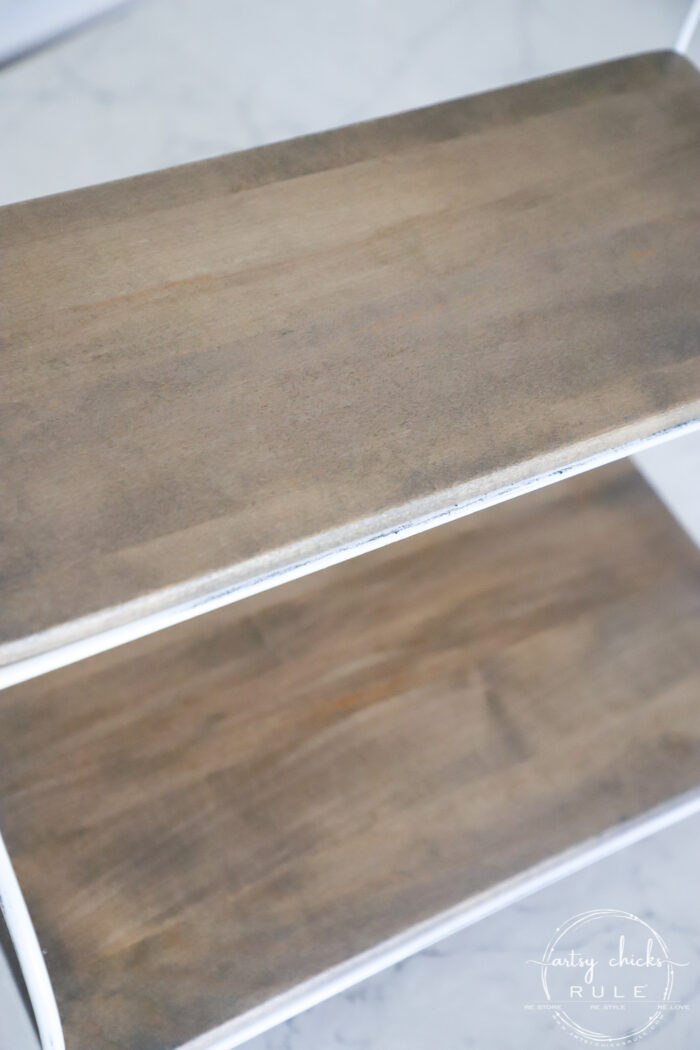
A little close up of the shelves…
It’s so much fun to transform things and give them a new look. Especially ones that you’ve owned that have taken a back seat (or been moved to the junk room! lol). Now this one can shine again in a brand new space.
Want to see more of the different ways I create a weathered wood finish??
I like this technique because it looks like it can go as “weathered” gray as desired or like you have done with less gray. Does it have to sit overnight after the stain is applied and then sit again overnight after each application of the gel topcoat? I really want to try this on a church pew. Do you not have to seal when using a stain and topcoat? Hope everyone is on the mend and feeling better! XOXO
Hey Cecilia! No, I just got busy with other things, but it does need to sit between 8-12 hours in between. I really like it but because it’s oil based, it does take a bit longer. And yep, you must seal the stain…the topcoat is the seal I mentioned. :) And also yes, thank goodness, hubby is all better and I didn’t catch it! Yippee! xoxo
Super cute!! I was a huge Longaberger basket fan too. My SIL used to sell them, so we all ended up with them. They were crazy expensive! Hope you are feeling better!! XOXO
I have couple of Longaberger baskets too.I believe my big ones are market baskets,and they are super handy to “stash” stuff in to take with me.Think fellowship meal at church,(put all your stuff in there!) It’s so much easier to carry.Or even when I’m going to my daughter’s or a friend’s house-it will hold a lot of stuff!
Anyway,I decided one day,that I love the basket,but not the color…
Painted it!! I know..people will think,”But it’s a Longaberger basket!!”..well,yes..,but it’s mine..
I have gotten tons of compliments on it,and I REALLY enjoy using my basket!! I’m going to paint the rest of em as soon as the weather warms up here!!
That came out great! I’m building a console table with 3 of those metal library card cabinet drawers. I’m wrapping them in wood but I couldn’t decide how to stain the wood, now I do! I love this color! As always thank you for the inspiration!
I have this little stand and a shelf stashed away also. I will not even say how many baskets are stashed away. I loved those baskets and had them all over my home. Now there are a few here and there the rest in totes, I rather have a wire basket from Home Goods. Why do we get caught up in collecting. Love what you did with the stand. I have seen people paint The Longaberger Baskets also. They turn out gorgeous. I just haven’t gotten the nerve Yet. I sure would like to know what people do with their old collections.
Don't Miss a Thing! Plus,Get My FREE ebook,"Creating Fabulous Finishes"!
Get My FREE ebook Now!
Want to be inspired, learn new skills, discover all the tricks to furniture makeovers, creating new out of the old and more?
You'll also receive my FREE ebook "Creating Fabulous Finishes" PLUS access to my private Printables Resource Library, too!
Sign up to get the Weekly Newsletter! Our emails include an unsubscribe link and you may opt-out at any time. Your information will *never* be shared or sold to a 3rd party.
Don't Miss a Thing! Plus,Get My FREE ebook,"Creating Fabulous Finishes"!
Don't Miss a Thing!! Plus Get My FREE eBook "Creating Fabulous Finishes"!


")

")
")
")
")


Oh Nancy, this is super cute! The white frame with the distressed wood stain is perfect. :) It will be perfect at the beach. :)
I like this technique because it looks like it can go as “weathered” gray as desired or like you have done with less gray. Does it have to sit overnight after the stain is applied and then sit again overnight after each application of the gel topcoat? I really want to try this on a church pew. Do you not have to seal when using a stain and topcoat? Hope everyone is on the mend and feeling better! XOXO
Hey Cecilia! No, I just got busy with other things, but it does need to sit between 8-12 hours in between. I really like it but because it’s oil based, it does take a bit longer. And yep, you must seal the stain…the topcoat is the seal I mentioned. :) And also yes, thank goodness, hubby is all better and I didn’t catch it! Yippee! xoxo
Super cute!! I was a huge Longaberger basket fan too. My SIL used to sell them, so we all ended up with them. They were crazy expensive! Hope you are feeling better!! XOXO
Nancy, what an easy and simple makeover and it looks SO much better! thanks for the inspiration!
Wow – I have a few of the black stands along with some of the chrome stands, but have hid them away. I think I’ll bring them out and paint them white.
Thanks for the idea!
I have couple of Longaberger baskets too.I believe my big ones are market baskets,and they are super handy to “stash” stuff in to take with me.Think fellowship meal at church,(put all your stuff in there!) It’s so much easier to carry.Or even when I’m going to my daughter’s or a friend’s house-it will hold a lot of stuff!
Anyway,I decided one day,that I love the basket,but not the color…
Painted it!! I know..people will think,”But it’s a Longaberger basket!!”..well,yes..,but it’s mine..
I have gotten tons of compliments on it,and I REALLY enjoy using my basket!! I’m going to paint the rest of em as soon as the weather warms up here!!
That came out great! I’m building a console table with 3 of those metal library card cabinet drawers. I’m wrapping them in wood but I couldn’t decide how to stain the wood, now I do! I love this color! As always thank you for the inspiration!
Looks amazing as all of your other projects! The ideas!!!!
Perfect for the beach! Even better when it doesn’t take a million steps to transform it.
Super cute!!! Was the white spray paint satin or flat
I have this little stand and a shelf stashed away also. I will not even say how many baskets are stashed away. I loved those baskets and had them all over my home. Now there are a few here and there the rest in totes, I rather have a wire basket from Home Goods. Why do we get caught up in collecting. Love what you did with the stand. I have seen people paint The Longaberger Baskets also. They turn out gorgeous. I just haven’t gotten the nerve Yet. I sure would like to know what people do with their old collections.
You made it beautiful again Nancy! It really coordinates well in your kitchen, which by the way is gorgeous!
Thank you so much, Christina! :) xo
Always love how you create gems. Thanks!
Aw, thanks much!! xoxo