How To Remove Peeling Paint From Doors & Trim (with these simple tools)
Is peeling paint a problem for you? Well, I might have the answer…read on!
Yep! It’s peeling paint day. ;)
Well, it’s no more peeling paint, really. Because it is all gone bye-bye now. And I’m hopefully going to help you do the same if you have any peeling paint on doors or trim like we did.
But first…do you know what today is?? It’s my 8 year blogiversary! What?! What an amazing journey it’s been. Want to read my very FIRST post ever on the blog? It has nothing to do with DIY or decor because I wasn’t sure how to jump in with a project first thing so instead I began with a sort of introduction. You can read it here >>> First blog post
AND guess what else??? I’m going to be doing a giveaway next week to celebrate it! (along with Christy who coincidentally also started her blog at the same exact time…and we didn’t even know each other then. How crazy is that?! So be sure to keep an eye out for that.
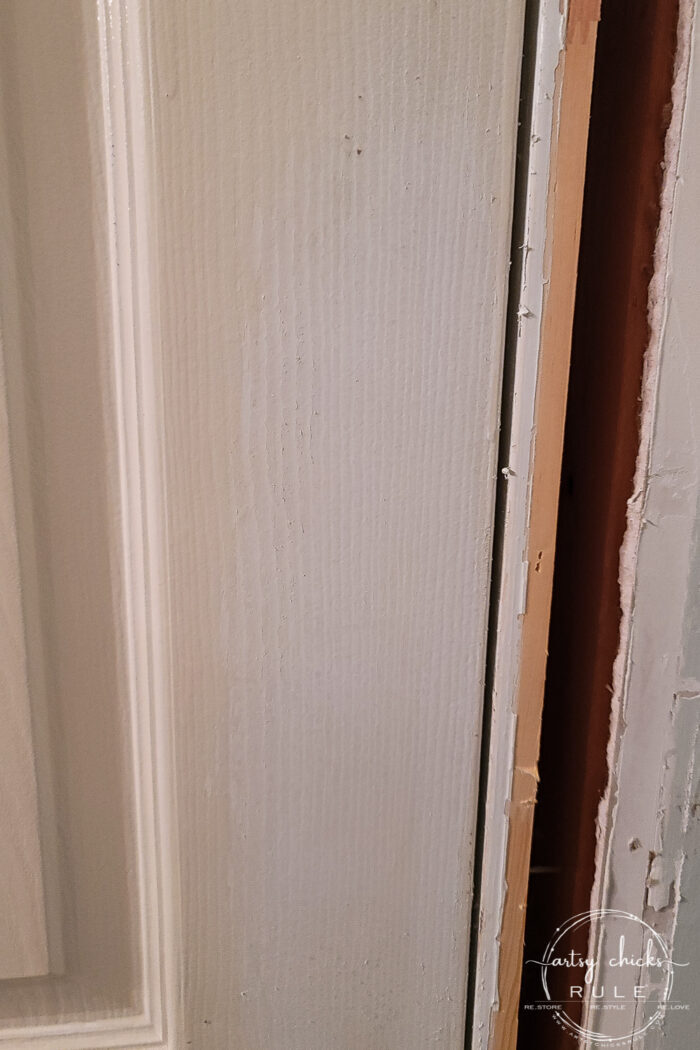
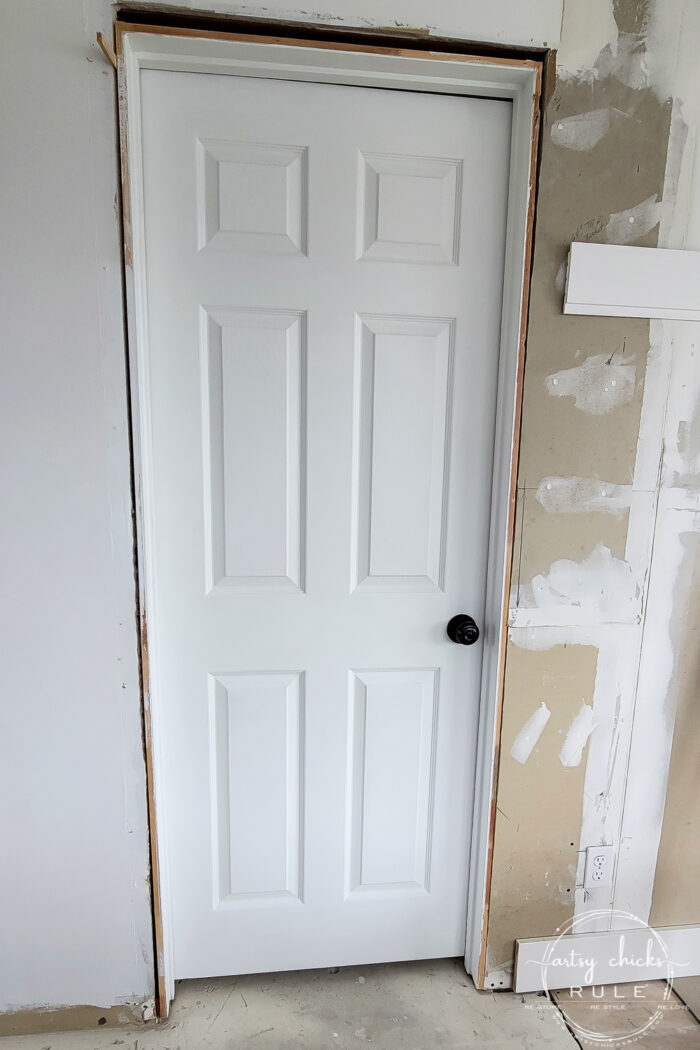
Okay, so you might recall me mentioning our doors at the beach condo were peeling everywhere. It looked as if they had been quickly painted over old oil paint without proper prep beforehand. Boo! What an absolute mess.
All the trim and the doors.
I shared on my Instagram stories a while back that I had decided to replace the doors instead of trying to remove all of that paint.
So much work. And I just wasn’t up for it with everything else we have going on.
BUT as it goes, expenses got the better of us. Haha!! It was one thing after another and we have quite a bit to do and replace still.
So I reconsidered repairing the doors and keeping them.
That doesn’t mean we won’t come back and replace them at a later date though. Because I really would love the 2-panel doors in here. We’ll see…it’s not high on the list right now, obviously!
Okay, so how did I do it?
Funnily, one thing that both my husband and I noticed was that the paint on the inside of the two bathroom doors was peeling off so much easier than the rest.
Can you guess where I’m going with that???
My mind thought, hmm, steam.
The shower produces lots of steam in here. I need steam.
So I had planned to bring my steamer back (I LOVE this steamer, by the way, it works so well) to test out my theory. But…I forgot to bring it on our next trip down. Ugh!
Well, I was planning to get to work on the doors so I wasn’t going to let that stop me. So I started looking around online to try to find a store that had the same steamer in stock. I checked Walmart…they had one. But Walmart is a good little hike so I checked Lowe’s which is closer. Guess what came up when I searched “steamer”? A wallpaper remover steamer thingy.
And I thought, OH…hmm, yes, that might work even better with its larger canister and 70 minute run time. So I went and picked up the only one they had. (thank goodness and it didn’t break the bank either!)
Now let me show you how it went.
How To Remove Peeling Paint
Here’s a list of supplies I used…
MATERIALS LIST
- Wagner Wallpaper Steamer
- Wire Brush
- Scraper Tool
- Sanding Block
- Sandpaper (I mainly used 100-120)
- Sander
- Primer
- Trim and Door Paint
IMPORTANT: If your home/project is older than around 1978 (and sometimes a few years later), be sure to test for lead paint before beginning any paint removal process. If in doubt of the age or the paint, test for lead. You can buy lead testing kits online or in most big box stores.
Our condo was built later than that so I didn’t test for lead.
…………………………………………………………………………………………………
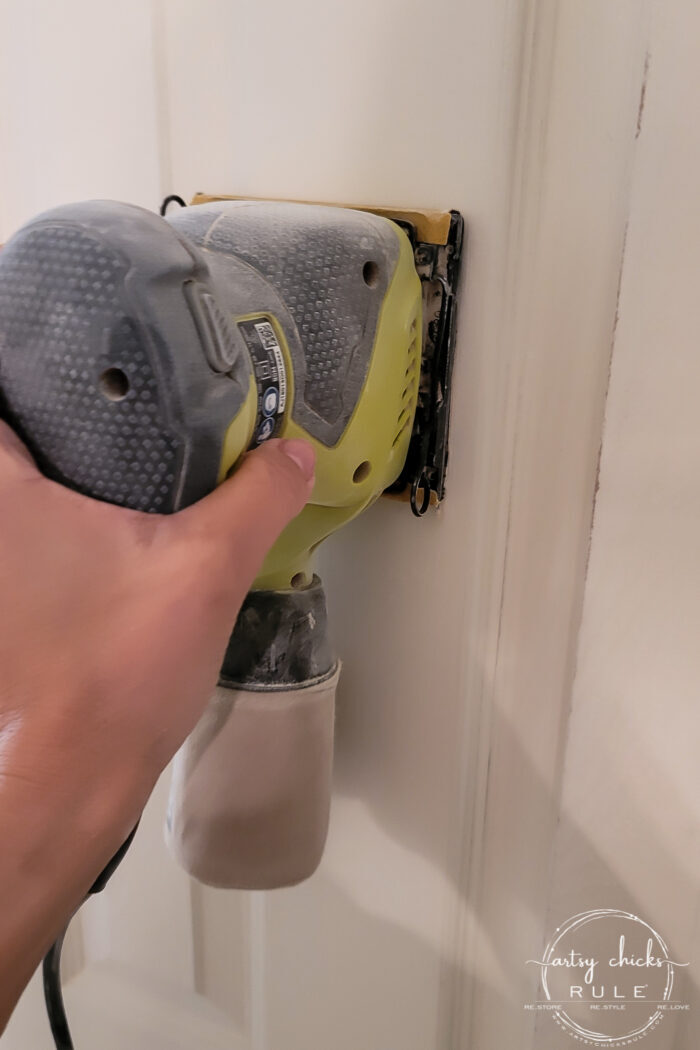
Simply fill the wallpaper steamer with water, let it heat up for about 15 minutes, and then get to it.
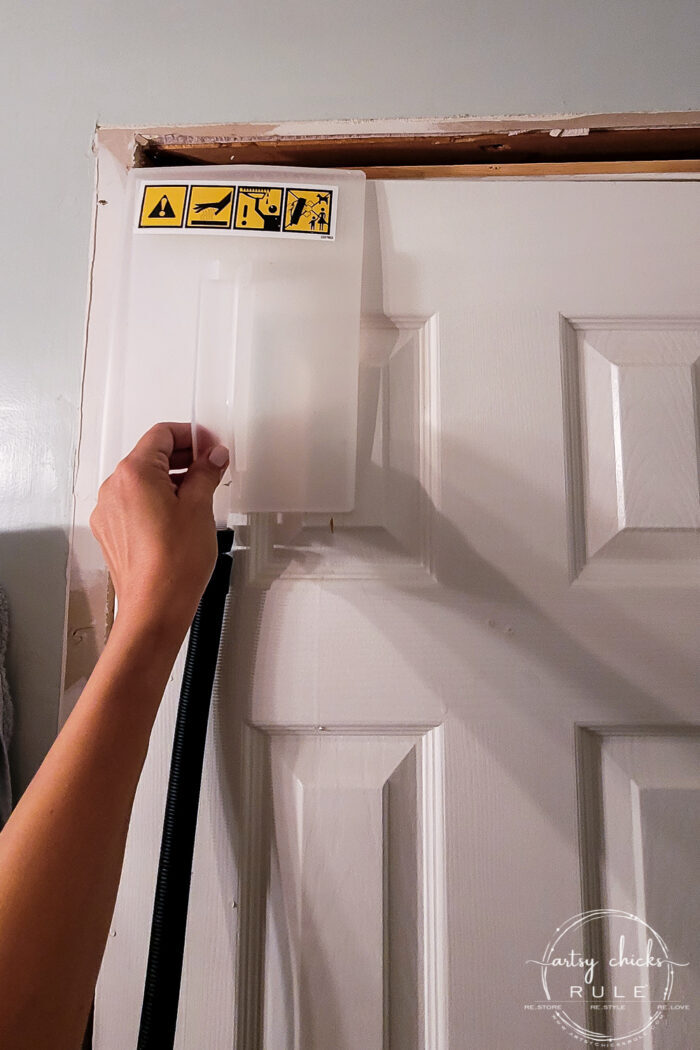
I would usually start at the top left and work my way down, one section at a time.
Meaning, I would hold it as you see for about 20 seconds, then slide it to the right and do the same until I got to the other side of the door. Then I would work on removing the paint in that section.
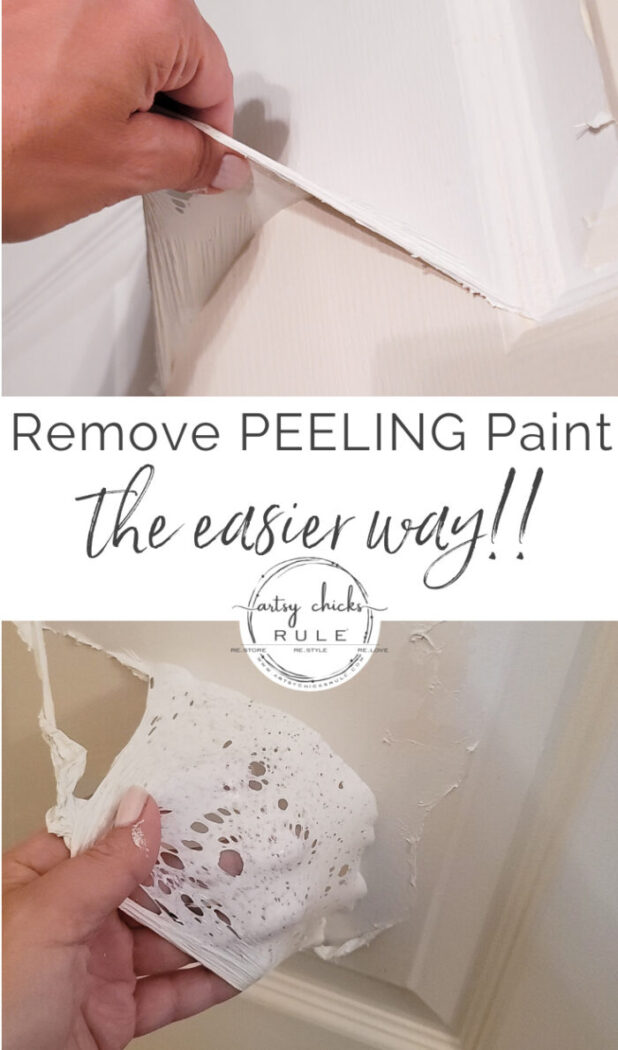
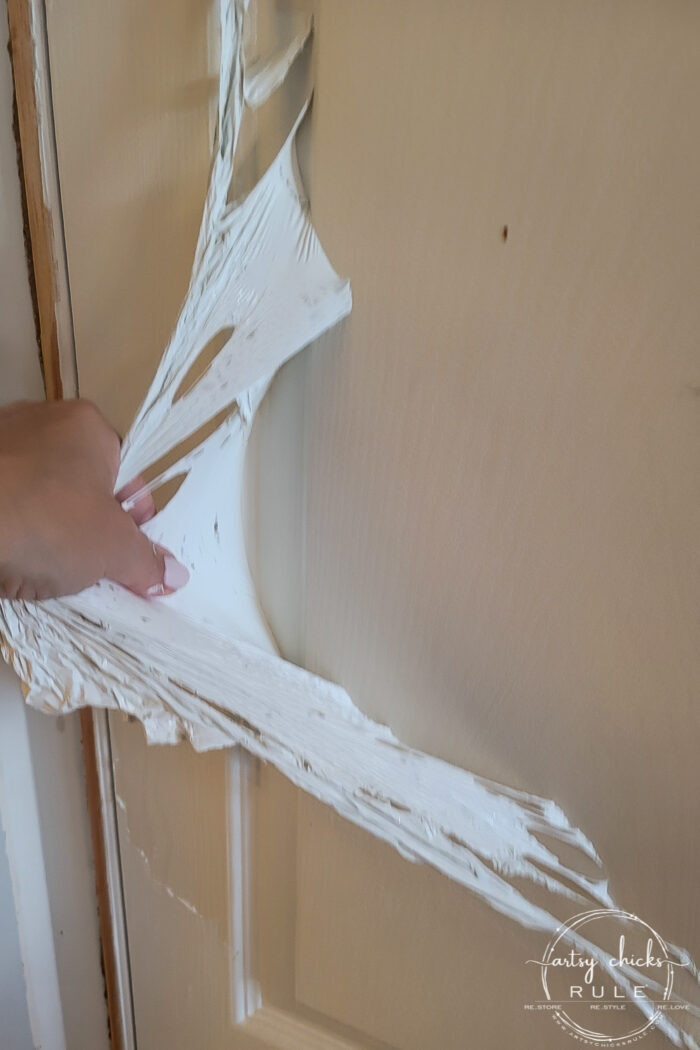
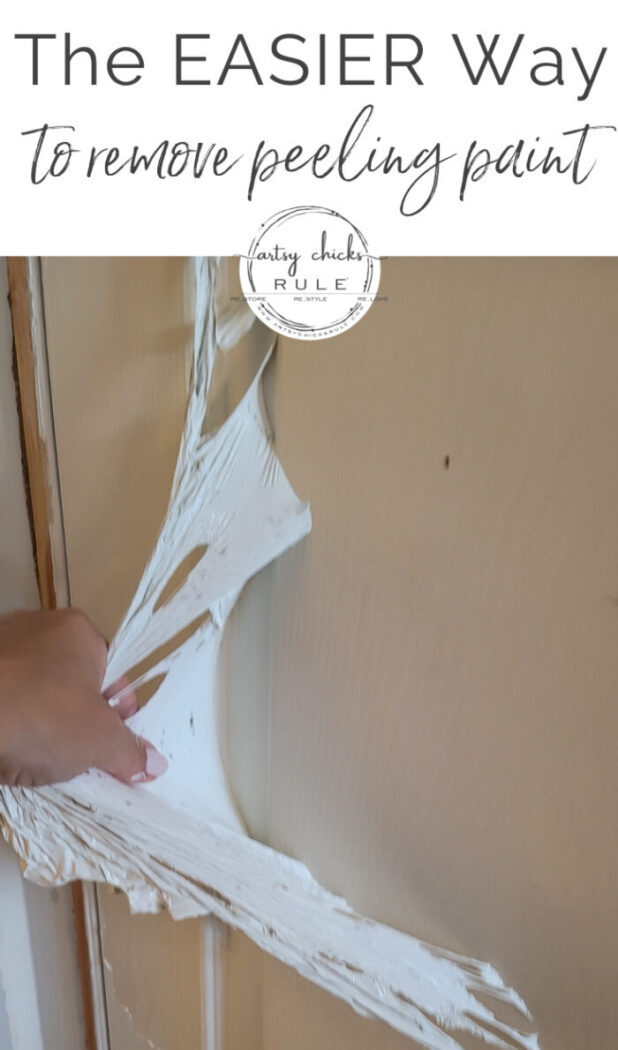
When you steam the paint, it gets really soft and pliable.
Now, I should mention that I am working to remove a layer of latex paint that is likely applied over oil-based.
The steam didn’t budge the oil-based beige colored paint underneath, only that top layer, which is all I was trying to remove.
You can see below how it got soft and gooey and comes up and pulls away almost like bubble gum.

It was kind of fun. Ha!
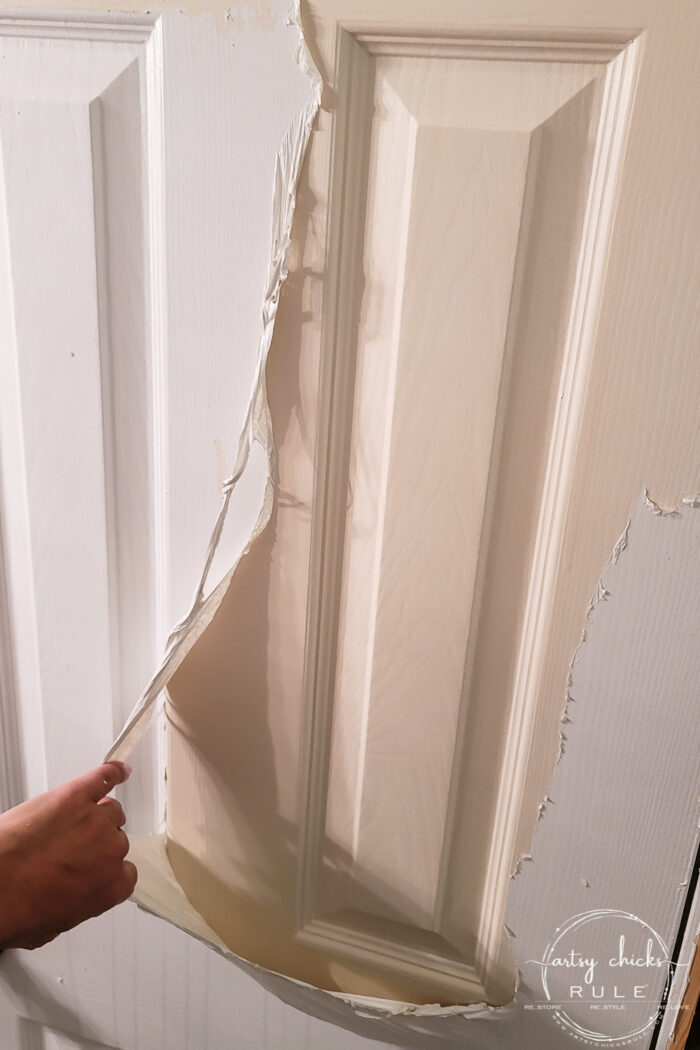
Check that out.
Just a note about the wallpaper steamer, it is messy and will drip water all over so keep that in mind. We have no flooring in yet so I didn’t care about it but if we did, I would’ve put towels underneath so as not to make such a big mess. (our floors are gypcrete so it just soaked right in)
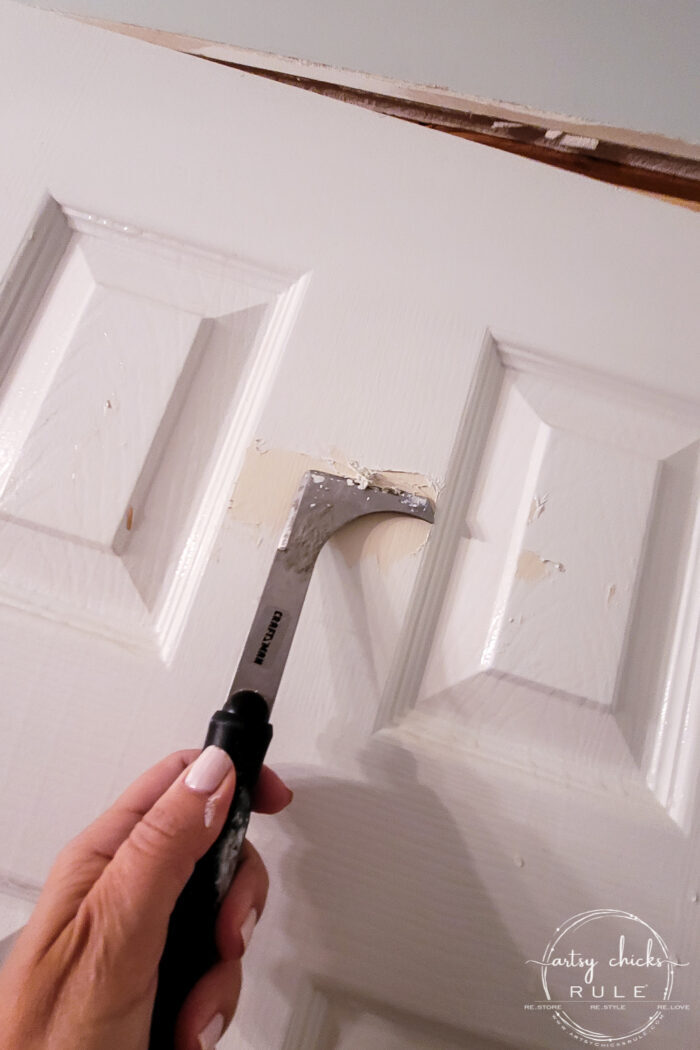
There were stubborn areas though.
Stubborn in that the paint was doing exactly what it was supposed to be doing…stick. haha
I used the scraper tool to scrape over that “stuck” part to remove whatever was loose that I could.
As you can see, not too much in that one section or this one below.
But that’s totally okay.
Because remember, the goal here is to remove what’s loose so you can paint again. No need to remove the paint if it has actually adhered well. You will need to do some sanding before painting again anyway and you will be able to smooth out those areas just fine.
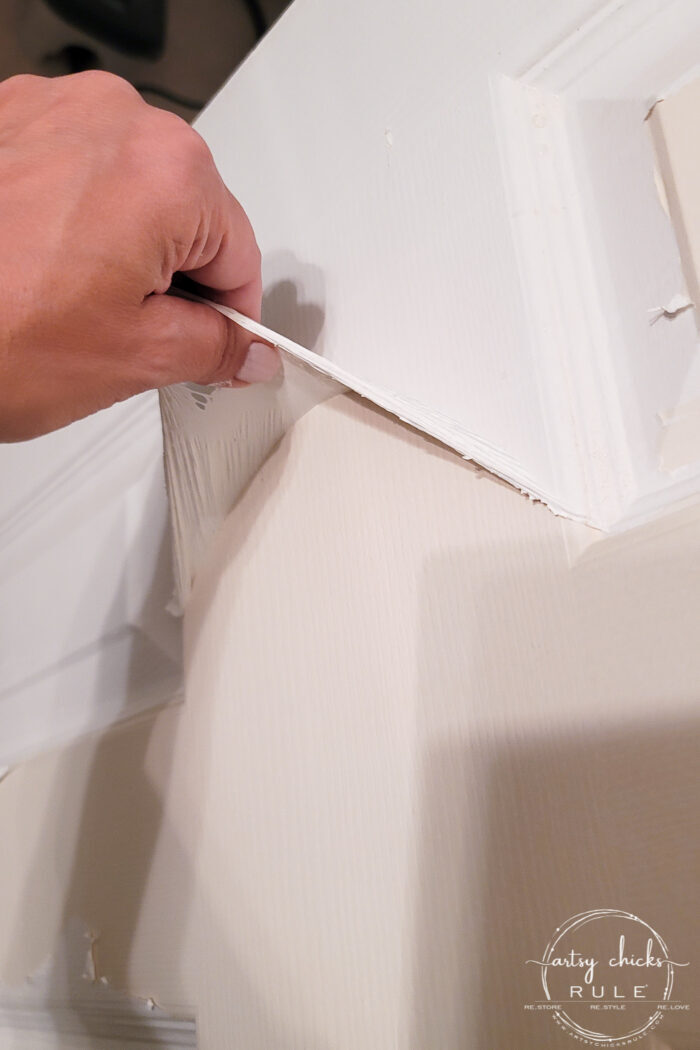
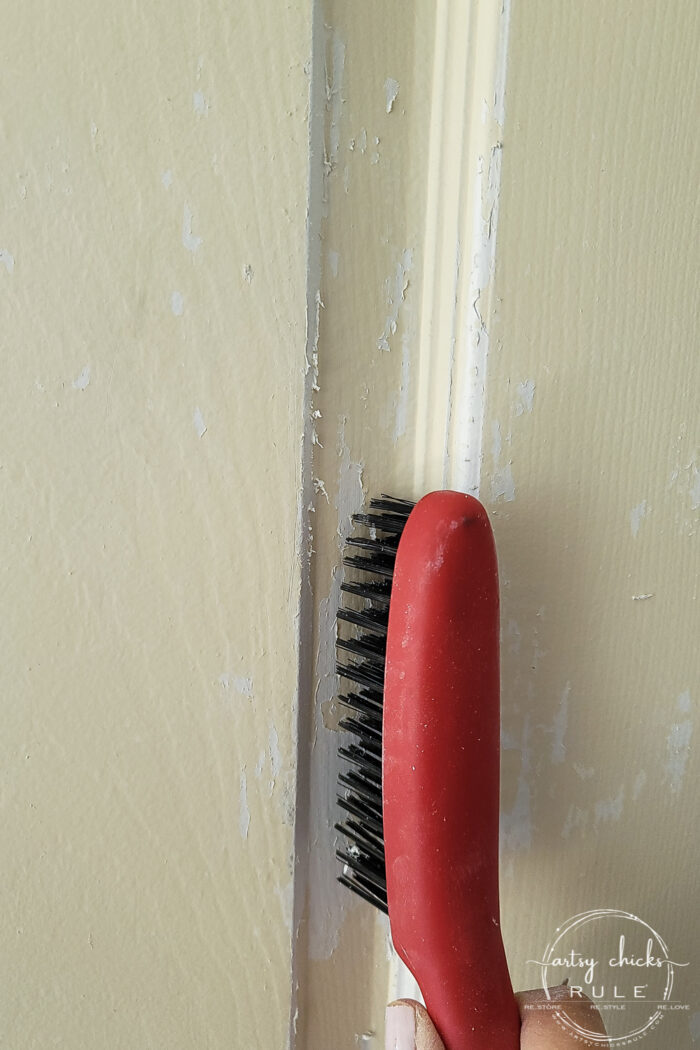
Some of the recessed areas like this were loose but didn’t come off in larger sheets like the big sections so that is where this wire brush comes in handy.
Simply “scrub” it in those areas or any other stubborn areas (after steaming) and the paint comes apart and falls to the ground.
Now…that is how it works with latex over oil-based paint.
Let me tell you about 2 doors that it didn’t work as well on.
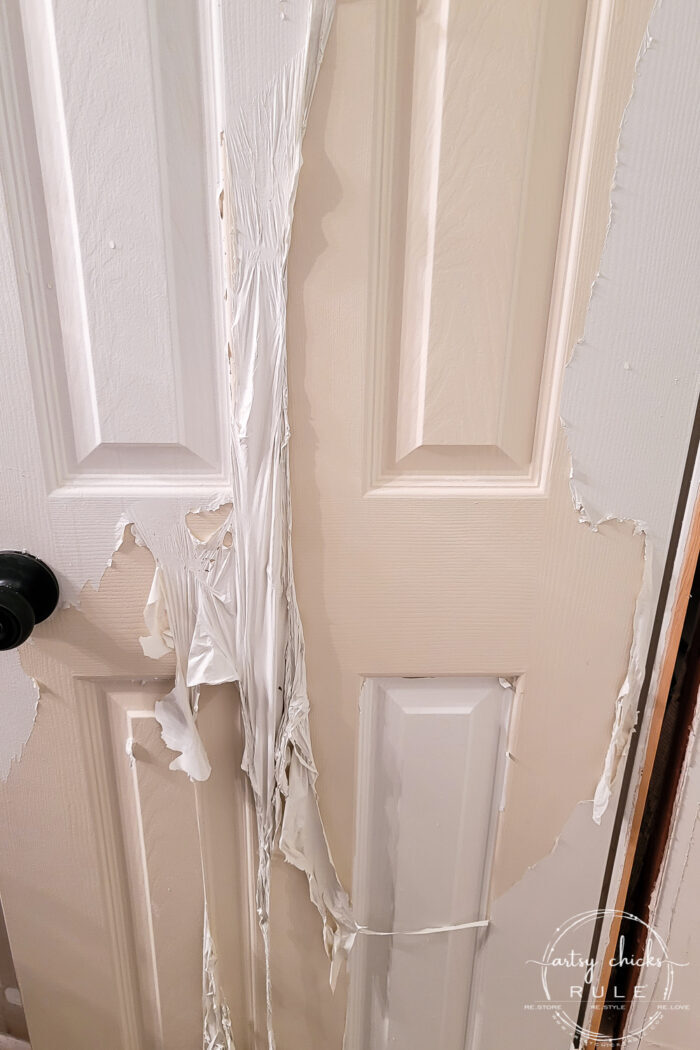
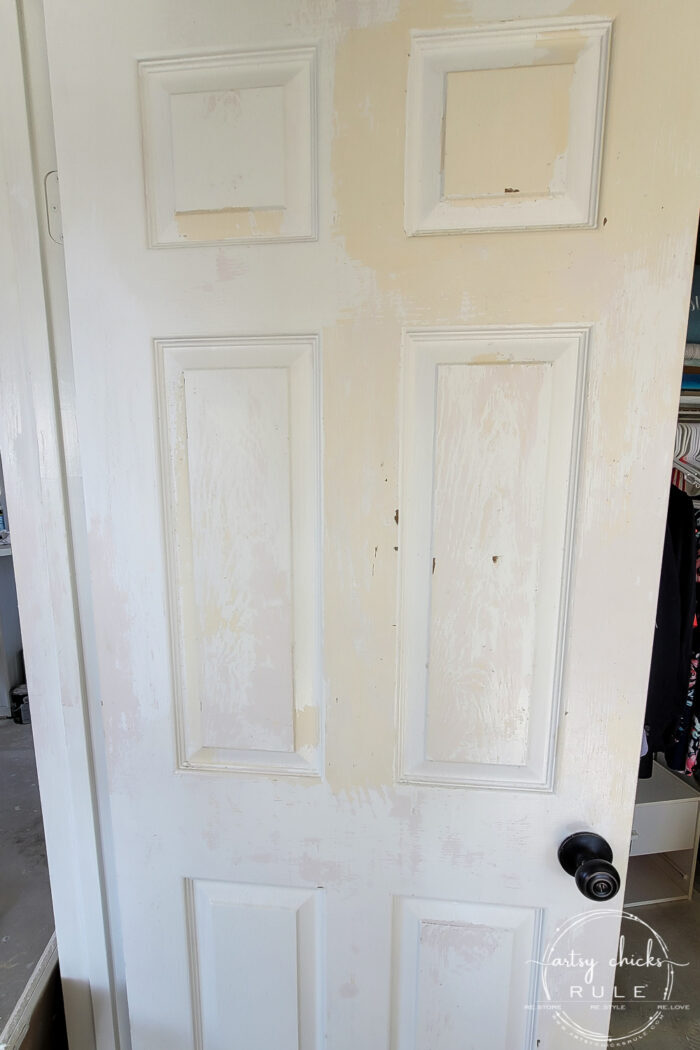
This one, which is the front side (shows in the living area) of the bedroom door. You can see the paint is not wanting to come off all over.
It appears that someone painted the front of this door lavender at some point, but only on this side. Well, the lavender paint is adhering to the original beige paint fairly well in some places and the white paint stuck to it pretty well too.
Same with the other door (the pocket door) that faces out to the living area.
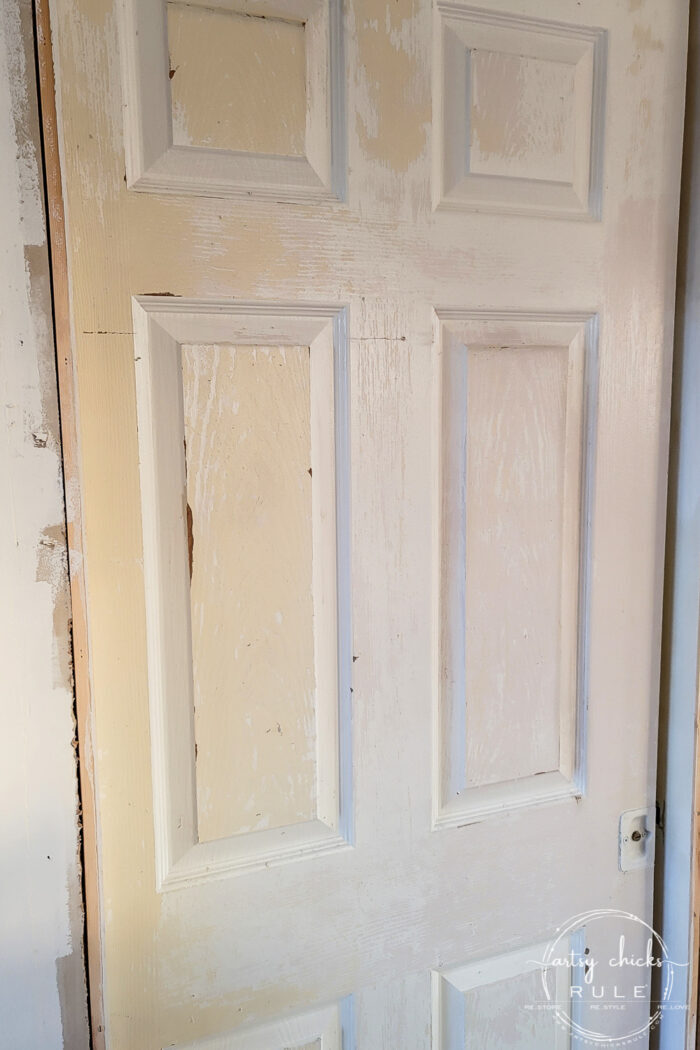
The pocket door also had the lavender paint, again, only on this side.
So…I removed what I could and left what didn’t want to come off.
Let me give a little disclaimer here…if all of my doors were acting like these 2 sides, I’d have quit! Ain’t nobody got time for that. lol
But really, I would have thrown in the towel. They were a bear and then they also required more sanding than the rest. So, nope! I would’ve bought new doors. But with that…it was do-able, and I did do it and now they look just fine so there’s that.
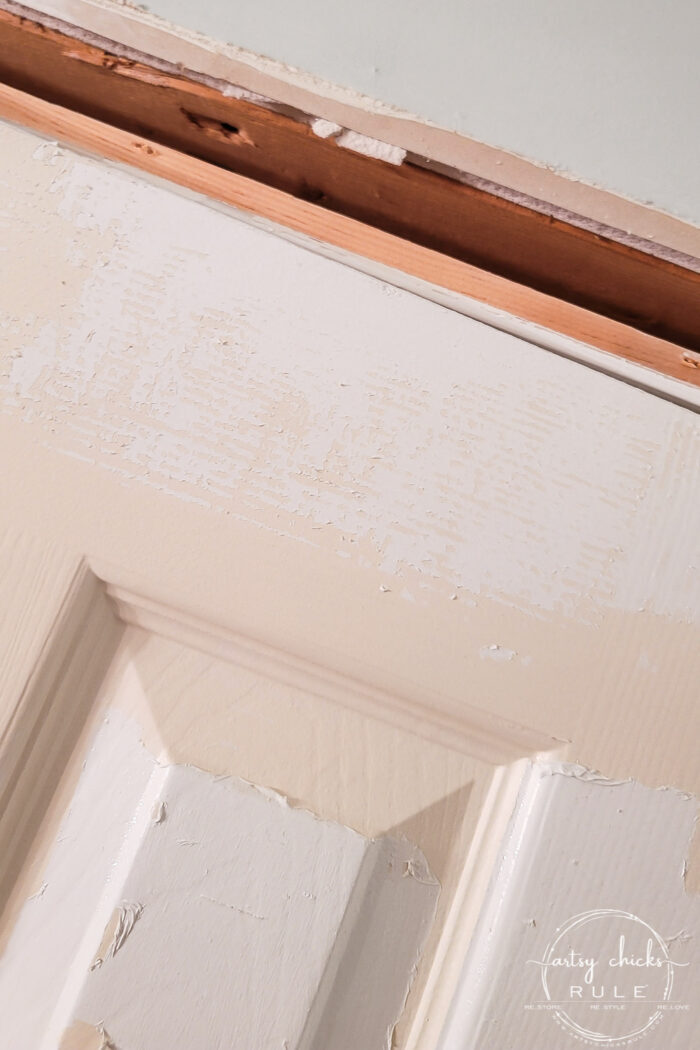
Remember, I also had to remove paint/prep/etc the door frames as well.
Thankfully, no baseboard or door casing though (the old was also peeling). It’s all getting replaced.
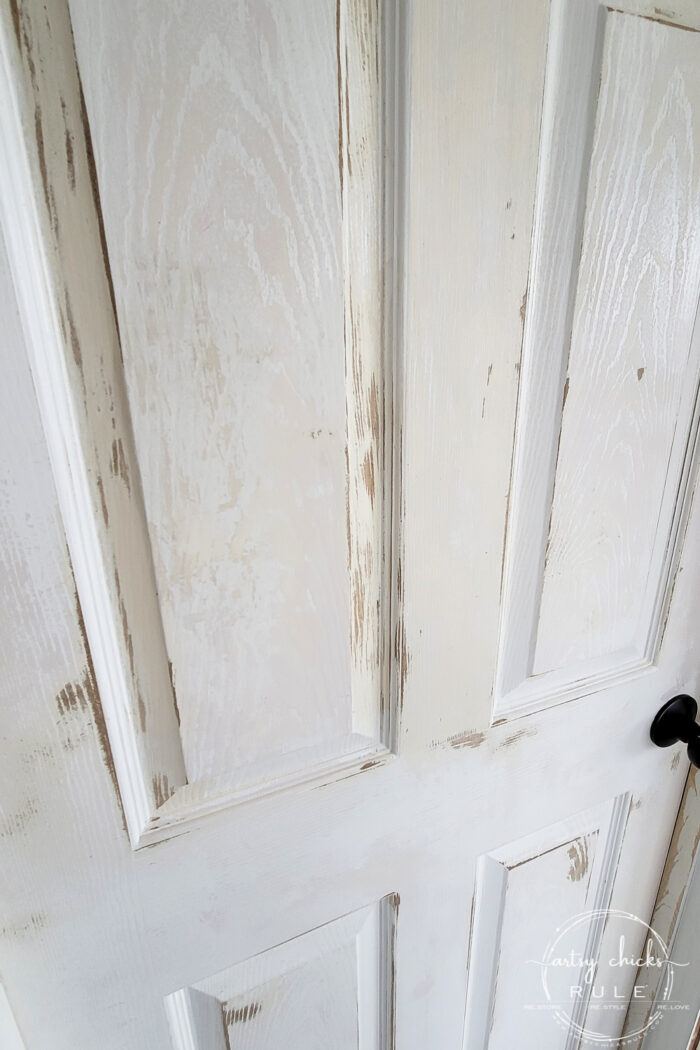
Okay, once you have all the paint off, or all that is coming off, now it’s time to prep for the new paint.
This is an important step because you don’t want to go through all this trouble only to have the paint peel right back off so make sure you prep well.
And use the right products to prime, etc.
I used my electric sander for the flat areas…
And the sanding block on the recessed areas.
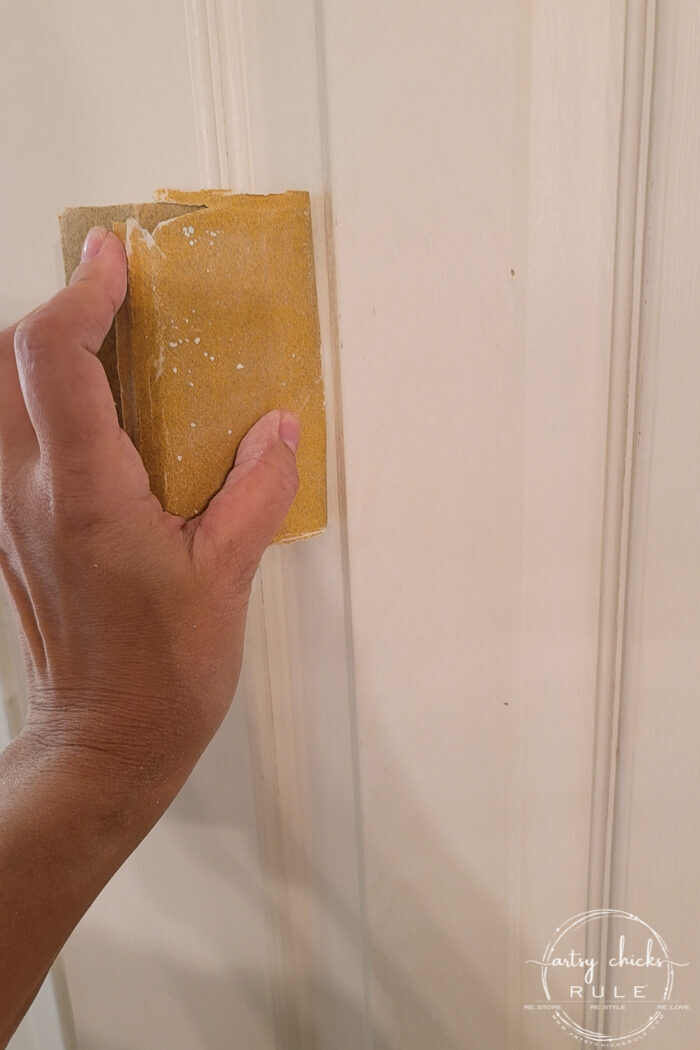
You are trying to accomplish several things here.
Smoothing out anything that was left behind and creating “tooth” for the primer and paint to adhere to.
Be very sure you remove all of the shine or you will potentially have the same problem again.
Wipe down all the doors before moving onto the next step…primer.
One of the “problem” doors sanded and ready for primer.
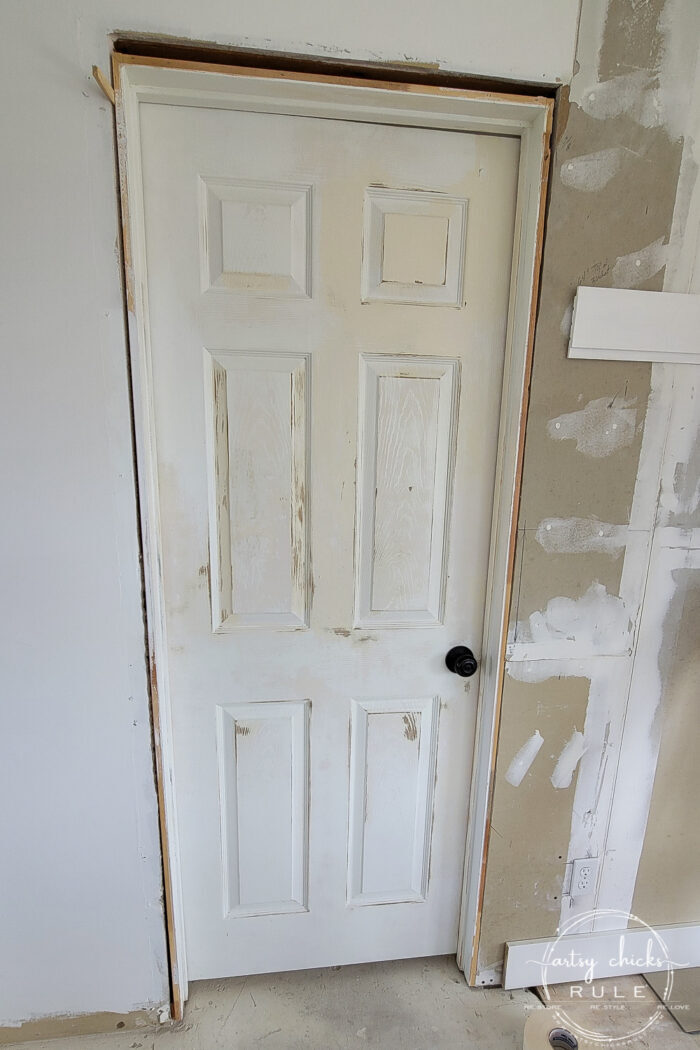
And painted with primer. (I’ll finish painting them after the flooring goes in)
Like new.
We do have some adjusting to do to the frames when we put the casing back up.
Oh…and sneak peek of the baseboard we are using (sort of a craftsman/coastal cottage feel)…and a little shiplap action above.
Paint is magic…and can also be a big ole pain in the butt too. haha But nothing that more paint (and a little elbow grease) can’t fix, right? Yep.
Okay, so what did I use for the primer?
I used Sherwin Williams Multi-Purpose Primer….only because I had it there in the condo from something else I used it for. I tested it out in several spots on the doors and it seemed to do the job so I went with it.
BUT ideally, I would’ve used something else, something a little more “heavy-duty” for this particular job.
Here are a few I would’ve considered instead:
- Kilz Adhesion Primer
- Gripper Primer
- Zinsser Extreme Adhesion Primer
- Sherwin Williams Extreme Bond Primer
Oil-based primer is an option too but I didn’t use that because I didn’t want the smell. But you can and then paint over with latex.
And what am I using for the trim and doors for finish paint?
Sherwin Williams Emerald Urethane Trim Enamel in Satin.
But there are many other paints you can use as this is just a personal preference.
I hope this post is helpful to you if you are dealing with a similar problem.
I know it won’t work in every situation but it’s worth a shot to try the steamer for any kind of peeling paint you might be having.
PIN it to save it!
Have a beautiful weekend, friends! Catch us over on Instagram again this weekend. We’ll be on condo remodel duty as usual! ;)
xoxo

Related Posts:


")
")

")
")


Wow, Nancy, that was an inspired solution to a very labor intensive fix!! I am thoroughly impressed. I take it the place is new enough to not have to test for lead paint. Very very sharp result!! I know you are thrilled.
Yes, it is not as old as that, but I meant to mention that in my post! Very important!! Thank you for the reminder, Christina. :) So happy it’s done!! xoxo
Wow what a chore! But also, what luck that you forgot your steamer and found that wallpaper remover! It does look kind of fun to peel it lol. And didn’t you have purple paint to contend with in your bedroom? Funny coincidence since that is an unusual color for doors or trim! And Happy Blogiversary!! Looking forward to our giveaway next week!! XOXO
Yes, we did!! Haha, so funny with the lavender/purple. It did leave me wondering what the rest of the living area was decorated and painted with at that time though. lol And yes, I’m looking forward to it too! xoxo
Well done! What a huge deal behind you now. That’s truly brilliant using the steamer. Glad it helped make it a tiny bit easier for you. Those doors are going to look amazing when finished.
Thank you, Michele!! Yes, it really worked well! :) xo
Oh my! I am so sorry you had to fight all those doors. Life sure isn’t like those Home Depot commercials where they make over a room in a weekend, is it? lol! Soon you will have the condo completely finished and the wretched lavender doors will be a faint memory. Good job!
Exactly right!! ha! Thank you though, thankfully only a couple was a bear. The others came off pretty well with the steamer, thank goodness! Thank you, Kimberly! xoxo
Nancy, you have more patience than I do! Wow. It looks as though your hard work paid off. Using the wallpaper steamer was a great tip! Your condo is shaping up. Thanks for sharing your tips and the steps you used.
I was running a little low, but I made it!! ;) We are finally starting to see the light at the end of the tunnel…I’m so happy! xoxo
Ug! Lots of sweat equity! Considering the other solution of replacing doors at a much higher cost seems like you came up with a win-win and didn’t break the bank! Gotta love when that happens! Keep up the good work and congrats on your 8 year anniversary!
Yes, lots!! But it really was worth it. It can get expensive doing all the reno at once! And thank you, Vicki!! xoxo
kind of fun, like picking a scab! I’ve only used a heat gun which also works well and something i already own. but good to know about the steam method too! have fun!
congratulations on your 8th year blogiversary! time flies, eh?
Yes!! lol Oh yes, the heat gun would probably work too! I didn’t think of that. The steam worked surprisingly well! And thank you, Gwen, yes it really does!! xo
I’ve heard of using a heat gun but the steamer really did the trick. When you’re finished, you need to have an admire your work party along with celebrating your 8th anniversary. Congrats on both! Have a great weekend.
I hadn’t heard about using a heat gun but the steamer did the job well! Yes, that sounds like a wonderful idea!! Thank you, Kathy, hope you had a wonderful weekend! xo
Wow, so proud of you! You really took ownership of the problem and found a great solution. Even with just primer the door looked really good.
Good job!
Aw, thanks so much, Mary! xoxo
What an awesome job you did. I will be doing something like this on one of my exterior doors. Thanks for the tips, and the wonderful step by step tutorial.
Oh yes, this worked so much better for me! Hope it does for you too! xo
Ohhhh, I can use a latex primer? I thought I had to use an oil based to keep the peeling from happening again. No? What paint did you use after primer?
Oh yes, absolutely, you can! Prep is always key. So sanding, removal of the deteriorating finish, non-compatible finish, peeling paint, etc, then using a good quality primer followed by a good quality paint. Sherwin Williams Emerald Urethane Trim Enamel. (there’s a link to it in the post if you want to read more about it)