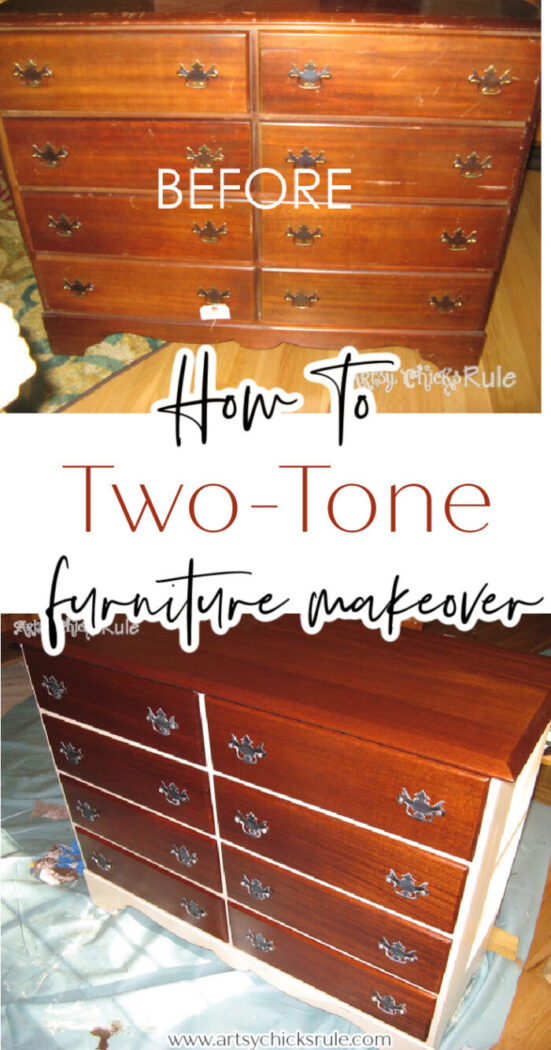
This two tone furniture makeover is the perfect solution to loving painted furniture but also wanting to see the wood! Best of both!
Hey there friends, today I’m jumping back into the time machine to share an oldie. I bet most of you have never seen this one! If you have seen it before (I’ll be shocked!) let me know in the comments. I’d love to know! It was one of my earliest posts written just a few months after starting my blog.
So with that, keep in mind when you view the photos. LOL I have come a long way in my photography. Lots of things I learned through blogging, that being one of them.
Bad photos or not, I want to give it a little love because it’s such a pretty piece.
OH! And hey, have you gone and entered my TEN YEAR BLOGIVERSARY yet??!! If not, get on over there and do that, it’s a good one! “10 Year Blogiverary Giveaway”
Two Tone Furniture Makeover
Thrifting for furniture all these years ago was so much fun! Don’t get me wrong, I still love it but darn it’s getting harder and harder to find those good deals, you know?
However, we do have things like Facebook Marketplace these days that we didn’t have back then. So maybe that makes up for it a bit?? Who knows.
Way back in the early days, I would sometimes venture “over the water”(bridge and bridge-tunnel) to Norfolk/VA Beach area to do thrift shopping once or twice a month.
I don’t do that anymore (who has the time?!) and we have quite a lot of them over here on my side of the water to shop.
I should really be saying “we” since I couldn’t do this without my awesome hubby.
Who happens to have a truck to haul all the great stuff back for me.
We really have a good ole time. It’s kinda like “date night”—>except its daytime.
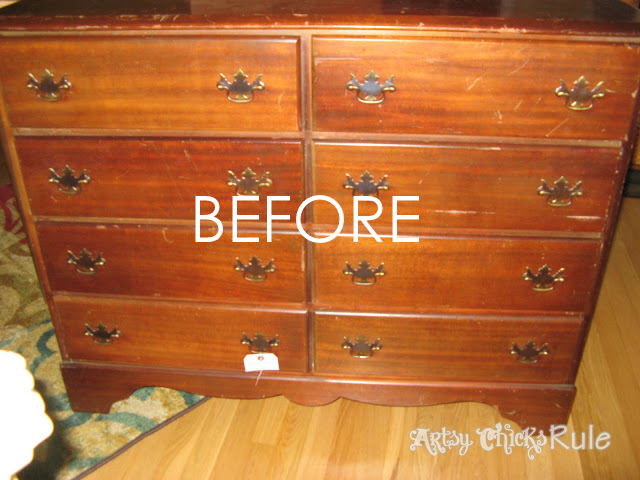
So on this particular visit, to the other side of the water, I found this great mahogany wooden dresser. I can find lots of oak and other wood varieties but not as many mahogany so it was a nice find.
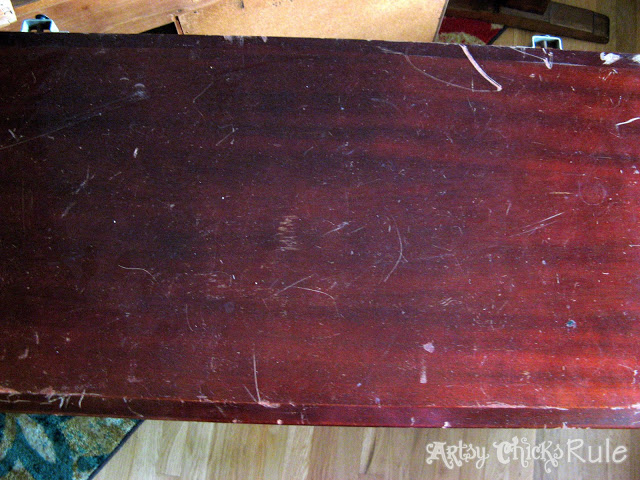
Kinda beat up but that’s to be expected.
Isn’t it pretty?
Of course, it didn’t look like this when we found it. No, but I knew it could.
Poor thing…. but how can you beat $35 for a solid wood chest of drawers this size? I mean really, any kind of solid wood furniture is a steal at that price.
Wood is so durable and I love that it can be refinished unlike laminate and such.
I sure wish I could find deals like that these days. Sigh.
And I don’t mind a beat-up dresser ever. All it needs is a little work and love, and it can be so amazing. Actually, I love the transformation.
So much fun.
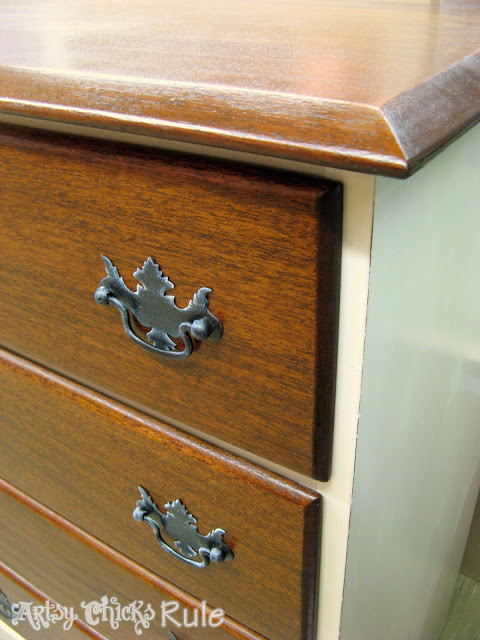
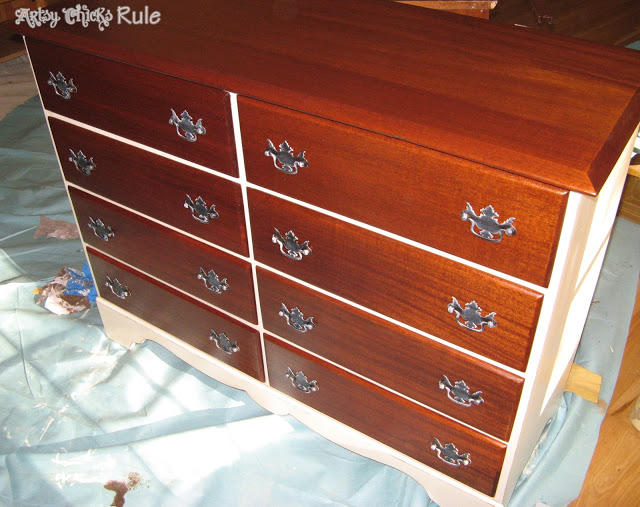
I love paint. You guys know that. I had originally thought I’d just paint the whole thing but no, I decided I wanted some of that pretty wood to show.
So two tone furniture makeover for this pretty dresser became instead.
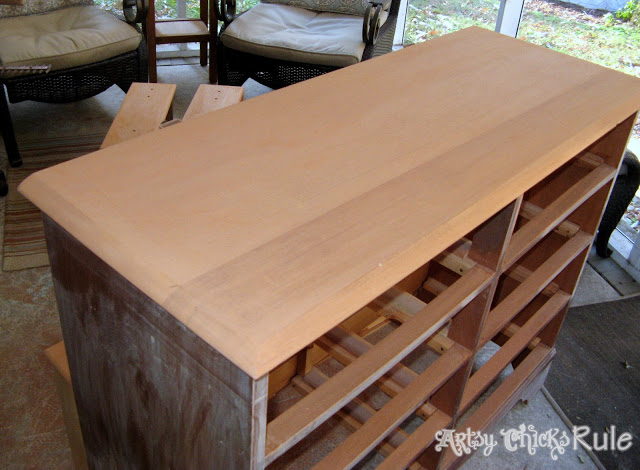
And this is nothing new, I hated sanding back then and I still hate sanding! LOL Boo!
But sometimes it’s really just necessary. I do LOVE what sanding reveals though. That’s the absolute best!
I mean really. Just look…at…that…
Look at those drawer fronts and the top. So so good, right?
It’s beautiful and I’ve done nothing to it except sand.
A brand new start for this wonderful dresser!
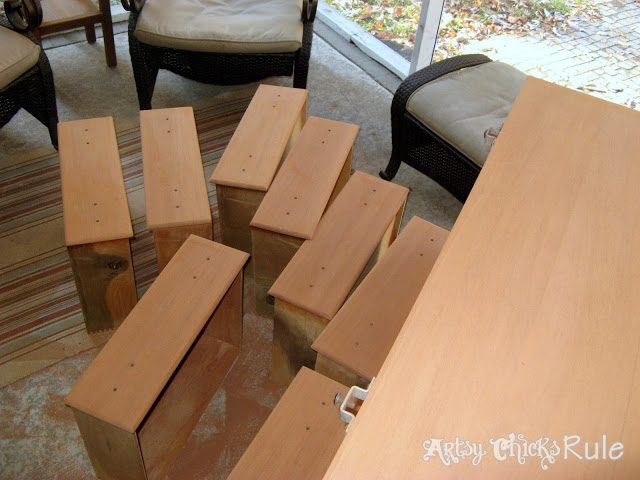
And yep, I was sanding on my screened porch but that was due for a re-do too. (And it’s had TWO since this post…want to see the latest?? Check it out here…”Screened Porch Refresh“)
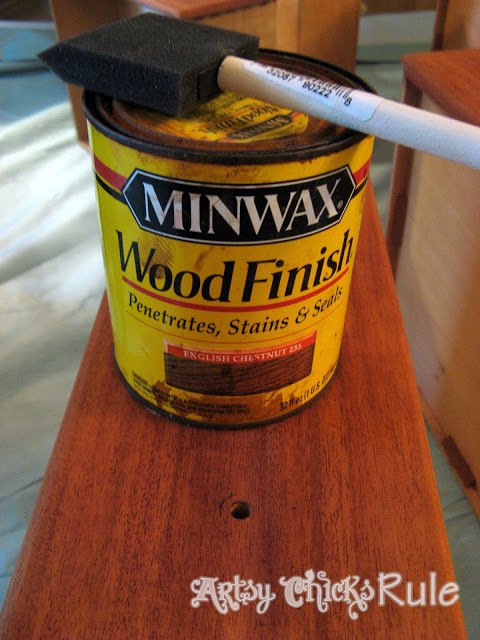
Be sure to clean all the dust away after sanding. You can use a tack cloth or something similar.
Then use some Pre-Stain Wood Conditioner before applying any stain.
I chose English Chestnut for this piece.
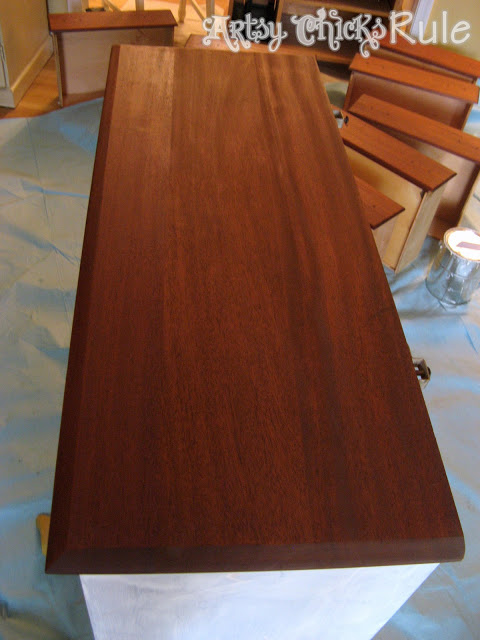
I don’t choose rich dark tones like this as much these days.
Wow!! That color is so rich. So rich looking. Did I say rich?? haha
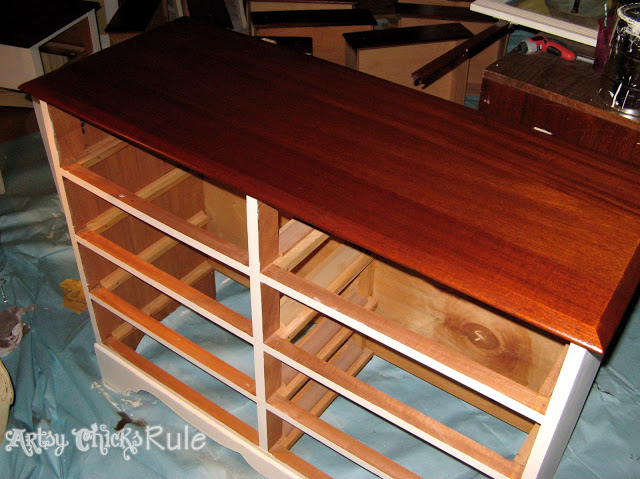
For the prep on the rest of the dresser, I lightly sanded and added a coat of primer with Sherwin Williams Adhesion Primer.
I added a coat of paint I mixed over the top of that which was also Sherwin Williams. I was using Chalk Paint during this time but also still using latex for some of my makeovers. I never use latex paint for furniture makeovers anymore though.
As y’all know, I use Fusion Mineral Paint a lot now and love it! I also sell it in my shop, here.
The color I mixed up for the side and front exterior was a creamy, off-white shade.
I added several coats of oil-based MinWax Wipe-On Poly in Satin to seal it.
I distressed the paint slightly to bring out the details and added a bit of glaze.
I put a coat of water-based Minwax Polycrylic (also in Satin) over the painted finish.
You can always use wax too if you like that. I don’t use that often these days.
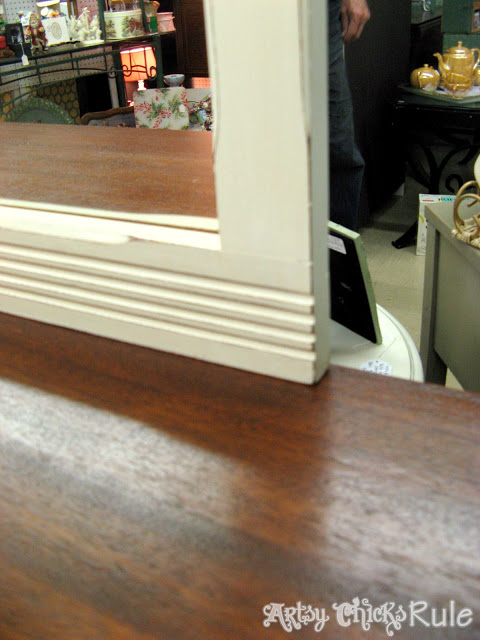
Look at that gorgeous smooth finish. And look at all that pretty wood.
The hardware got a coat of Oil Rubbed Bronze spray paint and a bit of dry brushing with the same paint used on the base.
Want to know more about dry brushing?? I’ve created a video for you, you can watch it right here… “How To Dry Brush”
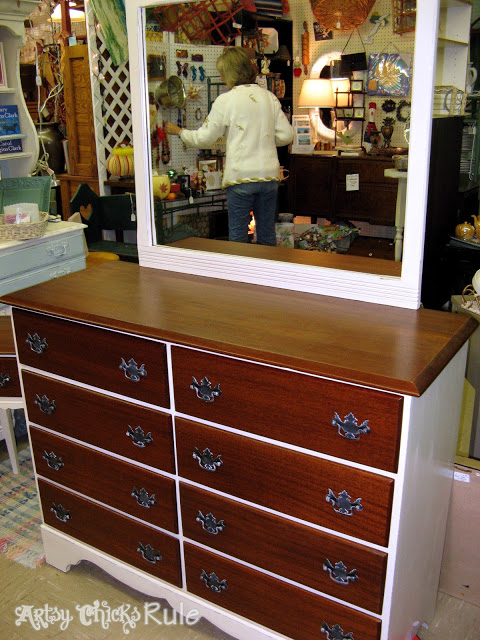
Here it is in the shop I used to have a small space in. I no longer have that and haven’t for many, many years.
I also painted the mirror surround with the same color paint.
It had great detail and I just love how it was brought out when I distressed it.
Too bad there weren’t two nightstands to match. Oh well!
I would have loved to have taken better pictures but I was in a hurry to get this one to the shop back then.
It’s too bad I don’t have pretty staged photos of this one. I didn’t really know to do that or how important it was.
I still had much to learn!
This was one of my more labor-intensive projects, with the sanding and all, but it was worth it.
It’s actually pretty much always worth it no matter what. Sanding just makes everything new again.
It brings back the beauty of that gorgeous wood furniture.
And with doing a two tone furniture makeover, you get the best of both worlds!
PIN it to save it!!
I will always love my paint though. But I do find that I am leaning more toward wood finishes these days. It just really adds warmth to a room.
If I can refinish a piece, I will do that instead. Unfortunately, a lot of the wood pieces I find are damaged in a way that only painting will work.
How about you?
Have a wonderful weekend!!
xo
Don't Miss a Thing!! Plus Get My FREE eBook "Creating Fabulous Finishes"!
Nancy, this is a great one from your archives. I had never seen it. Funny how blog pics change in ten years, right? I think it’s awesome “keeping it real!” We were all very new at it once.
Though I adore pretty stages “after” pics – sometimes just the grit and grind and how-tos work just fine!
My daughter did something similar to one of my mom’s old Ethan Allen dressers for her little girls room – loves wood but wanted to bring in some light white to match all the princess pink in her bedroom. I was just babysitting yesterday and really looked at it again, so it is fresh on my mind. ♥
This popped up in today’s emails just in time for me. (No I did not see it years ago.)
I just curb shopped a small but very heavy wood living room side table with a basket drawer.
Fab piece but I wanted to paint the top since it is beyond help IMO. Think rest can be cleaned and freshened. Was planning to look for some paint and natural wood combo inspirations and this one is a great start!
I didn’t see this previously — but WOW, what I missed!! That is a beautiful piece!! You did a great job!! I now KNOW what to do with a piece of my Mom’s furniture that I just don’t like as is. THANK YOU!!
Don't Miss a Thing! Plus,Get My FREE ebook,"Creating Fabulous Finishes"!
Get My FREE ebook Now!
Want to be inspired, learn new skills, discover all the tricks to furniture makeovers, creating new out of the old and more?
You'll also receive my FREE ebook "Creating Fabulous Finishes" PLUS access to my private Printables Resource Library, too!
Sign up to get the Weekly Newsletter! Our emails include an unsubscribe link and you may opt-out at any time. Your information will *never* be shared or sold to a 3rd party.
Don't Miss a Thing! Plus,Get My FREE ebook,"Creating Fabulous Finishes"!
Don't Miss a Thing!! Plus Get My FREE eBook "Creating Fabulous Finishes"!


")

")

")
")


Wow!
Thanks, Willie!
Nancy, this is a great one from your archives. I had never seen it. Funny how blog pics change in ten years, right? I think it’s awesome “keeping it real!” We were all very new at it once.
Though I adore pretty stages “after” pics – sometimes just the grit and grind and how-tos work just fine!
My daughter did something similar to one of my mom’s old Ethan Allen dressers for her little girls room – loves wood but wanted to bring in some light white to match all the princess pink in her bedroom. I was just babysitting yesterday and really looked at it again, so it is fresh on my mind. ♥
Yes, isn’t it?! I’ve learned so much since then! Oh, I bet it’s just beautiful! It sure sounds beautiful! :) xoxo
Beautiful! I refinished the same type of dresser but ended up painting and stenciling. Wish now I had done the 2 tone method after sanding.
Thank you, Barbara! Painting and stenciling sound pretty too! xo
Beautiful. Amazing that beautiful wood underneath. Love the stain and paint color choices.
Isn’t that the best? I hate sanding but I sure do love the “reveal” of pretty raw wood underneath. Thanks, Debra. :) xo
This popped up in today’s emails just in time for me. (No I did not see it years ago.)
I just curb shopped a small but very heavy wood living room side table with a basket drawer.
Fab piece but I wanted to paint the top since it is beyond help IMO. Think rest can be cleaned and freshened. Was planning to look for some paint and natural wood combo inspirations and this one is a great start!
Thank you for your timing ;)
Oh that’s perfect, so glad!! :) xo
I didn’t see this previously — but WOW, what I missed!! That is a beautiful piece!! You did a great job!! I now KNOW what to do with a piece of my Mom’s furniture that I just don’t like as is. THANK YOU!!
Thanks so much, Marti! And that’s wonderful, so glad!!! :) xoxo