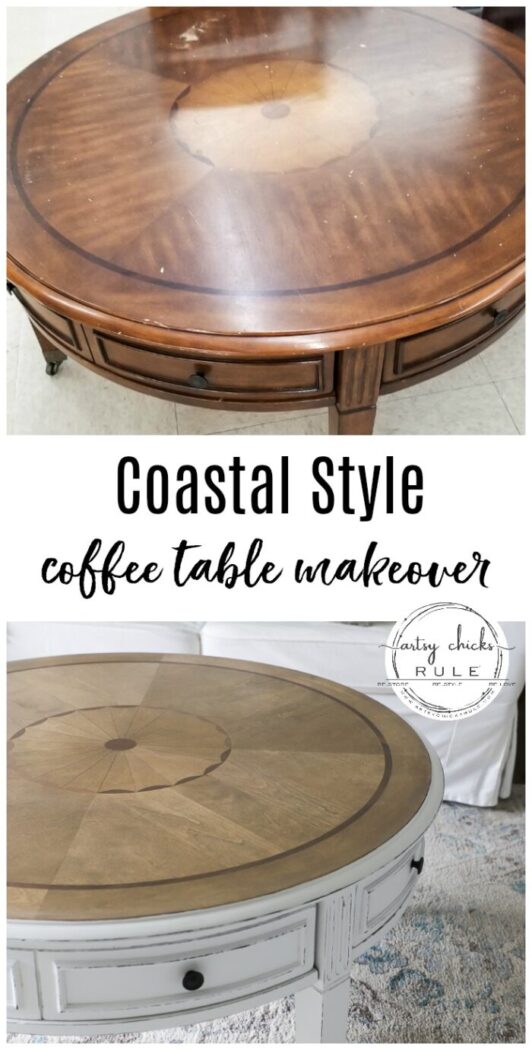
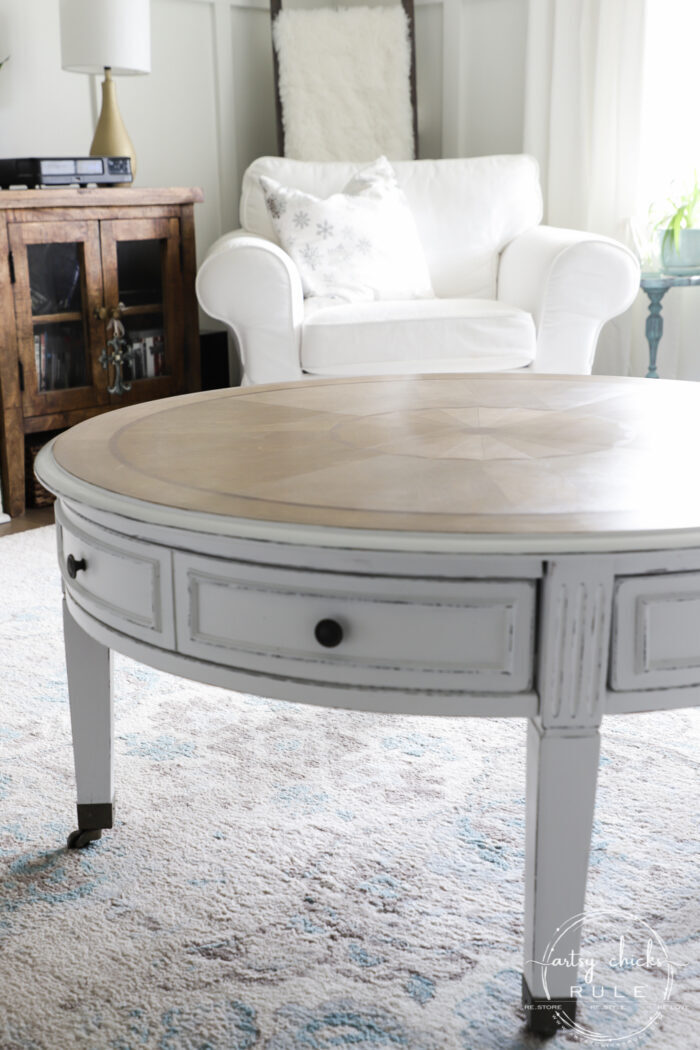
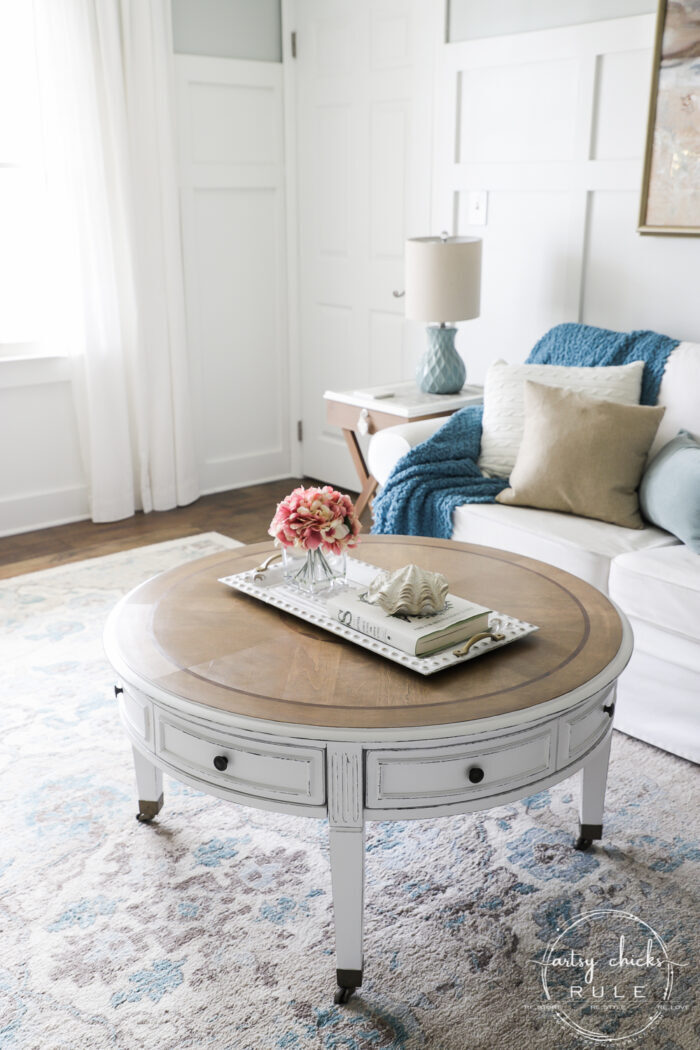
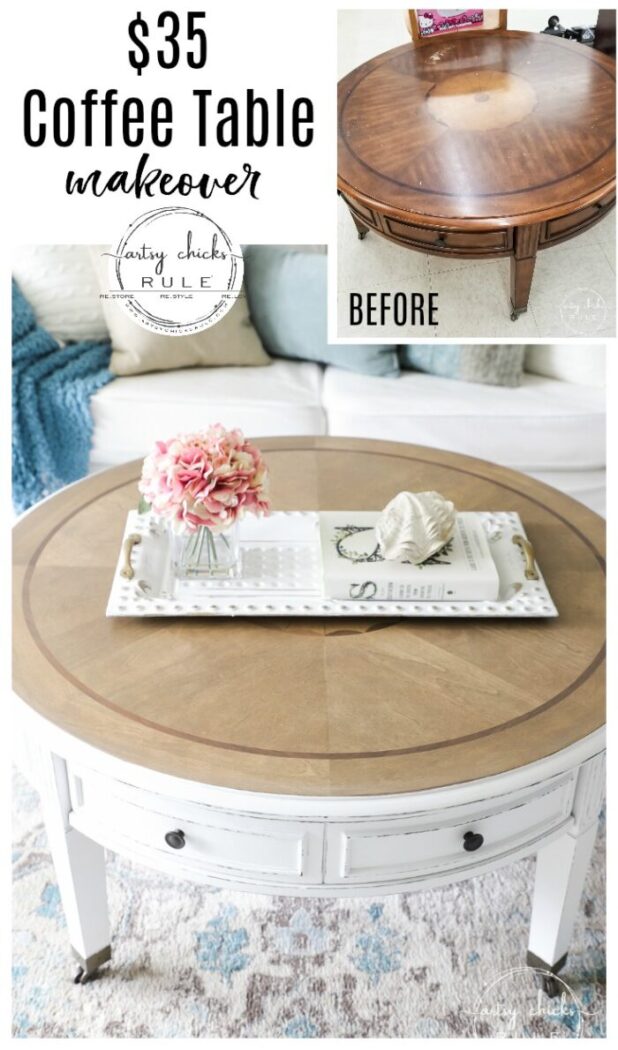
Budget decorating at its best! Can’t beat a $35 thrift store find turned coastal style coffee table. A little paint, stain and poly is all you need.
Hey, hey, friends! Guess what day it is??
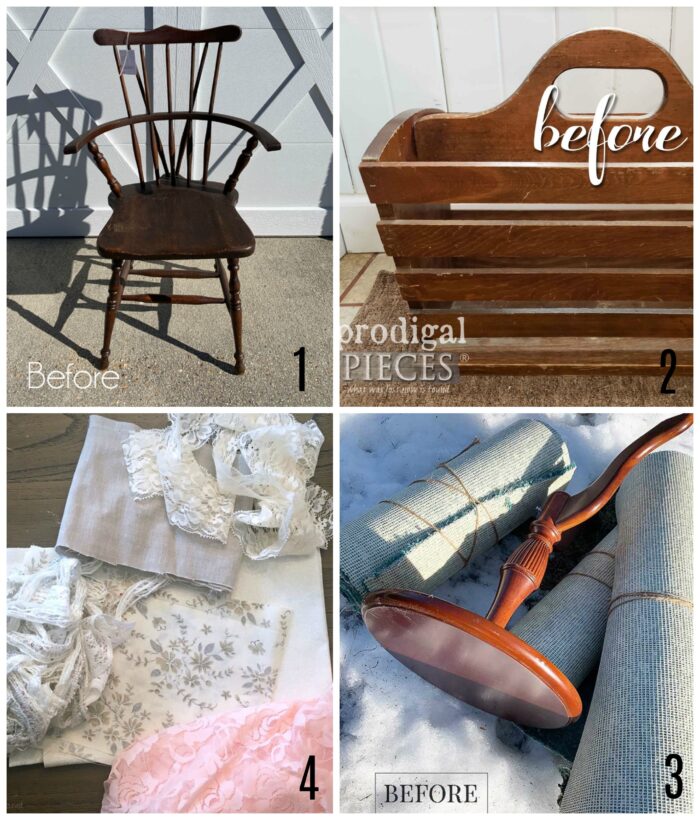
Trash to treasure transformation Tuesday! Yippee! My favorite day of the month. :)
If you are new around here, some friends and I get together every second Tuesday of the month to share our “trash” we’ve turned into treasures.
And we have some news, as I mentioned last month, Lauren from Bless’er House has decided to leave the group to focus on other areas of her blog, etc. We were sad to see her go but we are excited to welcome Denise from Salvaged Inspirations to our little group. She does ahhhmazing furniture makeovers, if you’ve never seen or heard of her, you will be in for a treat!
So follow along and be sure to scroll all the way to the bottom to catch everyone’s makeovers today.
Also, if you missed my post on Sunday, you need to hop on over there right now before you go any further. Why?? Because I’m doing a giveaway and you need to go enter to win! I’m giving away my most recent makeover here on the blog and a little something else. ;) Go on over and see >>> here.
Coastal Style Coffee Table Makeover
I am finally sharing that coffee table I’ve been teasing you with pics over in my Instagram stories. It was a little bit of a bear but I finally got her done! lol
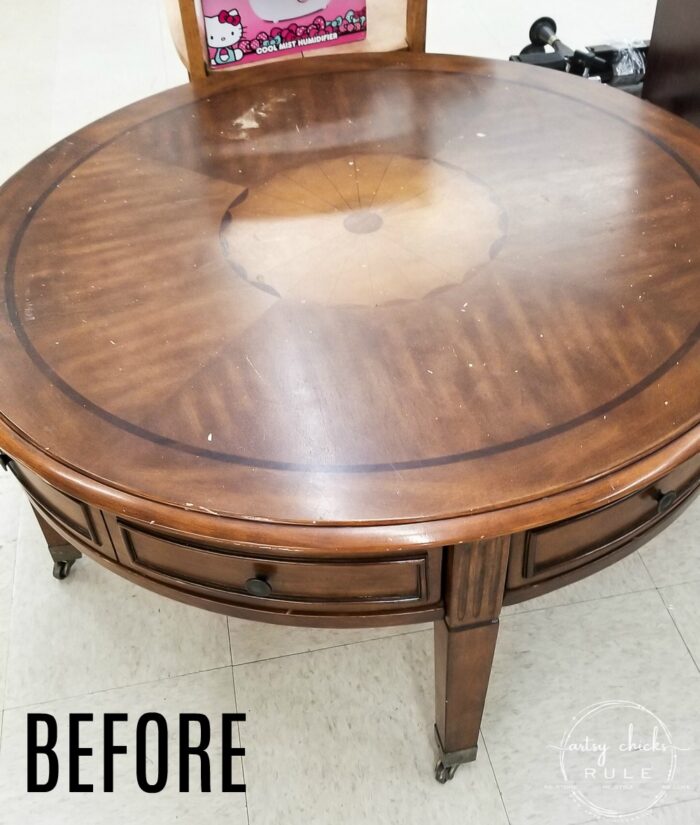
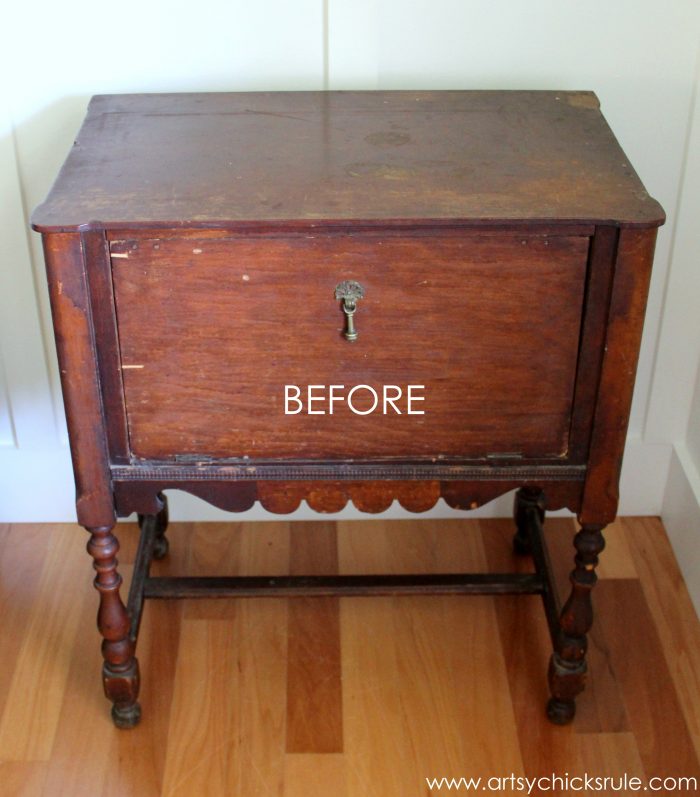
I found this somewhat beat up coffee table at the thrift store a while back. It was around $35, which is a great price considering solid wood, etc.
And it looked like this…
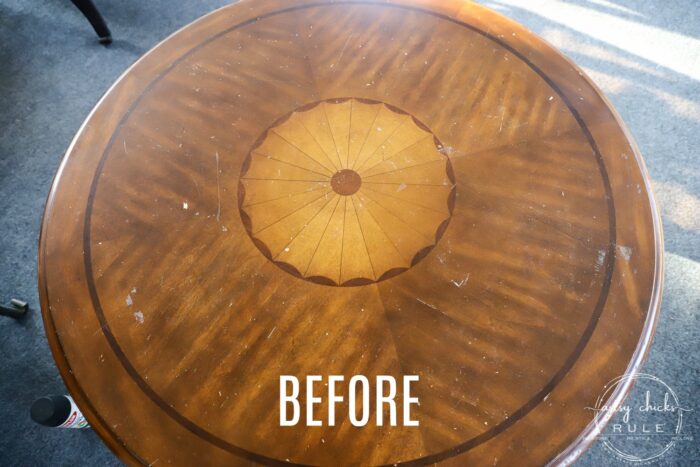
And a closer look at the top…
All kinds of chips in the finish and you can’t really even see the wood grain. Which is why my immediate thought was… “ohhh, paint it and put a big ole compass rose right there in the middle!” Yes!
But that’s not how it turned out. lol
MATERIALS LIST
Citristrip or similar (I don’t like the new formula)
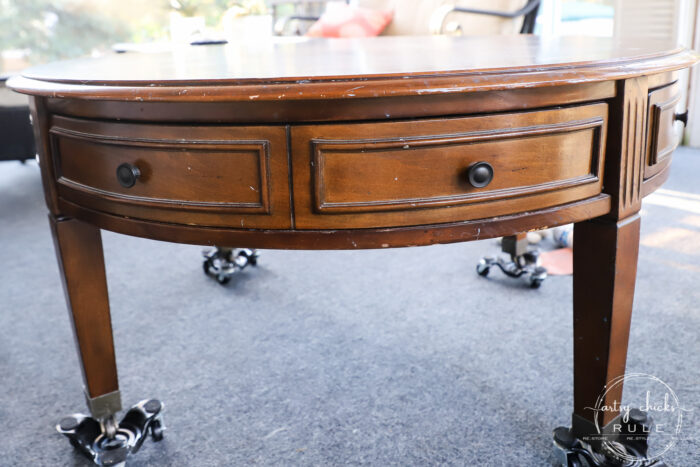
Here’s a close up of the side just to get an idea of where we started.
Wait til you hear all the things this top went through in my creative process. haha
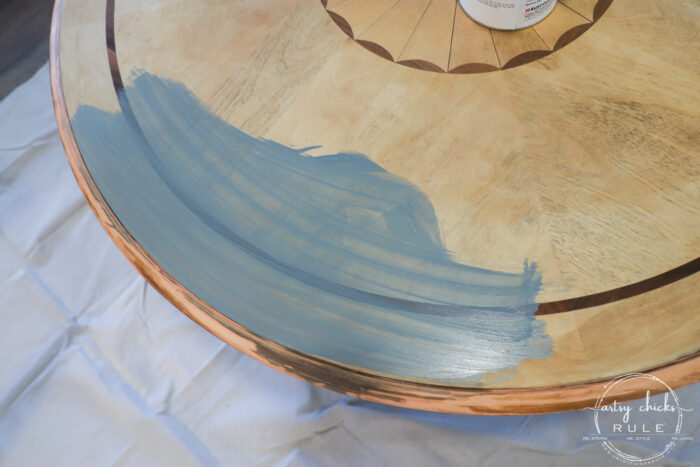
I actually started out by painting half of the top white. Then changed my mind.
So I got a wet rag and removed the paint quickly.
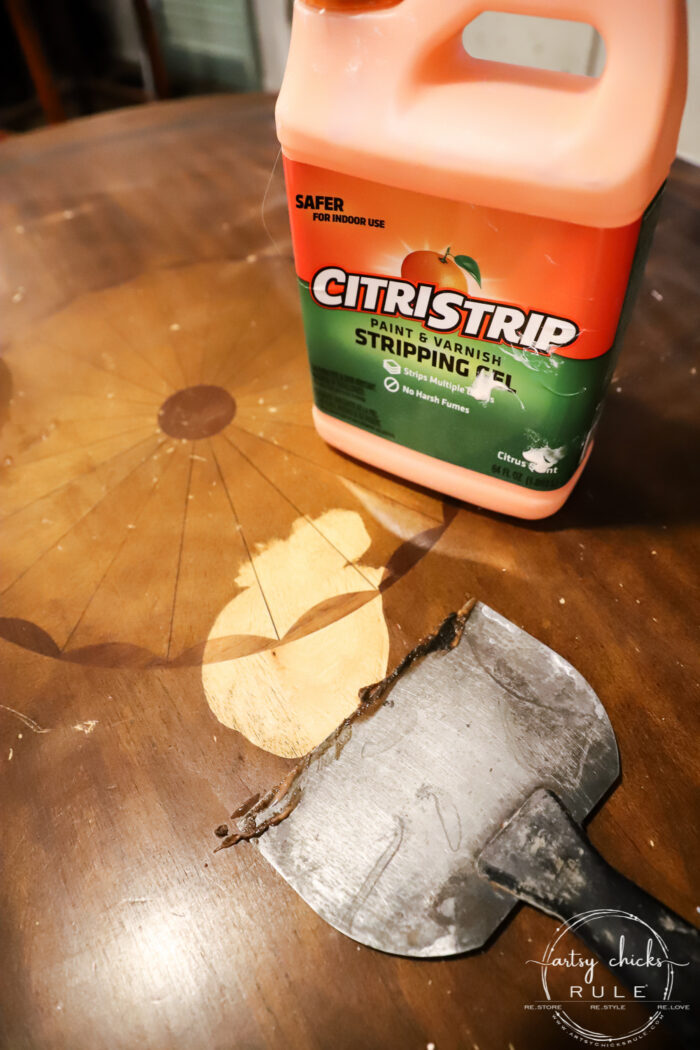
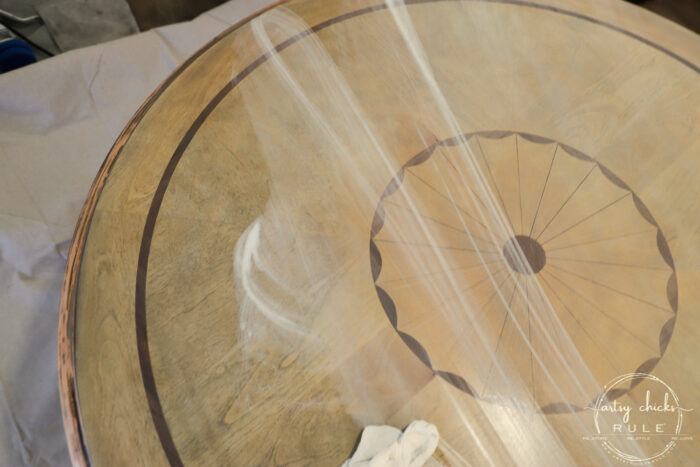
I decided I wanted to try to save that pretty wood inlay after all but I wasn’t sure what all was under there. Or if the wood inlay was real.
So I pulled out an old bottle of my favorite Citristrip and got to work testing out what’s underneath that old, dark finish.
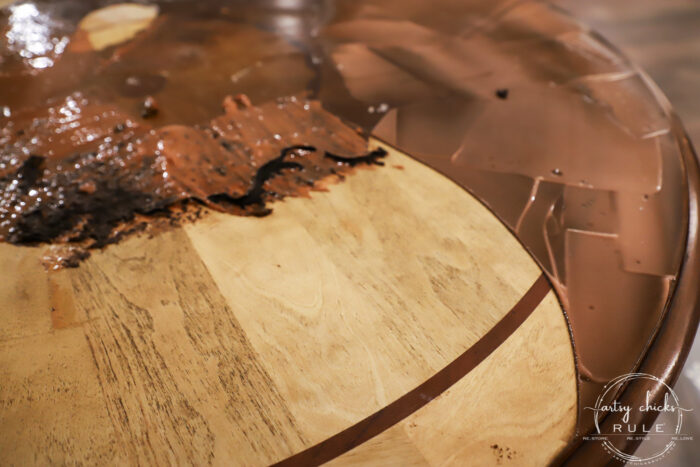
And like a charm!! My trusty ole Citristrip does the job, and does it well, without a lot of stink or chemicals.
Just look at that gorgeous wood under there. Wow.
Such a shame it was covered up in that old, dark finish.
Want to see some of these projects in “live” time? Hop on over and follow along with me on INSTAGRAM. I’m always sharing in my stories as I’m doing projects, finding new furniture, fun finds….just all the day to day behind the scenes.
Then came the second bump in the road. I didn’t quite have enough Citristrip left in my bottle to finish up well so I went and bought more.
Sadly, apparently, they have changed the formula. And…it doesn’t look the same, work the same or smell the same.
It used to be more like orange pudding in texture, now it is an orange gel.
It used to smell more like citrus, now it smells like chemicals.
And it used to actually work really well, now not so much.
I’m pretty unhappy about it and have no idea what I’ll use now but it won’t be this, I returned it.
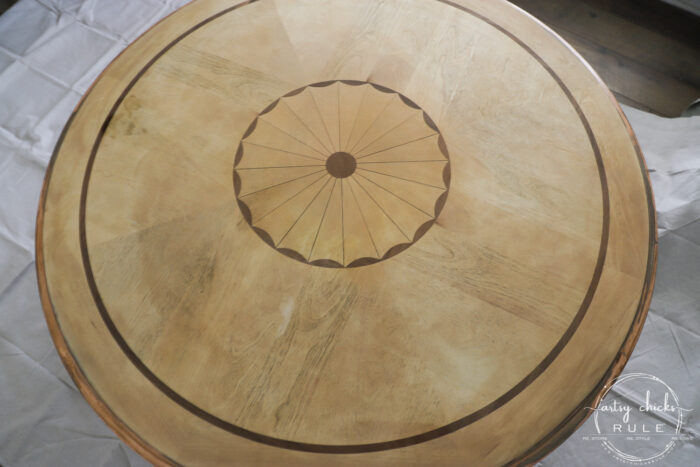
Anyway, I did manage to get the entire top off and most of the edges(the rim around the top section) with my sander.
But…boo…
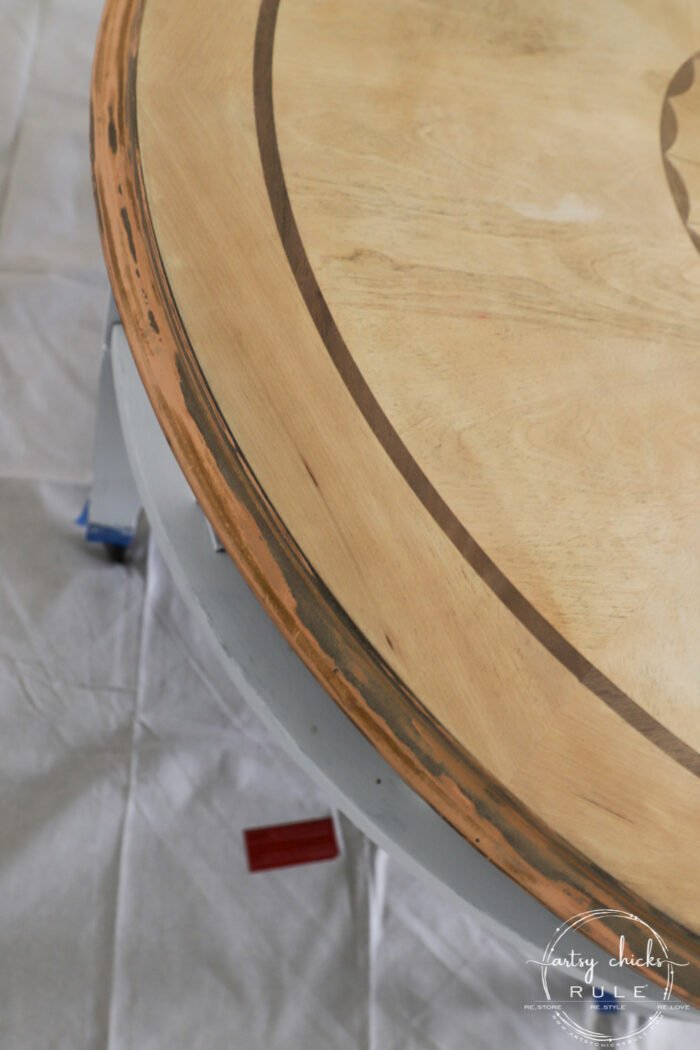
The darn edge isn’t wood like the rest (it was like a pressboard wood under there). Boohoo!! So that would have to get painted with the rest of the base.
Only the very top would get stained.
I decided to try out a water-based stain and use that instead of regular oil-based. That was all well and good but I did not like the color (which, by the way, was the only color on the chart that I was really liking for this project)
It looks really green in the photo but in actuality, it wasn’t quite that green. However, it was more green than I wanted.
I started to rub it in and no, that was not right at all. So I quickly wiped it off and gave it another quick run with my sander.
I did end up using that stain on another project in my haul though. So stay tuned.
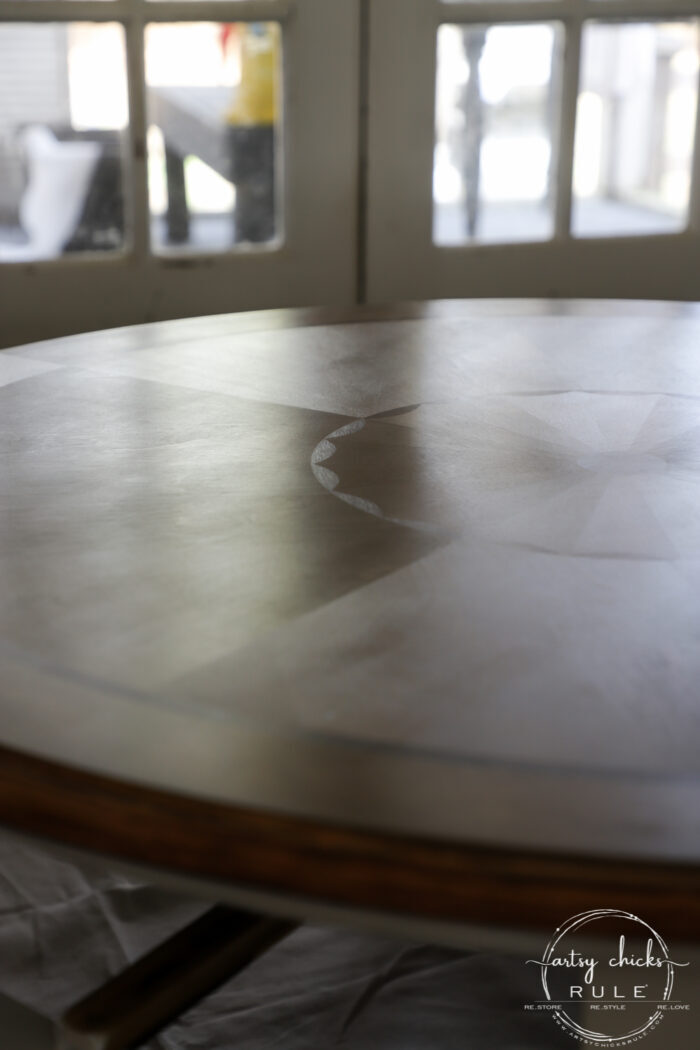
Then I thought, well, I’ll just whitewash it. Nope, I wasn’t loving that either! haha
So I took a wet rag and washed that off too.
I let it dry overnight and began again.
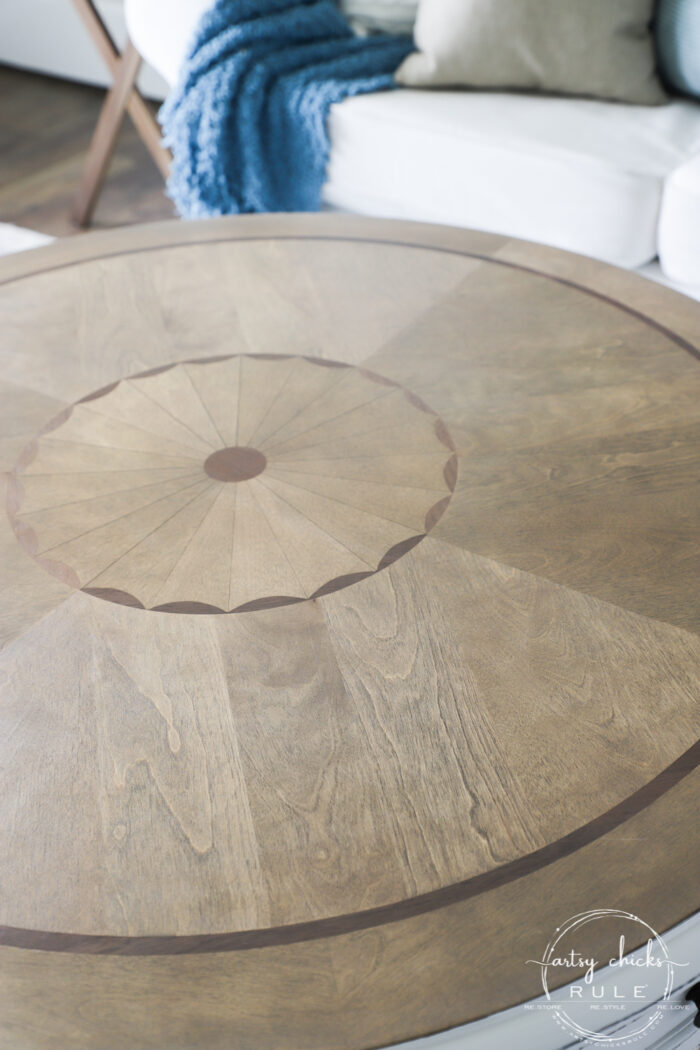
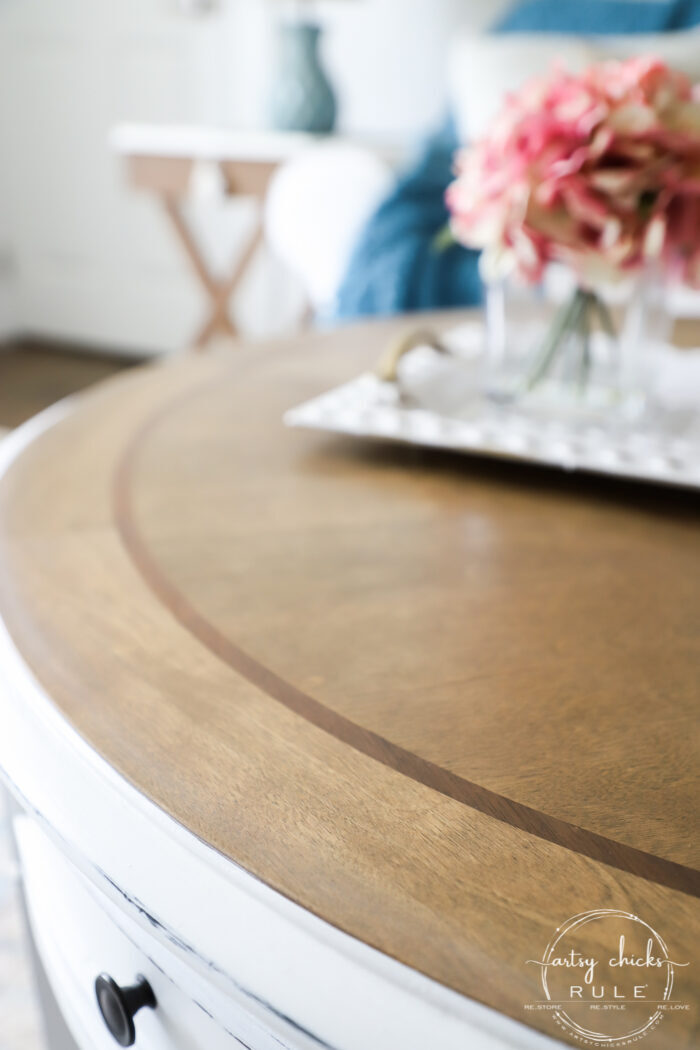
I started with a pre-stain wood conditioner then applied Antique Walnut Gel Stain. I didn’t really want to make it dark, but I wanted to change the tone and give it a sort of beach cottage look. (not orange-toned wood) So I wiped that on and wiped it back well. It wasn’t exactly how I envisioned it so I pulled out another stain, (Minwax Classic Gray) and put that over top, and wiped away the excess. (the same stain I used on this Aubusson Blue dresser top)
Yes!
That is what I envisioned. Finally.
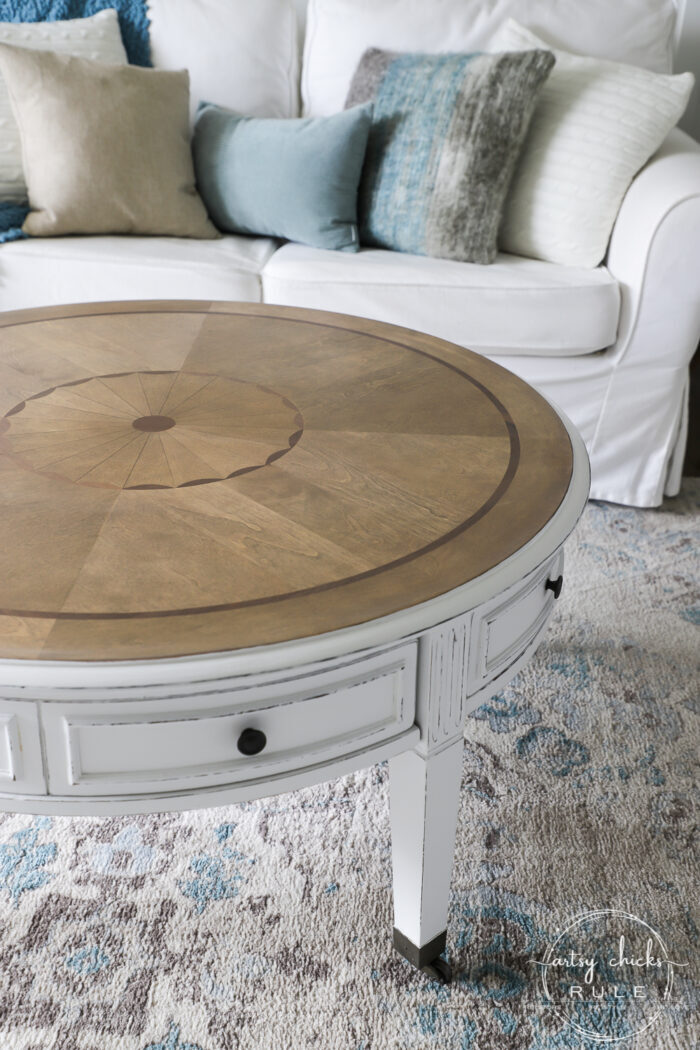
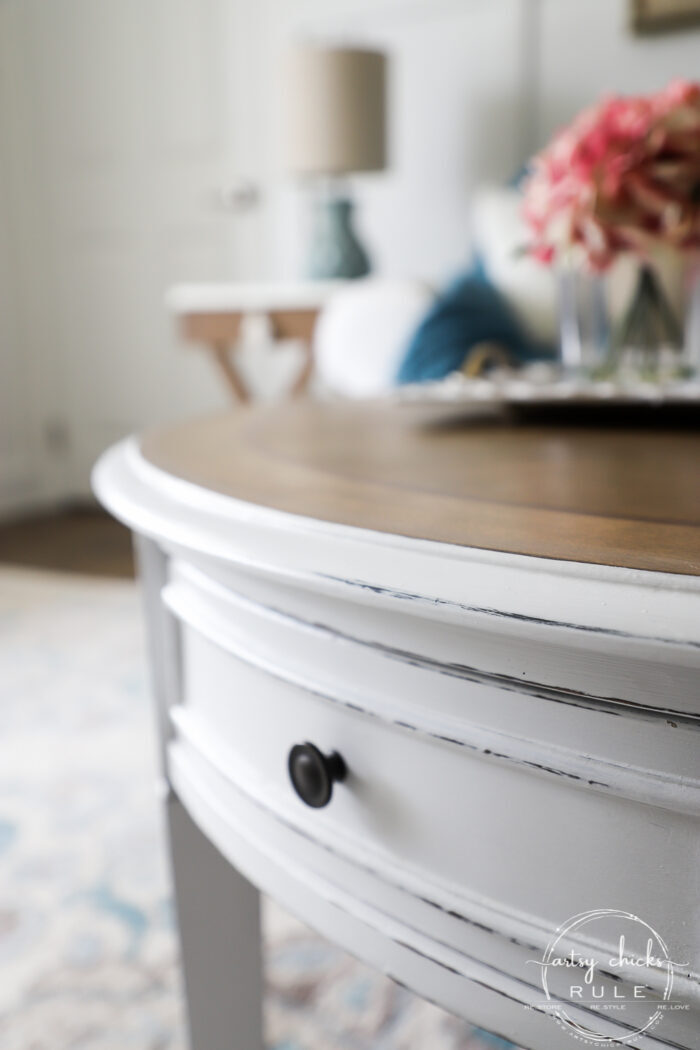
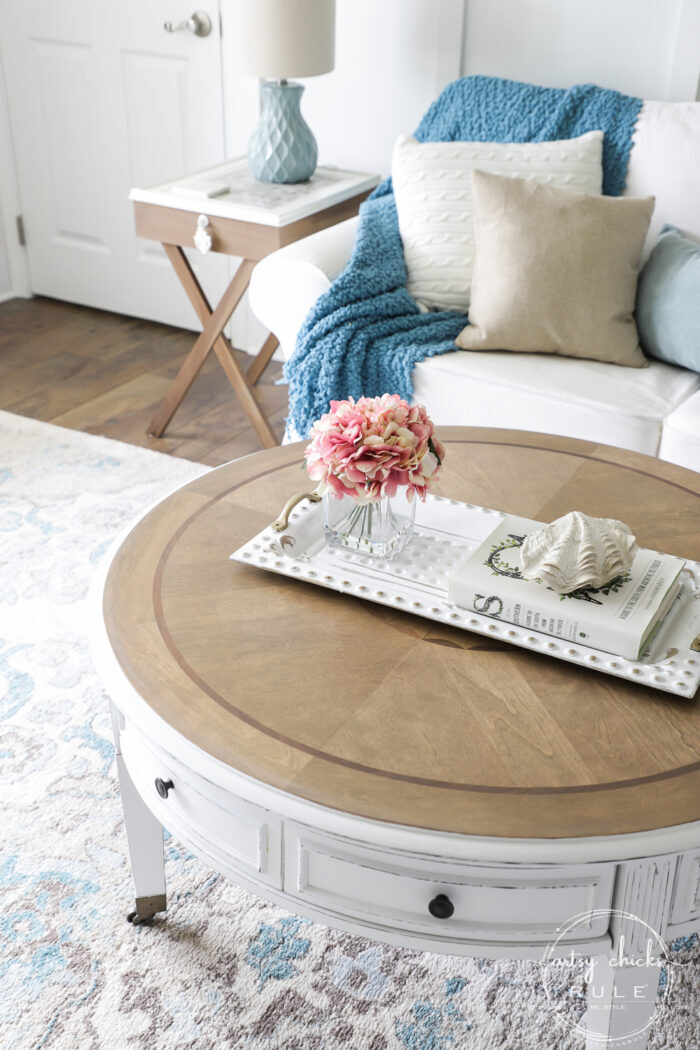
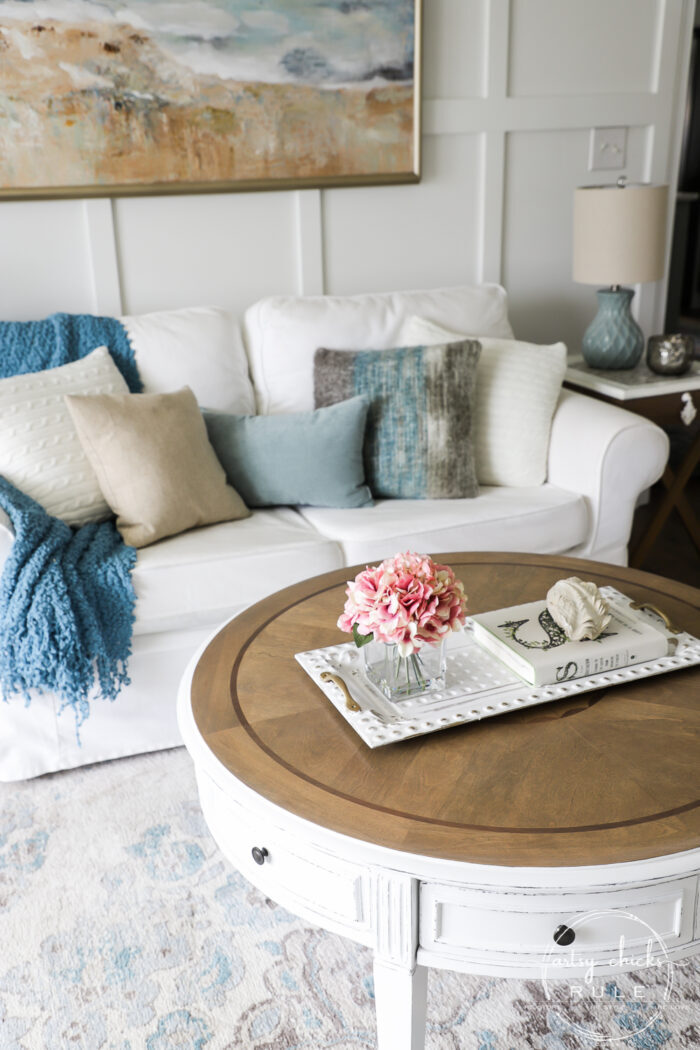
It’s now a soft, weathered wood look perfect for a coastal cottage vibe.
It’s very subtle but so much better. And look at all that pretty wood grain and those darker wood inlays.
It turned out so much better than I could’ve hoped after all of that.
And the reason I always say, just keep going. If you don’t love it, or mess it up, keep on going.
Don’t throw in the towel because you are probably just one step away from wonderful!
Then I gave it the perfect top coat, General Finishes Gel Topcoat. I love this stuff. The finish is amazing.
It’s the same finish used on my recently made over stained antique cabinet.
You simply apply it and rub it on using a T-shirt-type cloth. I use one to apply and one to wipe away excess and buff/rub.
It gives the most beautiful buffed finish. I tried to take a few photos to show you but it’s so hard to translate what I see in person to what the camera picks up.
But here goes anyway…
I did two coats, letting them dry in between.
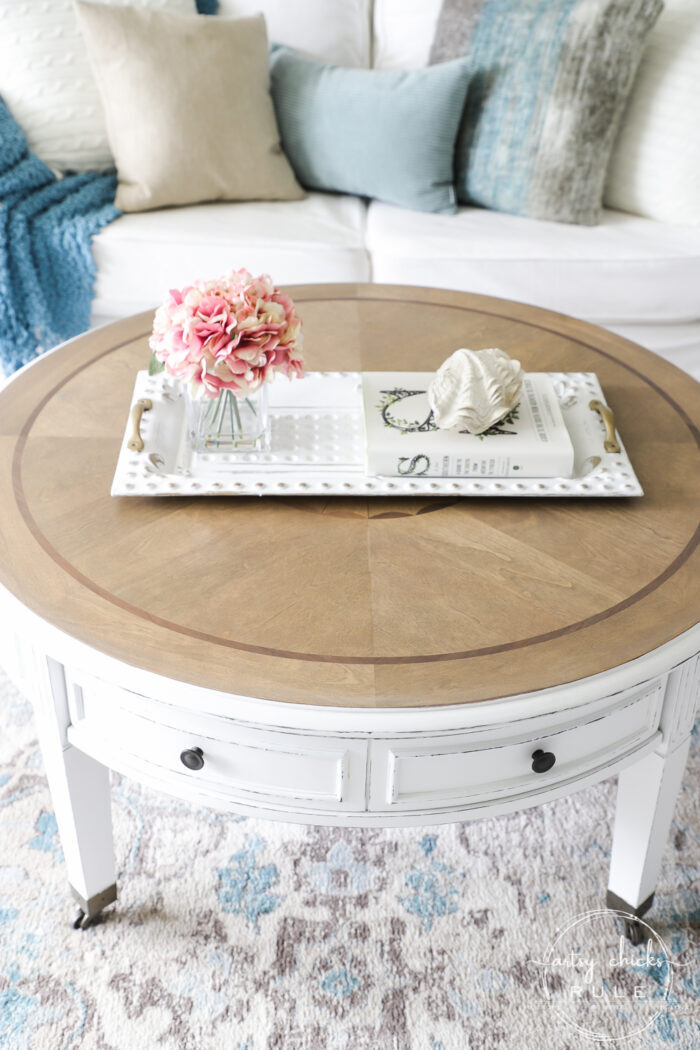
Can you see that pretty sheen??
Keep an eye out for it in the rest of the pictures I share below.
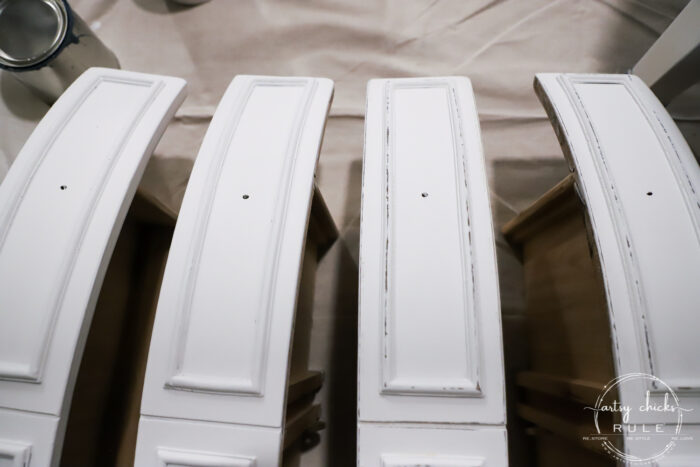
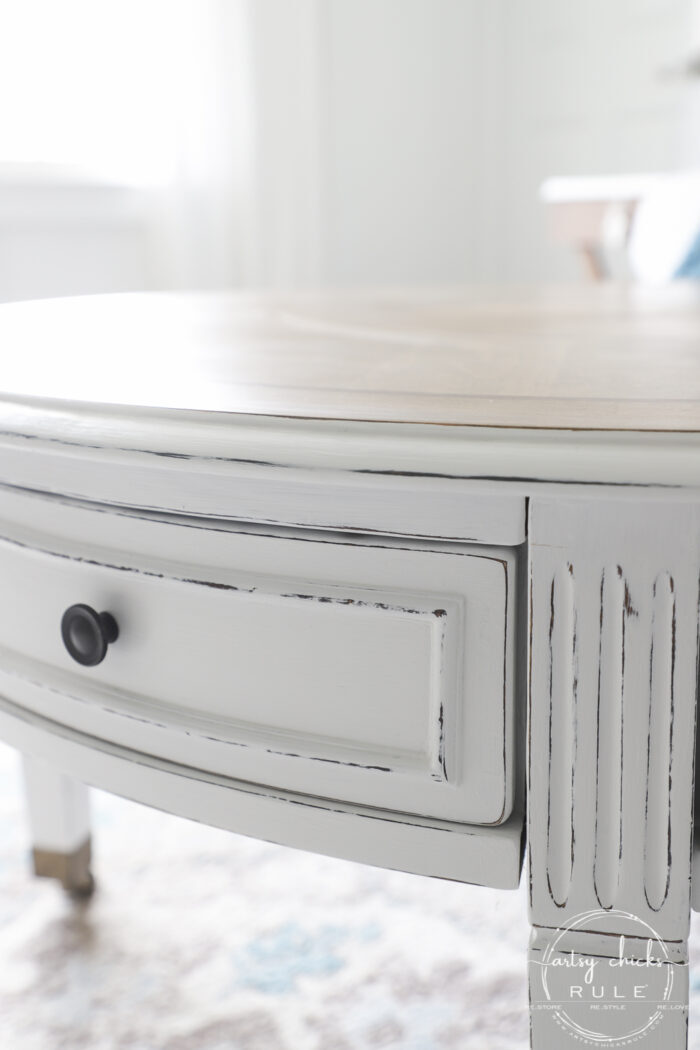
After that was dry, I painted the base white, with my favorite white paint. 2 coats.
I lightly sanded to distress the edges and applied 2 coats of my favorite water-based topcoat with a sponge applicator.
(the left 2 have not been distressed yet, the right two have)
I love the gel topcoat I used on the stained top but it is oil-based and I wouldn’t use it on white paint. I would definitely use it on any darker colored paints and stain though.
But for white paint, I only use water-based.
(Want to see even more of my favorite furniture makeover supplies??? Take a look in my very own curated shop, here!)
I left the knobs and feet the same color they were. Oddly enough, they both look darker now that the table is painted white.
So happy with that top!! I really, really wasn’t sure I was going to be after all that trial and error. ;)
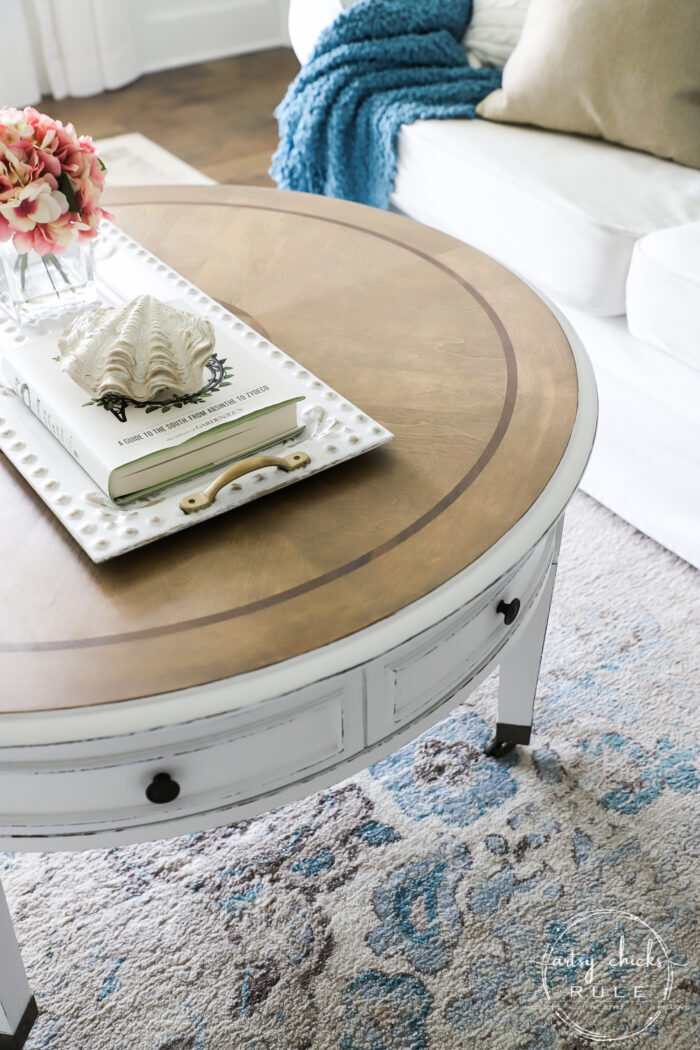
A few close-ups…
So in order for the top edge rim to show through dark like the rest of the table, once distressed, I did have to paint the edge of the table with black paint before painting it white. (the dark color will show through when distressed…being careful not to sand too much to go all the way to the lighter base)
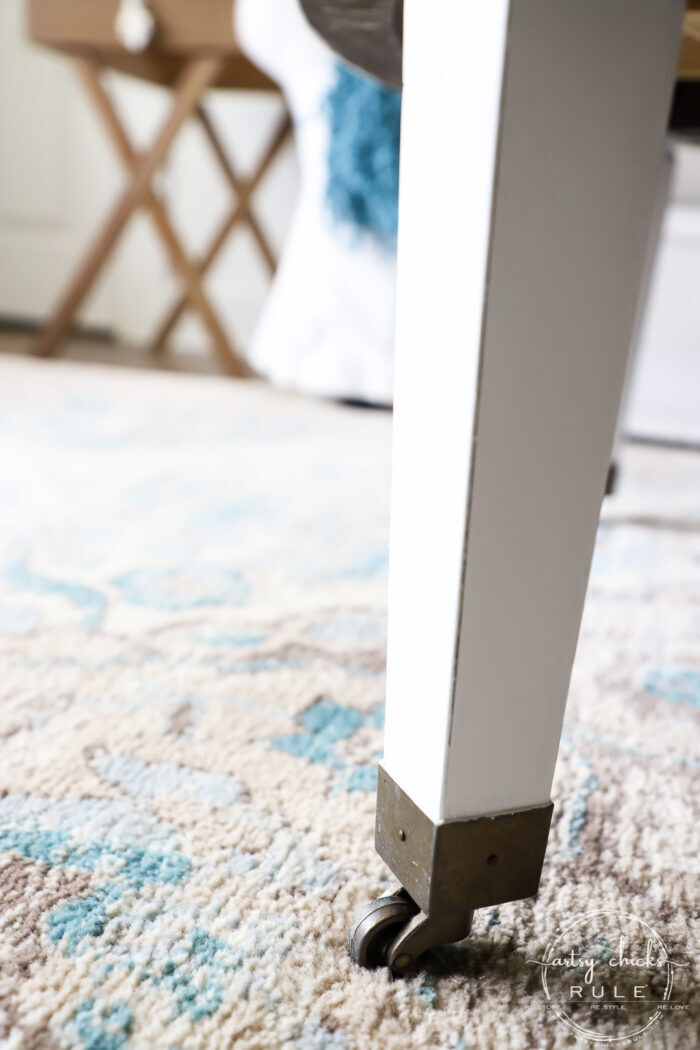
I love that this table has wheeled feet. Easy to move about.
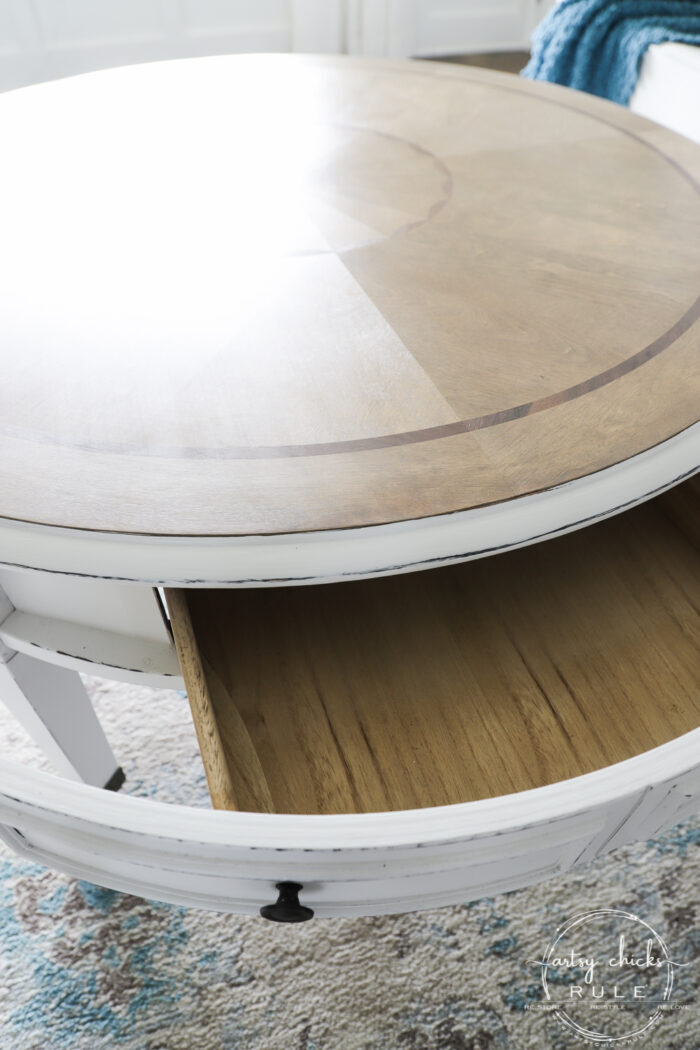
The drawers were in perfect shape inside so I didn’t do a thing with them.
And styled up a bit…
Interested in the rug?? It’s a steal and can be found >>> here.
See that buffed sheen on the top??
I’m feeling like spring with those pink flowers. I think it might be almost time for me to take down my winter decor for the year. I have to truthfully say though, I have really enjoyed having it up this year. But I’m excited to get busy on some spring projects around here!
That top is like buttah!! Really, it is. Sooo smooth.
Remember that metal tray makeover?? If not, you can see it >>> here. It’s another one that got multiple makeovers before I got it right. ;)
I hope you enjoyed today’s makeover. It was a labor of love, this one, for sure. I knew it had beauty under there just waiting to pop out. And there it is!! lol Even if it did take me a few tries before I got it right. It’s always worth the effort though. And how can you beat it for $35?? That’s a steal.
Decorate your home on a budget by shopping thrift stores? Most definitely.
PIN it to save it!!
But wait!! Don’t go just yet. You’ve got to hop over and see what kinds of treasures my friends turned these into!
Want to see even more Trash To Treasure Transformations? Check them all out >>> here.
Don’t forget to hop over and enter the giveaway I’m doing! You can find it >>> here.
I’ll see you back here on Thursday, marking one more makeover off the haul list! :)
Hi 🙂 . I’ve come over from Christy’s Confessions of a Serial DIY’er. I just love what you’ve done with this coffee table – and it’s great to see that we don’t all get it right the first time, or the second 😉 . Beautiful job 😀
Positively gorgeous Nancy! Your persistence paid off handsomely!! Though, I admit, I kind of expected you to stencil that mariner’s compass with another layer of stain on the top. lol :)
It has a wonderul, beachy vibe!
And if I didn’t say this before, Happy Birthday!!!
i don’t know that i would have the patience for all the trouble you went through to save this tabletop Nancy, but i love that you showed all your misconceptions and perseverance in making it the beautiful piece you had envisioned!
That’s why it took me so long to do as it was not done as quickly as it sounds in my post. ;) But I knew it was there…just had to figure it out. Thank you, Gwen! xoxo
I love the wood inlay with the weathered look and white legs. I made over a table with a similar top and just stained it…hummm, I think I’ll add a gray wash:) I also waxed it with a mix of white and dark AS wax and it looks dirty to me—seems like I’m always finding fault with my projects. Love your work and hope you had a wonderful birthday!!
I love using white wax over stain, I’m thinking that probably looks great! And yes, we are all way more critical of ourselves! I know I do the same thing. Thank you, Cecilia! xo
What a great turn out!! Trial and error. I didn’t know they changed the formula for Citristrip. If it smells like chemicals we cant use it indoors and what i big loss for them. Everyone i know uses Citristrip for just that reason. Grrr. Thank you for sharing this makeover. We either learn from our mistakes or we learn from our friends’ mistakes. LOL
Thanks, Cheryl! Lots of trial and error, for sure. Yes, ugh!!! I was so bummed. I searched online and it seems I’m not the only one who is unhappy about it. :( I guess if you’ve never used it you might *think* it smells of orange but yuck, it’s terrible now. And yes, we sure do! xo
Wow, that was a lot of effort, Nancy (kind of like using 15 makeup products to get that no-makeup look 😁) – but so beautiful in the end. Funny enough, I saw the first picture and thought “That can’t be the After picture, where’s the compass?” but leaving it unpainted was a good call for this one. Is it going to live at the beach?
Haha!! I laughed when I read your comment because isn’t that the darn truth? lol And yes, that compass rose might’ve been great over that but when I finally got the color I wanted and was happy with it…I was done! ;) And sadly no, it’s a bit too big for the space there. I even told my hubby, wow, this would be great at the beach! Oh well, off to live in someone else’s home. :) xo
OmGosh I LOVE this SO much!! Are you keeping it in your living room?? It is just stunning and looks SO good in there! I am so bummed about the Citristrip. Why on earth would they do that? Looks like 80% chance of rain on Thursday with thunder possible…boo…might need to reschedule our thrifting day again. Will text you! XOXO
I considered it, for a change for a little while anyway, but Wally said where am I going to put my feet up at?? hahaha! Oh well. Off to someone else’s home! And yes, I hate it now! It’s so stinky and does not work as well. So bummed. Now I’ll have to find something else to use. Thanks, Christy!! And yes, it’s gonna be snowing on our new date…watch! lol xoxo
Wow!!! Your table turned out gorgeous!!! Yes sometimes a lot of trial and error goes into a piece to bring your vision to life, but when it happens it’s such a great feeling!!!😃 TFS your tips and “trials” with us🙂.
I love the wood top on that table, it turned out beautifully. I am new to working with wood and find I really love it and as someone who is not naturally very creative, it satisfies my creative desire. I’m not sure that makes sense but anyway. . . I have a question. You said you used the sponge applicator to apply the topcoat over the paint, did you use that for the stain and topcoat on the table top too? I have been enjoying your website and all you great ideas. Thanks
Makes total sense! And yes, I used the sponge applicator over the base (works so well, especially in all those crevices, etc) but on the top I used a tshirt type material to apply the topcoat. One to apply and one to buff it back. I need to edit the post to detail that a bit better. So happy you are enjoying the site. :) xo
So Nice ! Really ends up being worth all your effort. ;)
Great finished choice. I’m happy you were able to salvage and beautify this
beautiful wood inlay.
I do have a question : You stained w/ antique walnut gel stain – then w/ classic grey.
Did you let the walnut stain fully dry 1st ? any prep between the different stains ?
I’m loving the final color / finish !!! Any / all technique details would be helpful.
Thanks so much for sharing ! I so enjoy your work.
Thanks in advance.
P
Thanks P!
Nope, I applied the walnut stain, wiped it back and went right over that with the other stain. I did not wait. It really gave it the perfect hue. And no, no prep in between. One on top of the other, both wiped back. Meaning, I didn’t leave excess stain in either case. Then I left that overnight and applied the poly coat the next day. :) xo
Wow ! I didn’t expect that. You achieved a warm soft color. Beautiful.
I’ve got several old pieces which are either to red / dark, or honey oak. ;(
Gel stain is great to work with, but most colors are so dark.
I had a professional stain/finish my poplar french doors. He mixed a custom stain
very similar to your results. (He’s an incredible wood artisan – so fun to watch him do his magic. )
I’ve been struggling to find something similar. I’m hesitant to start pre-mixing stains.
Thanks so much for the inspiration ! I’ll surely try this. :)
p
As always….gorgeous!
Do you have a recommondation for a satin/matte finish for a dining table? A friend bought a beautiful oak top table, but the finish is getting glossy at the edges where people sit. She loves the matte look and is very dissapointed that it is blotchy looking now.
Thanks so much, Kimberly! Hmm, I absolutely love this one. It’s satin but it’s not really shiny, it’s more of a buffed sheen. Interesting that hers is getting shiny with wear. She might like this one. She could give that one a very light sanding with a finer grade sandpaper and give this one a try.
Beautiful!!!!! Persistence pays off!!! Thank you for sharing the fails, redo’s and change of plans……..happens to me all the time!!!!! Your tray styling is very pretty but….it is covering up the pretty center piece of the table. this looks great in your room. Are you going to keep it? Every time you re-do one in looks great in there. Keep going on that pile.
Thanks, Addie!! Yes! It does! And yes, you are right, it is. lol I considered keeping it…even if for only a little while but I think it’s gonna go. It’s hard to not keep them all!! ;) xoxo
Love the final result!! And thanks for sharing all the details along the bumpy road -I feel much better about myself after reading your post… Now I’ll go and give my abandoned stuff a second chance :)
As always, you inspire me!! I have a magazine rack table that I painted years ago – was not at all happy with the results. Tried a completely different approach – was not happy again. Off to the basement . . . Recently I noticed it again and put it into the “off to Goodwill ” pile. Digging it back out to try something new!
I love this coffee table. Is the general finishes top goal just plain satin or is there a color in it. I want to order it on Amazon and one said oil based but with gray and one was oil based and said satin. Which one did you use? You did an awesome job! Thanks.
Thanks so much, Lori! It’s satin with no color, just clear poly. I used the ones that I have linked in the gray box in my post that says “Materials List”. The pre stain wood conditioner went first, then the antique walnut stain, then the gray stain followed by the gel topcoat in satin. Hope that makes sense! :) xo
Love this table! I’m hoping I have the same luck with a dining room table and the beautiful wood is beneath like on this table.
Also love your area rug! Where did you purchase it? Thanks!!
Thanks, Charlene! Good luck with it! Oh! Yes, check out this page and you will find the direct link right to it. I usually link it in the post because I always have people ask about it, but forgot! :) We love the rug and it’s a steal! xo
Gorgeous save, Nancy! That refinished top was worth the effort because it looks amazing! It’s such a chic piece and totally transformed from dark and drab. xo
As it so happens, I have almost the same coffee table. I bought it for $5.00 about fifteen years ago. I almost painted it but decided to try and clean it up instead. I’m so glad I did. It is in pristine condition and the design on top is just amazing. It’s probably the only piece I have never painted.
You did a beautiful job as usual.
I have a table similar to this one, and often wondered what to do with it. I plan to whitewash my table to. Thanks to you, I plan to turn my table into gorgeousness also, by the way, your table looks amazing,
What a shame they changed the Citristrip formula, that’s a game changer for those who refinish furniture indoors. Your coffee table makeover is gorgeous, Nancy! Love the top and how you aged it with grey. Your persistence paid off!
Nancy, you certainly have a talent! I wish I could look at something and see a vision for it’s makeover! I think your table turned out gorgeous! I love the beachy look! Instead of the top coat you used, could you have used Dixie Belle’s Gator Hide to protect it from feet being propped up on the table? I am getting ready to paint my coffee table and decided to use Gator Hide for protection. I love reading your blogs each week! I’m looking forward to your next blog!
Aw, thanks so much, Teresa! Yes, you could use that topcoat too. But it’s best to wait about 3 days or so since the stain is oil-based. The longer the better. But if you are putting over paint, you can do it right away without issue. I really like Gater Hide too! xo
Thank you! I actually used the water-based Varathane pre-stain wood conditioner since I was planning to use the water-based stain. After all the “trials”, I didn’t end up putting any more on before I went with the oil-based products. I just let it dry out well before I used those. :)
I’m so excited because I found the end table in this exact style on Facebook Marketplace for $10!! I have the top already stripped down and will start on the staining tomorrow. Thanks to you I have a exact guide 🙂
I am floored that while searching Pinterest for ideas that this popped up! I have this EXACT table and two matching side tables that I bought used about 6 months ago!! I loved the details and drawers and the center medallion so I’ve struggled with deciding whether to paint them and lose the center medallion, and mine are in fantastic condition. From your post, I can now see that I’m going to be able to keep that design if I decide it’s right. Thank you SO much! I’ve subscribed now because I can see we kind of have the same brain…ha-ha. Can’t wait to have more time to browse what you and your friends have shared!!
Oh that’s too funny! And yes, I just didn’t really want to cover the medallion and now I’m thrilled with out it turned out. It’s one of my favorite pieces…and I never even planned to keep it! lol And haha, that’s funny! Well, welcome and I will look forward to sharing more fun projects with you, Renee. :) xo
Don't Miss a Thing! Plus,Get My FREE ebook,"Creating Fabulous Finishes"!
Get My FREE ebook Now!
Want to be inspired, learn new skills, discover all the tricks to furniture makeovers, creating new out of the old and more?
You'll also receive my FREE ebook "Creating Fabulous Finishes" PLUS access to my private Printables Resource Library, too!
Sign up to get the Weekly Newsletter! Our emails include an unsubscribe link and you may opt-out at any time. Your information will *never* be shared or sold to a 3rd party.
Don't Miss a Thing! Plus,Get My FREE ebook,"Creating Fabulous Finishes"!
Don't Miss a Thing!! Plus Get My FREE eBook "Creating Fabulous Finishes"!


")
")
")
")


")


Absolutely gorgeous save and makeover, Nancy. Wow!
Thank you, Larissa! xo
Great rescue! Nice process and planning.
You did a great job of showing off that beautiful woodworking on the top! That inlay work is wonderful. Make it a focal point!
Thanks, Donna! :) xo
Thanks so much! :) xo
Hi 🙂 . I’ve come over from Christy’s Confessions of a Serial DIY’er. I just love what you’ve done with this coffee table – and it’s great to see that we don’t all get it right the first time, or the second 😉 . Beautiful job 😀
Hi Petra! Yes, that’s right. I surely don’t always! ;) Thank you. xoxo
Wow! What a difference! It’s beautiful!
Thanks, Donna! :) xo
Positively gorgeous Nancy! Your persistence paid off handsomely!! Though, I admit, I kind of expected you to stencil that mariner’s compass with another layer of stain on the top. lol :)
It has a wonderul, beachy vibe!
And if I didn’t say this before, Happy Birthday!!!
Haha!! You know me well!! That is totally something I would do but I was just done with it once I got that color right. lol Thank you!! xoxo
Beautiful Nancy! You brought out the details on that wood top…gorgeous!
Thank you, Denise! :) xo
i don’t know that i would have the patience for all the trouble you went through to save this tabletop Nancy, but i love that you showed all your misconceptions and perseverance in making it the beautiful piece you had envisioned!
That’s why it took me so long to do as it was not done as quickly as it sounds in my post. ;) But I knew it was there…just had to figure it out. Thank you, Gwen! xoxo
I love the wood inlay with the weathered look and white legs. I made over a table with a similar top and just stained it…hummm, I think I’ll add a gray wash:) I also waxed it with a mix of white and dark AS wax and it looks dirty to me—seems like I’m always finding fault with my projects. Love your work and hope you had a wonderful birthday!!
I love using white wax over stain, I’m thinking that probably looks great! And yes, we are all way more critical of ourselves! I know I do the same thing. Thank you, Cecilia! xo
What a beautiful transformation. I love it.
Thanks so much, Johnene! xo
What a great turn out!! Trial and error. I didn’t know they changed the formula for Citristrip. If it smells like chemicals we cant use it indoors and what i big loss for them. Everyone i know uses Citristrip for just that reason. Grrr. Thank you for sharing this makeover. We either learn from our mistakes or we learn from our friends’ mistakes. LOL
Thanks, Cheryl! Lots of trial and error, for sure. Yes, ugh!!! I was so bummed. I searched online and it seems I’m not the only one who is unhappy about it. :( I guess if you’ve never used it you might *think* it smells of orange but yuck, it’s terrible now. And yes, we sure do! xo
Wow, that was a lot of effort, Nancy (kind of like using 15 makeup products to get that no-makeup look 😁) – but so beautiful in the end. Funny enough, I saw the first picture and thought “That can’t be the After picture, where’s the compass?” but leaving it unpainted was a good call for this one. Is it going to live at the beach?
Haha!! I laughed when I read your comment because isn’t that the darn truth? lol And yes, that compass rose might’ve been great over that but when I finally got the color I wanted and was happy with it…I was done! ;) And sadly no, it’s a bit too big for the space there. I even told my hubby, wow, this would be great at the beach! Oh well, off to live in someone else’s home. :) xo
OmGosh I LOVE this SO much!! Are you keeping it in your living room?? It is just stunning and looks SO good in there! I am so bummed about the Citristrip. Why on earth would they do that? Looks like 80% chance of rain on Thursday with thunder possible…boo…might need to reschedule our thrifting day again. Will text you! XOXO
I considered it, for a change for a little while anyway, but Wally said where am I going to put my feet up at?? hahaha! Oh well. Off to someone else’s home! And yes, I hate it now! It’s so stinky and does not work as well. So bummed. Now I’ll have to find something else to use. Thanks, Christy!! And yes, it’s gonna be snowing on our new date…watch! lol xoxo
Wow!!! Your table turned out gorgeous!!! Yes sometimes a lot of trial and error goes into a piece to bring your vision to life, but when it happens it’s such a great feeling!!!😃 TFS your tips and “trials” with us🙂.
Thanks so much, Louise! You’ve got that exactly right! xoxo
What a great blog post Nancy. I love what you did with this beautiful table, as well as the reminder not to throw in the towel on a project.
Thanks so much, sweet friend! xoxo
I love the wood top on that table, it turned out beautifully. I am new to working with wood and find I really love it and as someone who is not naturally very creative, it satisfies my creative desire. I’m not sure that makes sense but anyway. . . I have a question. You said you used the sponge applicator to apply the topcoat over the paint, did you use that for the stain and topcoat on the table top too? I have been enjoying your website and all you great ideas. Thanks
Makes total sense! And yes, I used the sponge applicator over the base (works so well, especially in all those crevices, etc) but on the top I used a tshirt type material to apply the topcoat. One to apply and one to buff it back. I need to edit the post to detail that a bit better. So happy you are enjoying the site. :) xo
So Nice ! Really ends up being worth all your effort. ;)
Great finished choice. I’m happy you were able to salvage and beautify this
beautiful wood inlay.
I do have a question : You stained w/ antique walnut gel stain – then w/ classic grey.
Did you let the walnut stain fully dry 1st ? any prep between the different stains ?
I’m loving the final color / finish !!! Any / all technique details would be helpful.
Thanks so much for sharing ! I so enjoy your work.
Thanks in advance.
P
Thanks P!
Nope, I applied the walnut stain, wiped it back and went right over that with the other stain. I did not wait. It really gave it the perfect hue. And no, no prep in between. One on top of the other, both wiped back. Meaning, I didn’t leave excess stain in either case. Then I left that overnight and applied the poly coat the next day. :) xo
Wow ! I didn’t expect that. You achieved a warm soft color. Beautiful.
I’ve got several old pieces which are either to red / dark, or honey oak. ;(
Gel stain is great to work with, but most colors are so dark.
I had a professional stain/finish my poplar french doors. He mixed a custom stain
very similar to your results. (He’s an incredible wood artisan – so fun to watch him do his magic. )
I’ve been struggling to find something similar. I’m hesitant to start pre-mixing stains.
Thanks so much for the inspiration ! I’ll surely try this. :)
p
Thanks, P! Yes, give this a go! Even play around a bit on some scrap wood if you have any. xo
Gorgeous! This is my favorite out of all your projects! What a ton of try and re-try, and how worth it!
Aw, really?! That’s awesome, thanks so much Becky! xoxo
As always….gorgeous!
Do you have a recommondation for a satin/matte finish for a dining table? A friend bought a beautiful oak top table, but the finish is getting glossy at the edges where people sit. She loves the matte look and is very dissapointed that it is blotchy looking now.
Thanks so much, Kimberly! Hmm, I absolutely love this one. It’s satin but it’s not really shiny, it’s more of a buffed sheen. Interesting that hers is getting shiny with wear. She might like this one. She could give that one a very light sanding with a finer grade sandpaper and give this one a try.
Beautiful!!!!! Persistence pays off!!! Thank you for sharing the fails, redo’s and change of plans……..happens to me all the time!!!!! Your tray styling is very pretty but….it is covering up the pretty center piece of the table. this looks great in your room. Are you going to keep it? Every time you re-do one in looks great in there. Keep going on that pile.
Thanks, Addie!! Yes! It does! And yes, you are right, it is. lol I considered keeping it…even if for only a little while but I think it’s gonna go. It’s hard to not keep them all!! ;) xoxo
A super winner on this one. Love it!
Thank you, Helene! :) xo
Love the final result!! And thanks for sharing all the details along the bumpy road -I feel much better about myself after reading your post… Now I’ll go and give my abandoned stuff a second chance :)
Thanks, Olga! And yay!! So happy to hear that! :) xo
Love this transformation from an old-fashioned dark, clumsy looking thing into “chic!”
Yes, that is a great way to describe it! Thanks so much, Shirl! xo
As always, you inspire me!! I have a magazine rack table that I painted years ago – was not at all happy with the results. Tried a completely different approach – was not happy again. Off to the basement . . . Recently I noticed it again and put it into the “off to Goodwill ” pile. Digging it back out to try something new!
Aw, thanks, Kathy! Oh, that’s so great!! Yes, make it beautiful! :) xo
I love this coffee table. Is the general finishes top goal just plain satin or is there a color in it. I want to order it on Amazon and one said oil based but with gray and one was oil based and said satin. Which one did you use? You did an awesome job! Thanks.
Thanks so much, Lori! It’s satin with no color, just clear poly. I used the ones that I have linked in the gray box in my post that says “Materials List”. The pre stain wood conditioner went first, then the antique walnut stain, then the gray stain followed by the gel topcoat in satin. Hope that makes sense! :) xo
It’s lovely, Nancy… I especially like the top! So pretty!
Thanks so much, Julie! :) xoxo
Love this table! I’m hoping I have the same luck with a dining room table and the beautiful wood is beneath like on this table.
Also love your area rug! Where did you purchase it? Thanks!!
Thanks, Charlene! Good luck with it! Oh! Yes, check out this page and you will find the direct link right to it. I usually link it in the post because I always have people ask about it, but forgot! :) We love the rug and it’s a steal! xo
Gorgeous save, Nancy! That refinished top was worth the effort because it looks amazing! It’s such a chic piece and totally transformed from dark and drab. xo
Thanks, Jen!! :)
Nancy, it looks fantastic!
Thank you, Laura! xo
As it so happens, I have almost the same coffee table. I bought it for $5.00 about fifteen years ago. I almost painted it but decided to try and clean it up instead. I’m so glad I did. It is in pristine condition and the design on top is just amazing. It’s probably the only piece I have never painted.
You did a beautiful job as usual.
Oh wow, that’s awesome! Thank you! :)
It came out beautiful. I am glad I am not the only one who keeps trying until it comes out right. Happy Belated Birthday.
Thank you, Gail! :) xo
Really great job! I probably would have walked by this table while saying NAH. So glad you showed us how to make it beautiful again!
Thanks so much! I’ve had my share that I’ve walked by! ;) xo
I have a table similar to this one, and often wondered what to do with it. I plan to whitewash my table to. Thanks to you, I plan to turn my table into gorgeousness also, by the way, your table looks amazing,
Thank you! :)
What a shame they changed the Citristrip formula, that’s a game changer for those who refinish furniture indoors. Your coffee table makeover is gorgeous, Nancy! Love the top and how you aged it with grey. Your persistence paid off!
Yes, not happy bout it! Thanks Marie
Love Love Love!
Thanks, Robyn! :)
Nancy, you certainly have a talent! I wish I could look at something and see a vision for it’s makeover! I think your table turned out gorgeous! I love the beachy look! Instead of the top coat you used, could you have used Dixie Belle’s Gator Hide to protect it from feet being propped up on the table? I am getting ready to paint my coffee table and decided to use Gator Hide for protection. I love reading your blogs each week! I’m looking forward to your next blog!
Aw, thanks so much, Teresa! Yes, you could use that topcoat too. But it’s best to wait about 3 days or so since the stain is oil-based. The longer the better. But if you are putting over paint, you can do it right away without issue. I really like Gater Hide too! xo
I love the lighter look and that medallion in the center is great! I would not cover it up! Good job!
Me too!! I just couldn’t when I removed that icky old stain and saw the pretty wood underneath! :) xo
Love you work looking forward to seeing more
Thank you!! More to come! :) xo
Another georgeous piece!
Which pre-wood conditioner did you use?
Thank you! I actually used the water-based Varathane pre-stain wood conditioner since I was planning to use the water-based stain. After all the “trials”, I didn’t end up putting any more on before I went with the oil-based products. I just let it dry out well before I used those. :)
Beautiful makeover – love it!
Thank you, Julie! :) xo
I love how the table turned out!!
Question: is the General Finish top coat a liquid that you brush on and wipe off?? Did you use satin?
Thank you,
Thanks, Cathy! No, the GF topcoat is a brush on, no wiping off. Yep, Satin! :) xo
I’m so excited because I found the end table in this exact style on Facebook Marketplace for $10!! I have the top already stripped down and will start on the staining tomorrow. Thanks to you I have a exact guide 🙂
Oh, that’s awesome! Have fun!! xoxo
Absolutely love how you refinished this table!
Thanks so much, Debra! xoxo
I am floored that while searching Pinterest for ideas that this popped up! I have this EXACT table and two matching side tables that I bought used about 6 months ago!! I loved the details and drawers and the center medallion so I’ve struggled with deciding whether to paint them and lose the center medallion, and mine are in fantastic condition. From your post, I can now see that I’m going to be able to keep that design if I decide it’s right. Thank you SO much! I’ve subscribed now because I can see we kind of have the same brain…ha-ha. Can’t wait to have more time to browse what you and your friends have shared!!
Oh that’s too funny! And yes, I just didn’t really want to cover the medallion and now I’m thrilled with out it turned out. It’s one of my favorite pieces…and I never even planned to keep it! lol And haha, that’s funny! Well, welcome and I will look forward to sharing more fun projects with you, Renee. :) xo